
Flowers
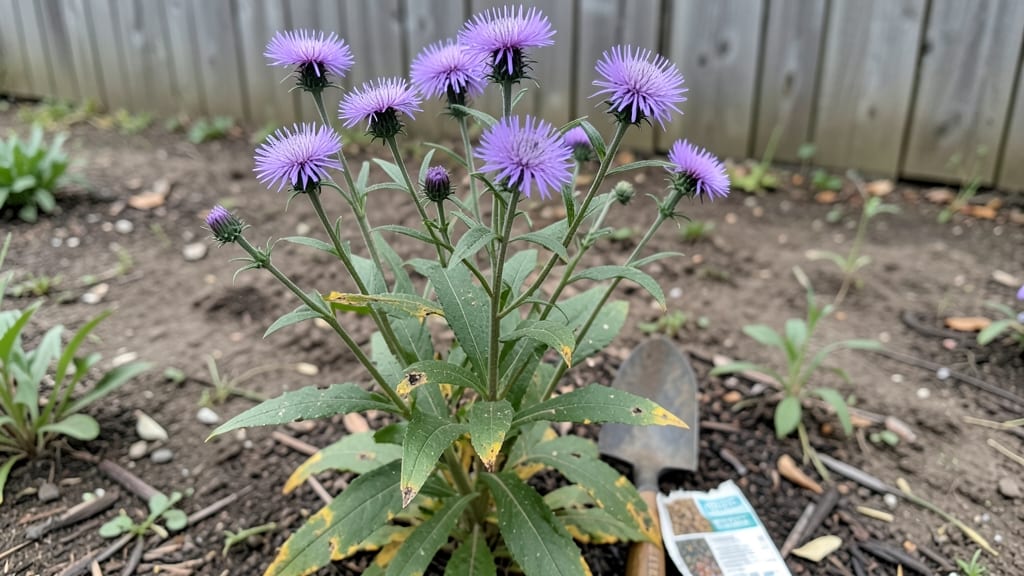
Autumn flowers seeds planted with the layered chill method bloom brighter and last longer than anything you’d buy at the nursery. 🌻 I learned this trick after struggling with weak fall color in my garden—now my chrysanthemums and asters stay vibrant until hard frost, even in cooler zones.
The secret lies in mimicking nature’s gradual temperature shifts, which primes seeds for robust growth when planted at the right time.
You’ll need a mix of cold-hardy varieties like pansies, goldenrod, and hardy mums, plus a simple setup: a seed tray, damp potting mix, and a refrigerator or cold frame.
Start seeds indoors 6-8 weeks before your first frost, then expose them to 40-50°F temperatures for 4-6 weeks to trigger dormancy. This mimics autumn’s natural chill, ensuring seeds break dormancy at the perfect moment for planting.
The payoff is a garden bursting with deep purples, fiery oranges, and creamy whites that attract pollinators until winter. Unlike spring-planted flowers, these varieties thrive in cooler weather and resist early bolting.
With the right timing, you’ll enjoy blooms 2-3 weeks longer than standard fall flowers—plus, the layered chill method cuts down on leggy seedlings.
This technique works for both in-ground gardens and containers, making it ideal for small spaces or urban balconies. Whether you’re extending your season or simply craving more color, the layered chill method delivers foolproof results with minimal extra effort. Ready to transform your fall garden?
📚 In This Guide
- What you need
- Instructions
- Tips and common mistakes
- Wrapping up and next steps
What you need
- ● Autumn-flowering seeds: Choose cold-hardy varieties like Chrysanthemum, Goldenrod, Black-Eyed Susan, or Mums. Buy 1–2 packets (50–100 seeds per packet) for a full-season display.
- ● Seed-starting trays or pots: 4–6-inch deep with drainage holes (biodegradable options work too!). Aim for 12–24 cells or 1–2 pots per seed type.
- ● High-quality seed-starting mix: 1–2 bags (sterilized, peat-free, or coco coir-based for moisture control).
- ● Grow lights or sunny windowsill: A full-spectrum LED grow light (or a south-facing window) for 12–16 hours/day of light.
- ● Spray bottle: For gentle watering (16–20 oz, with a fine mist nozzle).
- ● Small hand trowel or spoon: For planting seeds ¼–½ inch deep.
- ○ Plastic wrap or humidity dome: To retain moisture during germination (optional but helpful for slow-germinating seeds).
- ● Cooling method supplies: Refrigerator or cold frame: Set to 35–45°F (2–7°C) for 2–6 weeks (varies by seed type).
- ● Plastic bag or airtight container: To store seeds + moist paper towels during stratification (if not using a fridge).
- ● Fertilizer: A balanced, water-soluble fertilizer (e.g., 10-10-10) or fish emulsion for post-chill growth.
- ● Patience: Some seeds (like Chrysanthemums) may take 10–14 days to germinate after chilling!
- ● Weather check: Wait until after the first frost to transplant outdoors (or use row covers for early planting).
- ● Sunlight awareness: Most autumn flowers need 6+ hours of sun/day—plan your garden layout accordingly!
Step-by-step guide to stratifying autumn flower seeds
This layered chill method mimics nature’s way of breaking seed dormancy—no fancy equipment needed.
🌱 Step 1: Prepare Seeds for Cold Treatment
Start by gathering your autumn flower seeds—cosmos, black-eyed Susans, and asters all respond beautifully to this method. Place them in a ziplock bag with a damp paper towel (not soaking wet—just enough to feel slightly damp when squeezed). Seal the bag and label it with the seed type and date. The goal is to keep moisture consistent while allowing airflow.
Store the bag in your refrigerator’s crisp drawer (around 35-40°F) for 4-6 weeks. Check weekly to ensure the paper towel remains moist—if it dries out, spritz lightly with water. This cold period tricks seeds into thinking winter has passed, signaling them to break dormancy. Real talk: Skipping this step often results in seeds that either refuse to sprout or grow weakly.
⏰ Step 2: Monitor Germination Timing
After the 4-6 week chill, remove the bag and let it sit at room temperature for 24 hours to acclimate. This gradual shift prevents shock and gives seeds a chance to "wake up" naturally. Place the damp paper towel with seeds in a small plastic container (like a takeout container) and cover it loosely with plastic wrap to retain humidity. Set this container on a warm spot—near a sunny window or on top of your fridge—where temperatures stay around 65-70°F.
Germination typically begins in 7-14 days, but some varieties like asters may take up to 21 days. Watch for the first tiny green shoots—this is your cue that the seeds have successfully broken dormancy. If you don’t see sprouts within 3 weeks, gently press a few seeds between your fingers to check for firmness; if they’re still hard, return them to the fridge for another 2 weeks of chilling.
🪴 Step 3: Sow in Prepared Soil
Once sprouts appear, fill 4-inch pots with a lightweight seed-starting mix (never garden soil—it’s too dense). Moisten the mix until it’s damp but not soggy, then plant each seedling ½ inch deep, spacing them 1 inch apart in the pot. Gently press the soil around the stems to secure them without compacting it. If you’re sowing directly outdoors (after last frost), plant seeds ¼ inch deep in well-draining soil, thinning seedlings to 6 inches apart once they’re 2 inches tall.
Water lightly from the bottom of the pot to avoid disturbing the delicate roots. You’ll know moisture is right when the soil surface looks slightly damp but not glistening. Place the pots in a bright, indirect light spot (like an east-facing window) for the first 3-5 days to help seedlings adjust. This prevents shock from sudden exposure to strong sunlight, which can scorch tender leaves.
☀️ Step 4: Transition to Outdoor Conditions
After 10-14 days, when seedlings show their first true leaves (not the initial cotyledons), it’s time to harden them off. Move pots to a shaded outdoor spot for 2 hours the first day, gradually increasing exposure by 1 hour daily over 7-10 days. This slow transition builds resilience against wind, sun, and temperature fluctuations. You’ll notice seedlings develop a deeper green color and sturdier stems as they adapt.
Once hardened off, transplant outdoors in partial shade (autumn flowers appreciate dappled light) or their final location. Water deeply at the base to encourage root growth, and mulch with 1 inch of shredded bark to retain moisture and regulate soil temperature. Avoid fertilizing for the first 2 weeks—newly transplanted seedlings need time to establish roots before competing for nutrients.
Tips & tricks for perfect autumn flower seed stratification
Mastering this layered chill method takes patience—but these pro strategies will help you bypass common pitfalls and achieve vibrant fall blooms every time.
Temperature Precision: The 35-40°F range in your fridge's crisp drawer is critical for mimicking winter conditions. If your fridge runs cooler (below 35°F), move the bag to a slightly warmer spot like the main compartment. Too cold can actually inhibit germination, while temperatures above 40°F won't trigger the necessary dormancy break. I've seen seeds fail to sprout when kept in freezer temperatures—don't make that mistake!
Moisture Management: The damp paper towel should feel like a wrung-out sponge—not dripping wet, not bone dry. I recommend using a spray bottle to mist the towel weekly rather than soaking it. Overly wet towels can cause mold, while dry ones prevent proper hydration. For extra insurance, place a small piece of aluminum foil under the bag to prevent condensation buildup during the 4-6 week chill period.
Germination Timing: That 24-hour room temperature acclimation after the cold treatment is non-negotiable. I've rushed this step and ended up with weak seedlings that struggled to establish. The gradual temperature shift helps prevent osmotic shock, which can kill delicate embryonic roots. For varieties like asters that may take up to 21 days, mark your calendar and check daily—patience pays off with stronger plants.
Light Transition Strategy: When moving seedlings to bright indirect light for the first 3-5 days, position them within 6 inches of an east-facing window. South-facing windows can be too intense initially, causing scorching. I've found that using a sheer curtain as a diffuser creates perfect growing conditions for those first critical days. This gradual light introduction builds seedling resilience that pays off during hardening off.
Pro Tips for Autumn Flowers Seeds
- Mastering this layered chill method takes patience—but these pro strategies will help you bypass common pitfalls and achieve vibrant fall blooms every time.
- Temperature Precision: The 35-40°F range in your fridge's crisp drawer is critical for mimicking winter conditions.
- Moisture Management: The damp paper towel should feel like a wrung-out sponge—not dripping wet, not bone dry.
Frequently asked questions
Got questions about growing vibrant autumn flowers from seeds? Here are some of the most common ones—and their answers!
When is the best time to plant autumn flower seeds?
The layered chill method works best when you start seeds indoors 8–10 weeks before your last frost date (typically late summer for fall blooms). For direct sowing, wait until late summer or early fall (after soil temps drop below 75°F) to avoid heat stress. Check your local frost chart for precision!
How do I know if my seeds need stratification?
Many autumn flowers—like asters, black-eyed Susans, or chrysanthemums—benefit from cold stratification. If the seed packet says "needs chilling" or your region has harsh winters, stratify for 4–8 weeks in the fridge before planting. Skip it for heat-loving varieties like marigolds or zinnias.
What if my seeds don’t germinate?
Try these fixes:
- Check moisture: Keep soil consistently damp (not soggy) with a spray bottle.
- Test depth: Most seeds need ¼–½ inch of soil coverage.
- Warmth matters: Use a heat mat if your home is chilly (60–70°F ideal).
- Patience: Some seeds (like coreopsis) take 2–4 weeks to sprout.
Can I grow autumn flowers from store-bought bouquets?
Maybe! Try the water propagation method:
- Remove leaves from the stem, leaving just the flower head.
- Place the stem in water (change weekly) until roots grow (~3–4 weeks).
- Transplant to soil once roots are 2+ inches long.
How do I extend blooming season?
Use these tricks to keep colors popping:
- Deadhead spent blooms to encourage new flowers.
- Fertilize lightly every 4–6 weeks with a balanced 10-10-10 mix.
- Mulch around plants to retain moisture and regulate soil temp.
- Choose late-bloomers: Goldenrod, sedum, or Russian sage thrive in fall.
Wrapping up and next steps
Embracing the layered chill method for autumn flower seeds is your ticket to a vibrant, colorful fall garden that will turn heads and warm hearts. 🌿 With the right prep, patience, and a dash of creativity, you’ll unlock nature’s best-kept secret for seasonal blooms—whether you’re a green thumb or just starting your gardening journey.
Ready to plant your vision? Start small—pick one or two seeds or varieties to experiment with this season. Then, watch your garden transform into a living masterpiece as the cooler months roll in. Happy planting! 🌸