Propagation
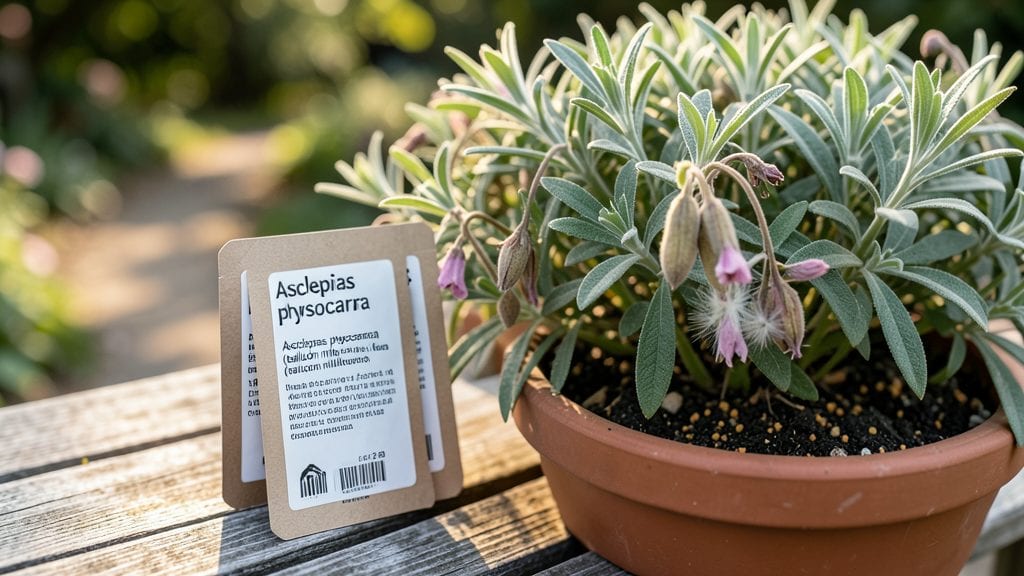
Saving balloon milkweed seeds for next year’s garden is one of the most rewarding ways to create a monarch butterfly magnet. ✨ The key is drying them properly—too much moisture ruins them, but the right method keeps them viable for planting.
I’ve learned that patience here pays off in spades when those first fuzzy milkweed pods appear the following spring.
You’ll need just three things: a clean paper bag, a dry spot indoors, and a little time—about two weeks. Once the seed pods turn brown and start splitting open, gently shake the seeds into your bag.
Hang it upside down in a warm, dry place where airflow keeps them from molding. This simple step turns a summer harvest into next year’s foundation.
When spring arrives, you’ll have seeds ready to plant that produce vibrant green foliage and those iconic milkweed pods monarchs can’t resist. The plants grow fast, reaching 3-5 feet tall, and their nectar-rich blooms keep butterflies visiting all summer.
Plus, the seeds are free—just wait until the pods burst open naturally.
This method works whether you’re a first-time gardener or a pollinator enthusiast expanding your patch. The only real challenge? Waiting for those first caterpillars to arrive. Here’s how to make sure your seeds stay viable until then.
📚 In This Guide
- What you need
- Instructions
- Tips and common mistakes
- Wrapping up and next steps
What you need
- ● Mature balloon milkweed pods: Collect 10–20 fully brown, dried pods (about 3–4 inches long) from healthy plants. Pro tip: Harvest them when they’re crispy and starting to split open naturally! 🌿
- ● Paper bags or brown lunch bags: 1–2 bags (8x10 inches) per 5 pods to contain seeds and prevent scattering.
- ● Scissors or pruning shears: Sharp enough to snip pods cleanly without crushing them.
- ● Newspaper or cardboard: A flat surface (12x18 inches) for drying seeds.
- ● Small mesh bags or envelopes: 1–2 breathable bags (like those for seed storage) to hold cleaned seeds.
- ● Ruler or measuring tape: To check pod maturity (aim for 3–4 inches).
- ● Labeling tags: Waterproof markers or tags to label seed bags with the date and plant variety.
- ● Desiccant packets: Tiny silica gel packets to reduce moisture in storage containers.
- ● Gloves: Protect your hands from sticky milkweed sap (latex gloves work great!).
- ● Magnifying glass: For spotting tiny seeds if your vision isn’t 20/20.
How to harvest, dry, and store balloon milkweed seeds for future plantings
Here’s the foolproof method I’ve used for years—no guesswork, just reliable seeds that sprout strong monarchs next spring.
🌱 Step 1: Harvest Mature Seed Pods at Peak Ripeness
Wait until late summer or early fall when the seed pods turn tan and papery—they’ll rattle when shaken. Cut pods with clean pruners, leaving ½ inch of stem attached. This prevents damage to the delicate seeds inside. Harvest on a dry, sunny morning when humidity is low; wet pods mold faster.
Don’t rush—green pods won’t dry properly, and seeds inside stay dormant. I mark pods with a small flag if I’m harvesting from a large patch. Store fresh pods in a paper bag (not plastic) in a shady, well-ventilated spot for 1-2 weeks. This mimics natural drying conditions and prevents rot.
🪴 Step 2: Dry Seeds Completely Before Storage
Once pods are fully dry and brittle, split them open with your fingers or a small knife. Seeds will pop out easily—each pod yields 50-100 seeds. Spread seeds in a single layer on a clean, dry tray (like a baking sheet lined with parchment paper). Place them in a warm, dry spot (around 70-75°F) for 3-5 days, stirring daily.
You’ll know they’re ready when they feel lightweight and papery—not damp or sticky. Test by pinching a seed between your fingers; it should crumble slightly. If any seeds still feel moist, dry them another day. Skipping this step risks mold or failed germination next spring.
⏰ Step 3: Store Seeds in Airtight Containers for Long-Term Viability
Transfer dried seeds into a small, airtight container (like a glass jar with a tight lid). Add a silica gel packet to absorb any lingering moisture. Label the container with the harvest date and variety—balloon milkweed seeds stay viable for 3-5 years if stored properly. Keep them in a cool, dark place (like a pantry or fridge).
Check seeds annually for pests or moisture. If you see any webbing or dampness, transfer them to a new container immediately. I like to store seeds in small portions (like 50-seed batches) so I don’t open the main container too often. This keeps them fresh for multiple planting seasons.
💧 Step 4: Prep Seeds for Spring Planting (Optional Stratification)
Balloon milkweed seeds don’t always need stratification, but a cold-moist treatment can boost germination. Place seeds in a ziplock bag with a damp paper towel, seal it, and refrigerate for 4-6 weeks. Check weekly—if the towel dries out, mist it lightly. After stratification, plant seeds ¼ inch deep in well-draining soil.
Sow seeds outdoors in early spring (after last frost) or indoors 8-10 weeks before transplanting. You’ll see sprouts in 10-21 days if conditions are right. Thin seedlings to 12-18 inches apart—they’ll spread naturally over time. Real talk: If you skip stratification, some seeds may still sprout, but this step ensures stronger, faster growth.
Tips & tricks for perfect balloon milkweed seed preservation
These simple strategies will ensure your milkweed seeds stay viable and ready for next year's monarch migration.
Timing is Everything: Harvest pods when they're completely tan and papery—this usually happens in late summer or early fall. I learned this the hard way after trying to harvest green pods that never dried properly. The 1-2 week drying period in Step 1 is critical; don't rush it. If you're unsure, split open a few pods to check seed readiness.
Drying Conditions Matter: For the 3-5 day drying period at 70-75°F, I recommend using a sunny windowsill or an area with good airflow. Avoid kitchens where humidity might linger. Stir your seeds daily to ensure even drying—this prevents clumping and mold. If you live in a humid climate, consider using a small fan on low to circulate air.
Storage Wisdom: When storing seeds in airtight containers, I like to add a small piece of chalk along with the silica gel packet. The chalk helps absorb moisture too, and it's a natural alternative if you don't have silica gel. Label each container with both the harvest date and variety—this helps track seed age and viability over your 3-5 year storage period.
Optional Stratification Tip: If you choose to stratify your seeds for 4-6 weeks, I've found that placing the sealed bag in the crisper drawer of your fridge works just as well as a dedicated refrigerator shelf. Just remember to check weekly and mist lightly if needed—don't let the towel dry out completely.
Pro Tips for Balloon Milkweed Seeds
- These simple strategies will ensure your milkweed seeds stay viable and ready for next year's monarch migration.
- Timing is Everything: Harvest pods when they're completely tan and papery—this usually happens in late summer or early fall.
- Drying Conditions Matter: For the 3-5 day drying period at 70-75°F, I recommend using a sunny windowsill or an area with good airflow.
Frequently asked questions
When is the best time to harvest balloon milkweed seeds?
The ideal time to harvest is when the seed pods turn brown and begin to split open naturally—usually late summer to early fall (August–October). Wait until the pods crack slightly but haven’t released seeds yet. Harvesting too early can result in immature seeds that won’t germinate well.
How long can I store balloon milkweed seeds before planting?
Properly dried and stored seeds remain viable for 1–2 years in a cool, dark place (like a sealed container in the fridge). For best results, plant them within 6–12 months. Moisture and heat are the enemies—keep humidity low to prevent mold or spoilage.
What’s the easiest way to dry balloon milkweed seeds at home?
After harvesting, spread the pods in a single layer on a mesh screen or paper towels in a warm, dry, well-ventilated spot (like a garage or shed) for 1–2 weeks. Avoid direct sunlight, which can overheat them. Once the pods are brittle and seeds rattle inside, gently crush them to release the fluffy seed tufts.
Are there alternatives if I can’t find balloon milkweed seeds?
Yes! Other milkweed varieties like common milkweed (Asclepias syriaca) or swamp milkweed (A. incarnata) work well for pollinators. Just ensure they’re native to your region—check local plant databases or native plant nurseries for region-specific options.
Why aren’t my stored seeds germinating? Troubleshooting tips.
If seeds fail to sprout, check these common issues:
- Improper drying: Seeds must be bone-dry before storage. Re-dry them in a warm, dry place if they feel damp.
- Old seeds: Viability drops after 2 years. Test a few seeds in damp paper towels to confirm viability.
- Cold stratification needed: Some milkweed seeds benefit from a 4–6 week cold period (refrigerate in a damp paper towel) before planting.
- Poor soil: Milkweed thrives in well-draining soil. Amend heavy clay with compost or sand.
Wrapping up and next steps
Harvesting and storing balloon milkweed seeds is a rewarding way to nurture your local ecosystem while ensuring a vibrant garden next season! 🌱 By following the right steps—drying, cleaning, and storing—you’ll give monarch butterflies and other pollinators a head start on life. Your efforts today will bloom into a thriving haven tomorrow!
Ready to take it further? Plant your stored seeds in early spring and watch your garden transform into a pollinator paradise. Share your progress with fellow gardeners—every seed counts! 🌟