
Propagation
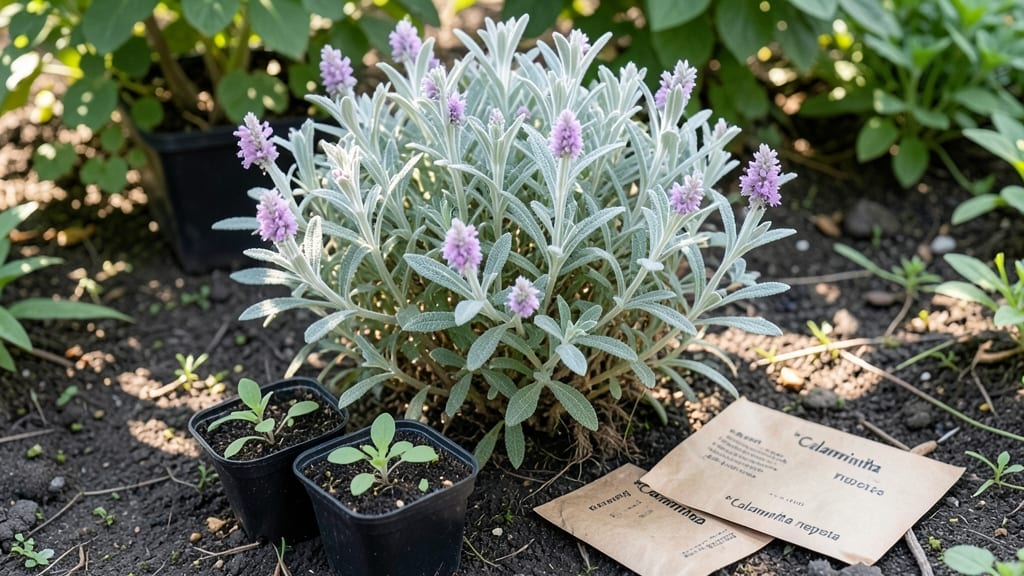
Growing calamintha nepeta seeds fast means skipping the months-long wait most gardeners face with these tiny, stubborn seeds. ✨ I’ve cracked the code after years of trial and error—these seeds will germinate quickly when you follow the right moisture, warmth, and light tricks.
The key isn’t patience; it’s creating the perfect microclimate from day one.
You’ll need a shallow tray, a heat mat (or warm spot), and a fine mist spray bottle—no fancy equipment, just precision. These seeds prefer 60-70°F soil and consistent dampness, not soggy conditions.
Most gardeners overwater and drown them before they even sprout. I’ll show you how to balance it so they pop up in 7-14 days, not the usual 3-4 weeks.
Once they emerge, you’ll have delicate, fuzzy seedlings that grow into fragrant, drought-tolerant plants perfect for borders or containers. The minty-scented foliage repels pests naturally, and bees adore the tiny purple flowers.
By late summer, you’ll have a low-maintenance herb that multiplies effortlessly—just pinch back the tips to keep it bushy.
Works in USDA zones 3-9, from coastal gardens to mountain slopes. The same method applies whether you’re starting indoors in March or direct-sowing in early spring. Let’s get those seeds moving!
📚 In This Guide
- What you need
- Instructions
- Tips and common mistakes
- Wrapping up and next steps
What you need
- ● Calamintha nepeta seeds – 1-2 packets (about 100-200 seeds per packet). Choose organic or heirloom seeds for best results!
- ● Seed-starting trays or small pots – 4-6 inch diameter (biodegradable pots are eco-friendly!).
- ● Seed-starting mix – Lightweight, sterile potting soil (avoid garden soil—it’s too dense!).
- ● Spray bottle – For gentle watering (avoid over-saturating seeds!).
- ● Plastic wrap or humidity dome – To keep seeds moist until germination.
- ● Grow lights or sunny windowsill – 6-8 hours of light daily (south-facing windows or LED grow lights work best).
- ● Small hand trowel or spoon – For planting seeds at the right depth.
- ● Heating mat – Speeds up germination (ideal for cooler climates).
- ● Fertilizer (low-nitrogen) – Like fish emulsion or compost tea (once seedlings sprout).
- ● Labels & markers – To track planting dates and varieties.
- ● Pruning shears – For pinching back leggy seedlings later.
- ● Outdoor hardening-off tray – If transplanting outside after germination.
Step-by-Step instructions for growing calamintha nepeta from seeds
Here's how to coax these delicate seeds into thriving plants with minimal fuss.
🌱 Step 1: Prepare Containers and Seed Starting Mix
Fill 4-inch diameter pots with a lightweight seed-starting mix—this herb hates dense soil that smothers its tiny roots. I press the mix down just enough to create a firm surface, then lightly scratch the soil with my finger to create shallow furrows about ⅛ inch deep. Calamintha seeds are microscopic, so precision matters.
Moisten the mix until it feels like a damp sponge—neither soggy nor dry. A spray bottle works best to avoid displacing seeds. Place the pots in a shallow tray to catch any runoff. Real talk: these seeds need consistent moisture to germinate, but they'll rot if waterlogged.
🌱 Step 2: Sow Seeds Strategically
Sprinkle seeds along the furrows using the fine tip of a toothpick—this gives you control over spacing. Aim for 3-4 seeds per pot since germination rates vary. Cover them with a thin layer of mix no deeper than ⅛ inch; burying them too deep delays sprouting.
Gently tap the pot's sides to settle the soil, then mist again until the surface looks uniformly damp. Place the tray in a clear plastic bag to create a humid microclimate. This is the moment that matters: patience now prevents leggy seedlings later.
☀️ Step 3: Provide Warmth and Light for Germination
Calamintha seeds germinate fastest at 70-75°F, so I place the tray on a seedling heat mat. Without this, germination can take 3-4 weeks instead of the 10-14 days I've seen with warmth. Keep the soil consistently moist—never let it dry out during this critical phase.
Once sprouts appear, remove the plastic bag immediately to prevent fungal growth. Move the pots to a bright window or under a grow light for 12-14 hours daily. You'll notice the first true leaves emerge in 2-3 weeks—these are your cue to thin seedlings.
✂️ Step 4: Thin and Harden Off Seedlings
Use scissors to snip the weakest seedlings at soil level, leaving the strongest one per pot. Calamintha grows in mounds, so give remaining plants space to spread. After thinning, water deeply to help roots establish in the remaining soil.
Begin hardening off by placing pots outside in partial shade for 1 hour daily, increasing time gradually over 7-10 days. Watch for wilting—this means they're not ready for more sun. Once hardened, transplant to a garden bed with well-draining soil and full sun.
🌿 Step 5: Maintain Through First Season
Water at the base when the top inch of soil feels dry—Calamintha hates wet foliage. Mulch with 1 inch of organic matter to retain moisture and suppress weeds. You'll see blooms in 6-8 weeks, signaling the plant is established.
Pinch back flowers to encourage bushier growth. By late summer, you'll have a fragrant, bee-friendly ground cover. Here's the thing—these plants multiply quickly, so divide clumps in spring if they spread too aggressively.
Tips & tricks for growing calamintha nepeta seeds
Fast germination starts with these precision techniques that make all the difference with these tiny seeds.
Precision Planting: In Step 1, when creating those shallow furrows, use a toothpick to draw faint lines in the soil—this helps you visualize where to place each seed without disturbing the delicate surface. I've found that spacing seeds just ¼ inch apart within the furrow gives them room to establish without competing. The key is patience here: these seeds are so small that even a slight misplacement can delay germination by days.
Temperature Matters: The 70-75°F range in Step 3 isn't just a suggestion—it's the sweet spot where germination accelerates from 3-4 weeks to 10-14 days. I use a seedling heat mat set to 75°F and place a digital thermometer on the tray to monitor consistency. If your home runs cooler, consider using a seedling dome with a built-in heat source. The difference is night and day—literally.
Humidity Control: That plastic bag in Step 2 creates the perfect humid environment, but it's a double-edged sword. Check for condensation daily—if you see water droplets on the bag, it's time to remove it for 30 minutes to prevent fungal growth. I've seen seedlings develop mold when left too long in humid conditions. Pro tip: Poke small holes in the bag if your kitchen feels particularly damp; this maintains humidity while allowing airflow.
Light Transition Strategy: When moving seedlings to 12-14 hours of light in Step 3, start with 8 hours daily for the first 2 days to prevent shock. Sudden exposure to bright light can cause seedlings to bolt (shoot up too quickly). Gradually increase exposure over 5 days—this gives their delicate stems time to strengthen. I've seen seedlings that would have stretched leggy instead develop sturdy, compact growth using this gradual approach.
Pro Tips for Calamintha Nepeta Seeds
- Fast germination starts with these precision techniques that make all the difference with these tiny seeds.
- Precision Planting: In Step 1, when creating those shallow furrows, use a toothpick to draw faint lines in the soil—this helps you visualize where to place each seed without disturbing the delicate surface.
- Temperature Matters: The 70-75°F range in Step 3 isn't just a suggestion—it's the sweet spot where germination accelerates from 3-4 weeks to 10-14 days.
Frequently asked questions
Got questions about growing calamintha nepeta from seeds? You’re in the right place! Here are some of the most common queries—plus quick, actionable answers to help you succeed with these fast-germinating herbs.
How long does it take for calamintha nepeta seeds to germinate?
Expect germination in 7–21 days under ideal conditions: consistent moisture, warmth (65–75°F), and indirect light. For faster results, soak seeds overnight before planting or use a seed-starting heat mat. Patience pays off—these tiny seeds pack a punch!
Can I grow calamintha nepeta seeds indoors first?
Start seeds indoors 6–8 weeks before your last frost for a head start. Use small pots with well-draining soil, keep them warm, and provide grow lights (12–16 hours/day). Once seedlings have 2–3 true leaves, transplant them outdoors after hardening off for 7–10 days.
What’s the best soil mix for calamintha nepeta seeds?
These herbs thrive in light, well-draining soil with a pH of 6.0–7.0. Mix equal parts potting soil, perlite, and compost (or coconut coir) to prevent soggy roots. Avoid heavy clay—calamintha nepeta hates "wet feet." A pro tip: Add a handful of sand for extra drainage if your soil is dense.
Why aren’t my calamintha nepeta seeds sprouting?
Common culprits: too-cold temps, dry soil, or old seeds (viability drops after 1–2 years). Try these fixes:
- Move pots to a warmer spot (like near a sunny window or under a heat lamp).
- Lightly mist soil daily—keep it damp but not soggy.
- Test seed viability by soaking a few in water; if they sink, they’re still good!
Are there alternatives to calamintha nepeta for fast-growing herbs?
If you love quick results, try these fast-germinating herb seeds:
- Cilantro: 5–10 days (but bolting can be tricky!).
- Dill: 7–14 days (great for pollinators!).
- Basil: 5–10 days (needs warmth to thrive).
- Chives: 10–20 days (perennial—comes back yearly!).
Calamintha nepeta’s minty-catnip flavor and hardiness make it unique, but these options offer variety!
Wrapping up and next steps
Growing calamintha nepeta seeds is a rewarding journey—these fast-germinating herbs bring fragrant beauty to your garden with minimal fuss! 🌱 Whether you’re a seasoned gardener or just starting, their hardiness and quick growth make them a perfect addition to any space.
Now that you’re armed with the right tips, why not start your seeds today?
Ready to dive in? Grab your supplies, follow the steps, and watch your tiny seeds transform into lush, aromatic plants! Happy gardening! 🌿