
Propagation
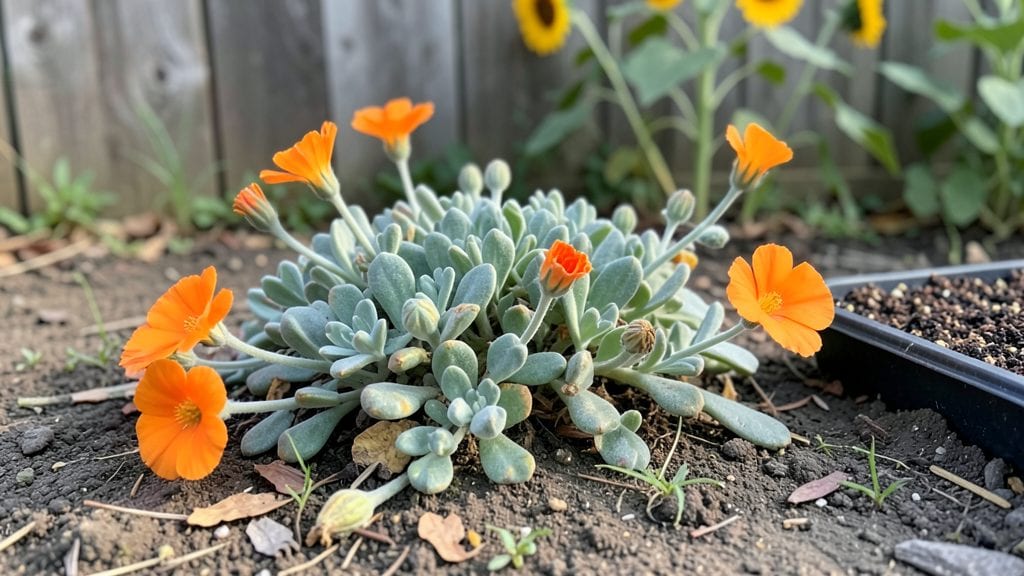
Growing portulaca from seeds delivers shockingly lush blooms in just 10-14 days—faster than most annuals. 🌱 I’ve watched these tiny seeds sprout into vibrant, heat-loving flowers that practically explode from containers, and they’re easier to grow than you’d think.
The trick is keeping them warm and bright from the start, which is where most beginners stumble.
You’ll need a shallow container with well-draining soil—portulaca hates soggy roots—and a sunny windowsill or grow light. Scatter those tiny seeds on top (no need to bury them), mist lightly, and keep the soil warm (70-80°F).
These seeds don’t play games—they’ll pop up quickly if given the right conditions, but too much moisture or cool temps will slow them down.
Once sprouted, space them 6-8 inches apart (they’ll spread fast) and give them full sun. Within weeks, you’ll have trailing stems bursting with bright blooms that last all summer long. The key? Don’t overwater—these drought-lovers thrive on neglect once established.
Perfect for containers, hanging baskets, or sunny garden edges. Even in hot zones (7-11), they handle the heat better than most flowers. Here’s how to avoid the common pitfalls and keep them blooming all season.
📚 In This Guide
- What you need
- Instructions
- Tips and common mistakes
- Wrapping up and next steps
What you need
- ● Portulaca seeds: 1–2 packets (about 50–100 seeds per packet). Choose heirloom or hybrid varieties for bold colors!
- ● Containers: Small pots (4–6 inches deep) or seed trays with drainage holes.
- ○ Optional: Shallow trays or biodegradable peat pots for transplanting.
- ● Well-draining potting mix: 1–2 bags (look for a cactus/succulent blend or add perlite/sand for extra grit).
- ● Watering can or spray bottle: With a fine mist nozzle for gentle hydration.
- ○ Gloves (optional): To keep hands clean while handling soil or seeds.
- ● Trowel or small shovel: For transferring seedlings.
- ● Plant labels: To track varieties (especially if growing multiple colors!).
- ● Grow lights or sunny windowsill: Portulaca loves light—aim for 6+ hours daily.
- ○ Fertilizer (optional): A balanced liquid fertilizer (5-10-5) or slow-release granules for established plants.
- ● Pro tip: Skip fertilizer until after the first true leaves appear!
- ● Warmth: Seeds germinate best in soil temps 70–85°F (21–29°C). Use a heat mat if starting indoors early.
- ● Sunlight: Full sun (6+ hours daily) is a must—portulaca thrives in hot, dry conditions!
- ● Drainage: Avoid soggy soil; these plants hate "wet feet."
Step-by-Step instructions for growing portulaca from seeds
Here's how to get vibrant portulaca blooms in just weeks—not months.
🌱 Step 1: Prepare Containers and Soil for Fast Germination
Portulaca thrives in well-draining soil, so use a mix of 50% potting soil and 50% coarse sand or perlite. Fill your containers—whether they're 6-inch pots or a shallow tray—leaving ½ inch of space at the top. The key here is drainage; portulaca seeds rot if kept too moist.
Lightly tamp the soil mix to remove air pockets, then moisten it until damp but not soggy. A spray bottle works best—avoid heavy watering that could displace the tiny seeds. I like to work in a sunny spot outdoors or under a grow light to keep the soil warm, since portulaca seeds germinate fastest at 70-80°F.
🌱 Step 2: Sow Seeds Shallowly and Keep Warm
Scatter the seeds on the soil surface—they need light to germinate, so don’t bury them. Gently press them into the mix with your fingertip, spacing them ½ inch apart for individual pots or 1 inch apart if sowing in a tray. A light misting with water ensures contact without washing them away.
Cover the container with clear plastic wrap to trap warmth and humidity. Place it in a sunny, warm spot—a south-facing windowsill or under a heat mat works well. Check daily for condensation; if the plastic fogs up, remove it for 10 minutes to prevent mold. You’ll see tiny green sprouts in just 5-10 days—that’s how fast portulaca grows!
☀️ Step 3: Transplant to Larger Containers for Full Growth
Once seedlings have 2-3 sets of true leaves (about 3-4 weeks after sowing), transplant them into 6-inch pots filled with the same well-draining mix. Handle them carefully—the stems are delicate. Plant them 1-2 inches apart to allow for bushy growth.
Portulaca loves heat and sun, so move them to a full-sun location (at least 6+ hours daily). If outdoors, harden them off by placing them in partial shade for 2-3 hours the first day, then gradually increase sun exposure. You’ll notice bright green leaves and early buds forming within 2 weeks of transplanting.
💧 Step 4: Water Sparingly and Fertilize Lightly
Portulaca is drought-tolerant, so water only when the top inch of soil feels dry. Overwatering causes root rot, so I use a spray bottle to mist the soil lightly rather than pouring. The plants will wilt slightly in hot weather—that’s normal and signals they need water.
Feed them every 4-6 weeks with a balanced, water-soluble fertilizer (diluted to half-strength). Too much fertilizer leads to lush foliage but fewer blooms. Watch for vibrant flowers opening within 6-8 weeks from seed—much faster than many annuals!
✂️ Step 5: Deadhead and Enjoy Fast, Long-Lasting Blooms
To encourage more flowers, pinch off spent blooms with your fingers or small pruners. Portulaca self-seeds easily, so you can collect seeds from mature plants for next season. The flowers last all day, even in heat, making them perfect for containers and sunny borders.
If you live in a warm climate, portulaca may rebloom all season with minimal care. In cooler areas, treat it as an annual and enjoy its fast, cheerful blooms from early summer until frost.
Tips & tricks for perfect portulaca blooms
Portulaca's rapid growth means timing and conditions matter more than you might expect—but these tricks will help you avoid common pitfalls and maximize those vibrant blooms in record time.
Soil Temperature Secret: That 70-80°F soil temperature range in Step 1 is non-negotiable for fast germination. If your space runs cooler, place containers on a heat mat or move them to a sunny windowsill with a clear plastic tent. I've seen germination times stretch to 2 weeks in cool conditions—cutting your blooming window by half. A simple infrared thermometer (under $20) lets you monitor soil temps without guessing.
Light Exposure Strategy: Portulaca seeds need light to germinate, but they also need warmth. In Step 2, position your covered container near a south-facing window or under a grow light for 12-14 hours daily. If using plastic wrap, prop it up slightly to prevent condensation from sitting on seeds. I've had batches fail because seeds suffocated under too much plastic—just a 10-minute daily ventilation break makes all the difference.
Transplanting Timing: The 3-4 weeks window for transplanting in Step 3 is ideal, but don't wait until seedlings are crowded. True leaves should be 1-2 inches tall when you move them. I use a toothpick to gently loosen roots before transferring to 6-inch pots—this reduces transplant shock. Water lightly after transplanting to settle the soil without drowning delicate stems.
Fertilizer Hack: When feeding every 4-6 weeks in Step 4, use a fish emulsion instead of synthetic fertilizers for even faster results. The natural enzymes stimulate root growth and flowering. Always dilute to half-strength—portulaca's drought tolerance doesn't mean it wants heavy feeding. I've noticed blooms appear 1-2 weeks earlier when using organic fertilizers compared to synthetic ones.
Pro Tips for Portulaca From Seeds
- Portulaca's rapid growth means timing and conditions matter more than you might expect—but these tricks will help you avoid common pitfalls and maximize those vibrant blooms in record time.
- Soil Temperature Secret: That 70-80°F soil temperature range in Step 1 is non-negotiable for fast germination.
- Light Exposure Strategy: Portulaca seeds need light to germinate, but they also need warmth.
Frequently asked questions
about growing Portulaca from seeds—because even the easiest plants have their quirks! Here’s what you need to know to avoid common pitfalls and grow like a pro.How long does it take for portulaca seeds to germinate?
Portulaca seeds are fast—usually sprouting in 5–10 days under ideal conditions (warmth, sunlight, and moisture). Keep soil lightly damp (not soggy) and place trays in a sunny spot or under grow lights. Patience pays off, but don’t wait longer than 2 weeks unless you’ve got a heat-loving secret trick up your sleeve!
Can I grow portulaca from seeds indoors before transplanting?
Start seeds 4–6 weeks before your last frost in small pots or trays with well-draining soil. Use a heat mat (70–80°F) to speed up germination. Once seedlings have 2–3 sets of leaves, harden them off for 7–10 days before moving to containers or garden beds. Just avoid overcrowding—they’ll compete for sunlight!
Why aren’t my portulaca seeds sprouting? Troubleshooting tips.
If seeds aren’t germinating, check these fixes:
Too cold? Portulaca loves warmth—aim for 70°F+ soil temps.
Too wet? Overwatering can drown seeds; let soil dry slightly between waterings.
Old seeds? Store-bought seeds last 1–2 years; fresh seeds germinate best.
No light? Place trays near a sunny window or use a grow light.
Pro tip: Scarify seeds (lightly nick the shell) if germination is slow—it mimics natural weathering!Do I need to thin portulaca seedlings, and how?
Thinning isn’t critical for portulaca, but if seedlings are crowded (less than 6 inches apart), snip the weakest ones at soil level with scissors. Space mature plants 8–12 inches apart in containers or beds. They’ll self-thin naturally if given enough sun—just let the strongest survive!
What’s a good alternative if portulaca seeds don’t work out?
If portulaca proves tricky, try these sun-loving, drought-tolerant seed alternatives:
- Calendula – Edible, cheerful blooms; germinates in 7–14 days.
- Zinnia – Fast-growing, great for cut flowers; loves heat.
- Sunflower (dwarf varieties) – Quick sprouts, edible petals!
- Sweet Alyssum – Self-seeding, fragrant, and low-maintenance.
Wrapping up and next steps
Growing portulaca from seeds is a rewarding journey that brings vibrant blooms to your sunny spaces in record time! With just a few simple steps—quick germination, minimal care, and a sunny spot—you’ll enjoy a burst of color that thrives even in containers.
Whether you’re a beginner or a seasoned gardener, these fast-growing beauties make container gardening effortless and fun.
Ready to dive in? Start with a small batch of seeds this weekend and watch your garden transform in weeks. Happy planting! 🌱✨