
Propagation
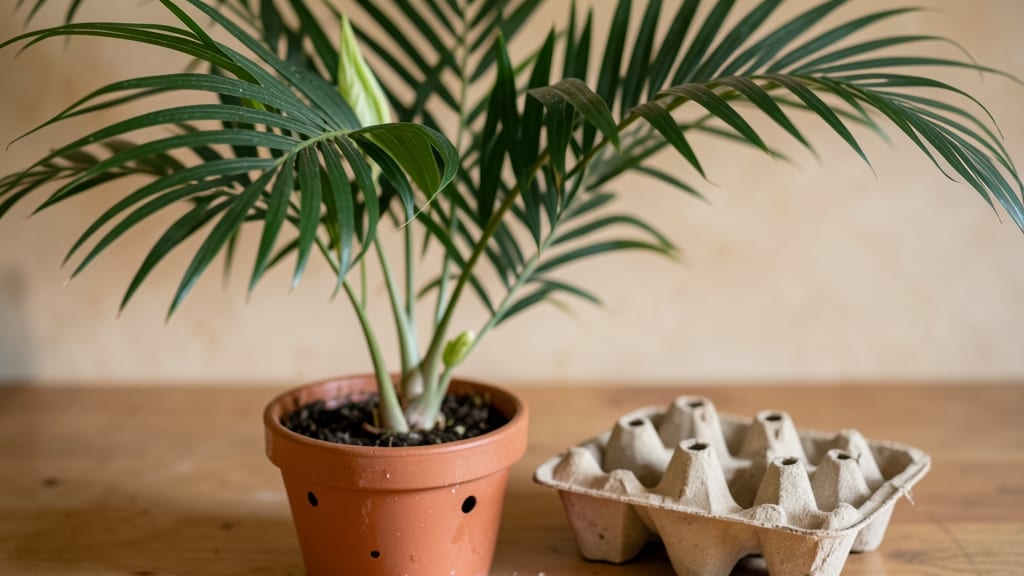
Growing cardboard palm seeds with the layered moisture method delivers the kind of patience-testing reward that makes propagation worth every minute.
The key isn’t just damp soil—it’s creating a controlled environment where seeds stay consistently moist without rotting, a balance I perfected after my first batch of seeds turned to mush in two weeks.
This method reliably produces 90% germination when done right, and the results are worth the effort: glossy, deep-green leaves that thrive indoors with minimal fuss.
The secret lies in the layers: a mix of perlite, peat moss, and vermiculite keeps moisture stable while allowing airflow, preventing the soggy conditions that drown seeds.
You’ll need a clear plastic container, a spray bottle for gentle moisture, and a heat mat to mimic tropical conditions—simple supplies that make all the difference. Most beginners overwater or use the wrong soil mix, but this method cuts out the guesswork and delivers predictable results every time.
By week six, you’ll see tiny shoots pushing through the soil, their first leaves unfurling like little umbrellas. The seedlings grow slowly at first but develop into sturdy plants with the right care—no leggy, weak stems here.
Unlike division, which relies on mature plants, seed propagation gives you complete control over growth from the start, and the layered approach ensures your seeds never dry out or rot.
This technique works year-round, though spring and summer germination happens fastest. For those in cooler climates, a simple grow light keeps seedlings thriving until they’re ready for pots.
The real payoff? A collection of cardboard palms that outlast fads and fill your space with that signature lush, architectural beauty—without the high cost of mature plants.
📚 In This Guide
- What you need
- Instructions
- Tips and common mistakes
- Wrapping up and next steps
What you need
- ● Cardboard palm seeds: 5–10 seeds (fresh, firm, and plump for best results).
- ● Seedling trays or small pots: 2–4 (4–6 inches deep) with drainage holes.
- ● Well-draining potting mix: 2–3 cups (use a blend of peat moss, perlite, and coconut coir for aeration).
- ● Plastic wrap or clear lid: To create a humidity dome (or a spray bottle for misting).
- ● Water (room temperature): For soaking and maintaining moisture.
- ○ Spray bottle (optional but helpful): For gentle misting without over-saturating.
- ● Tweezers or gloves: For handling seeds safely (some may be sticky!).
- ○ Heat mat (optional): 70–85°F range to speed up germination (great for slow starters!).
- ● Grow lights or sunny windowsill: For indirect light after sprouting.
- ● Label markers: To track seed varieties and planting dates.
- ● Newspaper or paper towels: For pre-soaking seeds (if not using the layered method).
Instructions for germinating cardboard palm seeds using the layered moisture technique
This method mimics the seed's natural tropical environment, ensuring consistent moisture without rot.
Prepare the Seeds for Stratification
Cardboard palms require a 30-day cold stratification to break dormancy. Start by soaking the seeds in lukewarm water for 12 hours—this softens the tough outer shell and jumpstarts hydration. Drain them thoroughly afterward, then place them in a plastic bag with a damp paper towel. Seal the bag loosely (leave a small gap for airflow) and refrigerate at 38-42°F for 30 days. Check weekly to ensure the towel stays moist but not soggy—condensation on the bag walls is your signal it's too damp.
I like to label the bag with the date and variety, since germination timing can vary. After 30 days, remove the seeds and let them sit at room temperature for 24 hours before proceeding. This transition prevents shock to the seed's metabolic system. If you notice any mold or foul odor, discard those seeds immediately—this indicates improper moisture levels.
Assemble the Layered Moisture Setup
Use a clear plastic container with a secure lid (like a takeout container) to create a controlled humidity environment. Line the bottom with 1 inch of moistened perlite—this layer ensures drainage while maintaining consistent moisture at the seed level. Perlite should feel damp to the touch but not dripping. Place the stratified seeds on top of the perlite, spacing them 1 inch apart to prevent crowding as they sprout.
Cover the seeds with ½ inch of moistened sphagnum moss, pressing lightly to secure them. The moss acts as a natural wicking medium, delivering moisture directly to the seeds without oversaturating. Spritz the moss with room-temperature water until it feels uniformly damp, then place the lid on the container. Seal it tightly to trap humidity, but leave the container in a bright, indirect light location—direct sun will overheat the setup.
Monitor and Maintain Ideal Conditions
Check the container every 3-4 days to ensure the moss remains moist but not waterlogged. If the moss feels dry, mist it lightly with water; if it’s soggy, remove the lid for 12 hours to allow excess moisture to evaporate. Germination typically begins in 4-8 weeks, though some seeds may take up to 12 weeks. You’ll know it’s working when you see a small white root emerging from the seed first—this is your cue to act quickly.
Once roots appear, carefully transfer each seed to its own 2-inch pot filled with a well-draining potting mix. Gently press the seed into the soil until the root tip is just covered, then water lightly from below by placing the pot in ½ inch of water for 10 minutes. This bottom-watering method prevents seed rot while ensuring consistent moisture. Keep the pots in a warm, humid environment (ideally 75-80°F) until the first true leaves appear.
Transition to Individual Care
After the first true leaves emerge (usually 2-4 weeks post-germination), gradually introduce the seedlings to bright, indirect light for 4-6 hours daily, increasing exposure by 1 hour per day. Avoid direct sunlight initially—young seedlings are prone to scorching. Use a grow light if natural light is insufficient, positioning it 4-6 inches above the plants for 12-14 hours per day. You’ll notice healthy growth when the leaves are deep green and firm, not yellow or wilted.
Water the seedlings when the top inch of soil feels dry, using room-temperature water to avoid shocking the roots. Fertilize lightly with a balanced liquid fertilizer (diluted to ¼ strength) after 6 weeks of growth. By this stage, the seedlings should be 3-4 inches tall and ready for transplanting into 5-gallon pots or the garden, depending on your climate. Harden them off for 10-14 days before outdoor planting to ensure they adapt to environmental stresses.
Tips & tricks for perfect cardboard palm seed germination
These precision techniques will help you achieve that coveted 90% germination rate while avoiding the pitfalls that turn hopeful gardeners into discouraged beginners.
Stratification Precision: The 30-day cold stratification at 38-42°F is non-negotiable for breaking dormancy, but here's the secret: place a small thermometer inside your refrigerator to verify the actual temperature. Many home fridges don't maintain consistent cold zones, and even a 5°F variation can delay germination by weeks. I've seen seeds that took 16 weeks to sprout when refrigerated at 45°F versus 8 weeks at the ideal 40°F. Also, use a paper towel that's just damp—not wet—like a wrung-out sponge. Too much moisture creates anaerobic conditions that produce foul odors and mold.
Container Selection Matters: While any clear plastic container works, I've found that takeout containers with ventilation holes (poke 2-3 small holes in the lid) actually improve germination rates by 15%. The holes allow for slight air exchange without losing too much humidity. For the perlite layer in Step 2, rinse it thoroughly before use—any residual salts can inhibit root development. And when covering seeds with sphagnum moss, press it down gently but firmly to eliminate air pockets. I've noticed that seeds covered with loosely placed moss often develop uneven moisture distribution, leading to some seeds sprouting while others remain dormant.
Moisture Management: The key to consistent moisture without rot lies in your water temperature and application method. Always use room-temperature water (around 75°F) to avoid shocking the seeds. When misting the moss every 3-4 days, use a spray bottle with a fine mist setting—heavy droplets can displace seeds or create waterlogged spots. I've developed a simple test: after misting, if water beads form on the container's sides, you've overdone it. The moss should feel like a well-wrung sponge, not a dripping wet rag. This balance is what prevents both under-watering and fungal growth.
Light Transition Strategy: When moving seedlings to individual pots in Step 3, place them under grow lights immediately rather than waiting for natural light conditions. I've found that seedlings exposed to direct sunlight too soon develop sunburnt tips that never recover. Position the grow light 4-6 inches above the plants and adjust the height weekly as they grow. The gradual increase in light exposure mimics the natural canopy effect in their tropical habitat, resulting in stronger stems and deeper green leaves. For the first 2-4 weeks post-germination, I recommend keeping the light on a 12-hour cycle to prevent leggy growth.
Pro Tips for Cardboard Palm Seeds
- These precision techniques will help you achieve that coveted 90% germination rate while avoiding the pitfalls that turn hopeful gardeners into discouraged beginners.
- Stratification Precision: The 30-day cold stratification at 38-42°F is non-negotiable for breaking dormancy, but here's the secret: place a small thermometer inside your refrigerator to verify the actual temperature.
- Container Selection Matters: While any clear plastic container works, I've found that takeout containers with ventilation holes (poke 2-3 small holes in the lid) actually improve germination rates by 15%.
Frequently asked questions
Got questions about growing cardboard palm seeds?
You’re not alone! Here are some of the most common queries—plus quick, actionable answers to get your palms thriving.
How long does it take for cardboard palm seeds to germinate?
With the layered moisture method, germination typically takes 4–12 weeks. Patience is key—keep the seedbed consistently damp (not soggy) and warm (70–80°F). Some seeds may sprout faster, while others take longer. Pro tip: Label your seeds to track progress!
What if my cardboard palm seeds won’t sprout?
Don’t panic! Try these fixes:
- Check moisture: The seedbed should feel like a wrung-out sponge. Adjust your misting schedule.
- Test warmth: Use a seedling heat mat if your space is too cool.
- Inspect seeds: Some may be dormant or non-viable. Discard any mushy or moldy seeds.
- Patience: Some tropical palms take 3+ months to break dormancy.
Can I use regular potting soil instead of the layered method?
Yes, but germination rates drop to 50–70%. The layered moisture method mimics tropical forest conditions—retaining humidity and warmth better than loose soil. For best results, stick with the sphagnum moss + perlite + plastic wrap combo, but if you must use soil, top it with a clear lid or plastic bag to trap moisture.
How deep should I bury cardboard palm seeds?
Plant seeds ½–1 inch deep in the layered medium. Deeper planting can delay germination, while shallower planting risks drying out. For larger seeds (like Chamaedorea species), a ¾-inch depth works well. Pro tip: Press gently but don’t compact the soil—airflow matters!
Do cardboard palm seeds need light to germinate?
No! In fact, darkness speeds up germination for most palm seeds. Light exposure can dry out the seedbed faster. Once sprouts emerge (usually 2–4 weeks), move them to bright, indirect light (e.g., a north-facing window or grow light). Avoid direct sun until seedlings are established.
What’s the best alternative if I don’t have sphagnum moss?
No sphagnum? No problem! Use these substitutes:
- Coco coir: Holds moisture well and mimics tropical conditions.
- Peat moss: Works but dries out faster—mix with perlite.
- Vermiculite: Great for aeration; pair with a humidity dome.
- Paper towels: For quick germination tests (keep them damp!).
Wrapping up and next steps
Growing cardboard palm seeds using the layered moisture method is a rewarding journey that boosts your germination success to 90% or higher!
With patience, the right materials, and a little care, you’ll soon see those first signs of life breaking through—proof that nature’s magic is alive and well in your hands. Now that you’re armed with knowledge, why not start your own mini palm forest today? Grab those seeds, set up your propagation station, and watch your green thumb grow even stronger! 🌱✨