
Watering
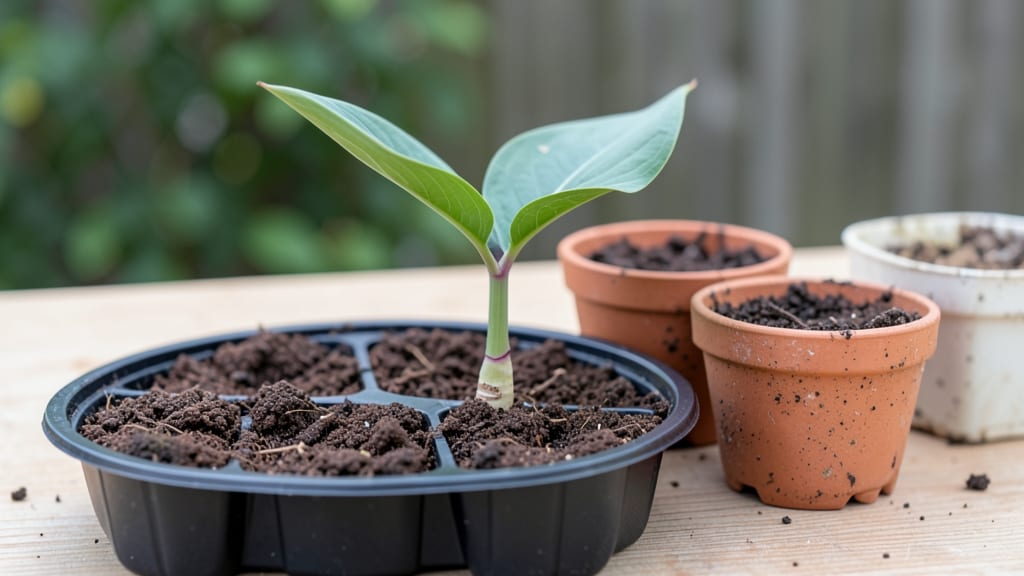
Growing calla lily seedlings starts with keeping that soil perfectly moist—not soggy, not dry, but just right. 🌱 I’ve watched these delicate sprouts transform from tiny specks into bold, blooming plants by mastering the balance of water and patience.
The secret isn’t complicated—it’s about consistency, and once you get it, you’ll see those first leaves push through the soil in just a few weeks.
You’ll need a shallow tray, a mix of peat and perlite for drainage, and a spray bottle to mist without overdoing it. Calla lilies hate sitting in wet soil, but they will tell you when they’re thirsty—wilted leaves mean it’s time to water again.
Most beginners drown them by accident, but this method keeps the roots happy while you wait for those iconic arrow-shaped leaves to appear.
By the time you’re transplanting, your seedlings will be sturdy enough to handle a bigger pot or garden bed. The payoff? Those striking blooms in late summer, when every other garden is fading, will make your neighbors do a double take.
The key is staying steady—no skipping the moisture check, no rushing the growth. Trust the process, and you’ll have a standout display by bloom time.
This works for both indoor starters and outdoor plantings, though container-grown seedlings adapt faster to garden conditions. Once you’ve got the rhythm down, you’ll be dividing mature plants in no time—each one a promise of next year’s bold, velvety blooms.
📚 In This Guide
- What you need
- Instructions
- Tips and common mistakes
- Wrapping up and next steps
What you need
- ● Calla lily tubers: 3–5 healthy, firm tubers (1–2 inches in diameter) with visible growth buds.
- ● Well-draining potting mix: 2–3 gallons of a blend designed for tubers (e.g., 60% peat moss, 30% perlite, 10% compost).
- ● Containers: 2–3 pots (6–8 inches deep) with drainage holes, or a shallow tray for propagation.
- ● Watering can or spray bottle: With a fine mist nozzle for gentle hydration.
- ○ Clear plastic wrap or dome: To create a humidity tent (optional but helpful for sprouting).
- ● Grow lights or sunny windowsill: A south-facing window or LED grow lights (12–16 hours/day).
- ● Pruning shears: For trimming dead foliage or dividing tubers (if needed).
- ● Thermometer: To monitor soil temp (ideal: 65–75°F for sprouting).
- ● Fertilizer: Balanced liquid fertilizer (10-10-10) or slow-release granules (use sparingly).
- ○ Mulch (optional): Fine gravel or pebbles to retain moisture and deter pests.
Step-by-Step instructions for cultivating calla lily seedlings
Mastering moisture is the secret to strong calla lily seedlings that bloom reliably.
🌱 Step 1: Prepare the Germination Medium
Fill a shallow tray with 2 inches of moistened perlite—this lightweight medium holds just enough moisture without suffocating delicate roots. I like to mix it with 1 part vermiculite to improve aeration while keeping the mix damp but not soggy. Use a spray bottle to mist until the perlite feels like a wrung-out sponge.
Calla lily seeds need consistent moisture to germinate, but they’ll rot if drowned. The key is keeping the medium evenly damp—never waterlogged. Tap the tray gently to settle the perlite, then create shallow ¼-inch-deep furrows in a grid pattern, spacing them 1 inch apart. This gives each seedling room to grow without competing for space.
💧 Step 2: Plant and Maintain Moisture
Place 1 seed per furrow, pressing it lightly into the perlite so it makes contact with the medium. Cover the tray with clear plastic wrap to trap humidity—this mimics the moist, shaded conditions calla lilies prefer in their native habitats. Seal the edges tightly to prevent moisture loss.
Check the perlite daily. It should feel damp to the touch but not dripping. If the surface dries out, mist lightly with warm water—never soak it. Place the tray in a warm spot (70-75°F) where it won’t be disturbed. Germination can take 3-6 weeks, so patience is key. You’ll see tiny green sprouts pushing through the perlite when they’re ready.
☀️ Step 3: Introduce Light Gradually
Once seedlings emerge, remove the plastic wrap immediately to prevent mold. Move the tray to a bright, indirect light spot—think filtered sunlight or a grow light 6-12 inches away. Direct sun at this stage will scorch the tender leaves. You’ll notice strong seedlings developing 2-3 true leaves within 4-6 weeks.
Rotate the tray a quarter turn daily so seedlings grow straight toward the light. If they stretch toward the window (a sign of legginess), your light source isn’t strong enough. Adjust the grow light to 4-6 inches above the seedlings and increase light duration to 12-14 hours daily.
🪴 Step 4: Transplant to Soil
When seedlings have 4-5 leaves and are 3-4 inches tall, it’s time to transplant. Fill 4-inch pots with a mix of 50% potting soil and 50% perlite to keep roots aerated. Gently remove each seedling, keeping the root ball intact, and place it in its own pot. Press the soil lightly around the base to secure it.
Water thoroughly until moisture runs out the drainage holes, then let the soil settle for 24 hours before watering again. Place the pots in bright, indirect light for 1 week to help them adjust. After that, they’re ready for morning sun and can handle slightly drier soil as they mature.
Tips & tricks for perfect calla lily seedling growth
Mastering moisture and timing is everything when growing calla lily seedlings—here's how to avoid common pitfalls and give your plants the best start.
Medium Consistency is Key: In Step 1, when preparing your 2 inches of moistened perlite, I can't stress enough how important it is to get the moisture just right. The mix should feel like a wrung-out sponge—if it drips when squeezed, you've overdone it. Too much moisture suffocates the seeds, while too little prevents germination. I like to test it by pressing my finger into the perlite; it should leave a slight indentation but not feel soggy. This balance is what creates that perfect environment for those delicate seeds to sprout.
Germination Timing Secret: The 3-6 week germination window in Step 2 can feel like an eternity, but patience pays off. I've found that maintaining a consistent temperature of 70-75°F is crucial—any cooler and germination slows dramatically. If your home tends to be chilly, consider using a seedling heat mat underneath the tray. You'll know you're on the right track when you see those first tiny green sprouts pushing through the perlite. Don't be tempted to peek too often—the temperature fluctuations from opening the plastic can actually delay germination.
Light Transition Strategy: When you reach Step 3 and it's time to introduce light, the gradual approach is everything. I've seen many growers make the mistake of moving seedlings directly into bright light too soon, which causes those telltale leggy stems. Start with that bright indirect light and pay attention to your seedlings' response. If they're stretching toward the light source, it's a clear sign they need more intensity. The quarter-turn rotation you do daily helps prevent uneven growth, but don't skip it—straight seedlings are a common problem when people forget this step.
Transplanting Wisdom: In Step 4, when you're ready to transplant those 3-4 inch seedlings, timing is everything. I recommend waiting until you see those 4-5 leaves—this indicates the seedlings have developed strong enough root systems to handle the transition. The 24-hour settling period after transplanting is non-negotiable. This gives the roots time to adjust to their new environment without the shock of immediate watering. I've seen many growers skip this step and end up with transplant shock, so don't make that mistake.
Pro Tips for Calla Lily Seedling
- Mastering moisture and timing is everything when growing calla lily seedlings—here's how to avoid common pitfalls and give your plants the best start.
- Medium Consistency is Key: In Step 1, when preparing your 2 inches of moistened perlite, I can't stress enough how important it is to get the moisture just right.
- Germination Timing Secret: The 3-6 week germination window in Step 2 can feel like an eternity, but patience pays off.
Frequently asked questions
Got questions about growing calla lily seedlings? You’re not alone! Here are answers to the most common concerns to help you nurture healthy sprouts and stunning blooms.
How long does it take for calla lily seeds to sprout?
Patience is key! Most calla lily seeds sprout within 4–12 weeks, depending on temperature (65–75°F is ideal) and moisture levels. Keep the soil consistently damp but not soggy—overwatering can delay germination. If no sprouts appear after 3 months, the seeds may need stratification (a cold period) or could be non-viable.
Why are my calla lily seedlings wilting or turning yellow?
Wilting or yellowing often signals overwatering or poor drainage. Calla lilies hate soggy roots! Ensure pots have drainage holes and use a well-draining mix (like peat-perlite). Yellow leaves can also mean nutrient deficiency—try a balanced fertilizer (diluted to half-strength) every 4–6 weeks once seedlings are established.
Can I grow calla lilies from seed faster than waiting for blooms?
Yes! While seeds take 1–2 years to bloom, you can speed things up by:
- Dividing rhizomes (buy mature plants and split them for faster growth).
- Using growth regulators (like gibberellic acid) to encourage flowering in younger plants.
- Providing bright, indirect light (12+ hours/day) to mimic long summer days.
What’s the best container size for calla lily seedlings?
Start small but plan for growth! Use 3–4 inch pots for initial sprouts, then upgrade to 6–8 inch containers once roots fill the space. Calla lilies have aggressive rhizomes, so avoid overcrowding—give each plant 12+ inches of space in the ground or large pots (10+ gallons for mature plants).
Do calla lilies need a dormant period, even as seedlings?
Not strictly, but a short "rest" period (4–6 weeks of cooler temps, 50–60°F) can boost future blooms. Reduce watering slightly in winter, but keep soil barely moist. If growing indoors, mimic seasons with lower light and temps to encourage healthy dormancy—though tropical varieties tolerate year-round warmth.
What can I do if my calla lily seedlings aren’t growing upright?
Leaning or floppy seedlings often need more light or support. Move them to a south-facing window or use grow lights (12–14 hours/day). For extra stability:
- Stake tall seedlings with toothpicks or bamboo sticks.
- Gently weave in twine to guide growth without damaging stems.
- Check for root-bound pots—transplant if roots circle the container.
Wrapping up and next steps
Growing calla lily seedlings is a rewarding journey that combines patience, precision, and a little green thumb love! 🌱 With the right moisture control, well-draining soil, and consistent care, you’ll soon be enjoying vibrant blooms that brighten up any space.
Whether you’re a seasoned gardener or just starting out, every seedling you nurture brings you one step closer to stunning floral displays.
Ready to take the next step? Start with just one pot—experiment with moisture levels, and soon you’ll have a thriving collection! Share your progress with fellow plant enthusiasts or expand your garden with confidence. Happy growing! 🌸