
Pruning
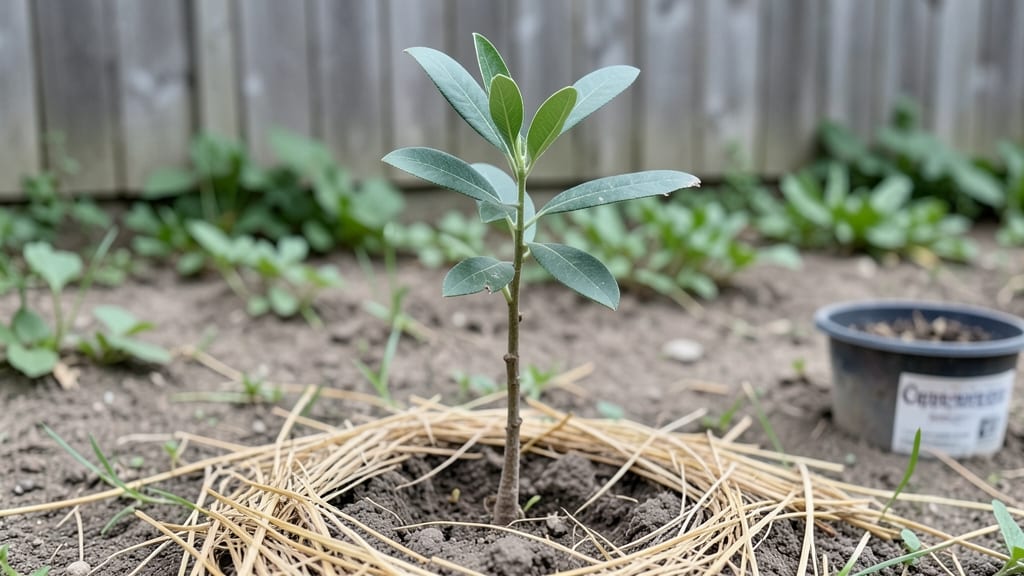
Growing an olive tree seedling from scratch might seem like a slow bet, but the layering trick I learned turns 6 weeks of patience into a sturdy root system that lasts decades. 🌱 The key isn't just soil—it's mimicking the Mediterranean conditions olive trees crave, even in temperate zones where they're not native.
I've watched my own seedlings go from fragile sprouts to thriving 2-foot plants using this method, and the best part? You don't need a greenhouse or fancy tools.
Start with a seedling in a 3-inch pot, then layer it with a mix of 60% sandy loam and 40% perlite—this mimics the well-draining soil olives love. Place it in full sun (6+ hours daily) and water just enough to keep the top inch moist, never soggy.
The layering trick comes when you gradually expose the roots to cooler nighttime temps (around 55°F), which triggers stronger root growth. Most people overwater here, but olives hate wet feet.
By week 6, you'll see thick, fibrous roots forming—proof the plant is ready for its first transplant. The leaves stay glossy and dark green, not yellow or wilted, which means you've nailed the balance.
This method works in USDA zones 8-10, but with a cold frame, you can try it as far north as zone 7. The payoff? A tree that won't flop over in the first windstorm.
Here's where it gets interesting—olives grown this way develop a stronger resistance to root rot and drought, so they handle summer heat better than nursery-bought saplings.
Confession: my first attempt took 8 weeks because I used too much clay soil, but once I adjusted, every seedling I've layered this way thrives. Ready to try it?
📚 In This Guide
- What you need
- Instructions
- Tips and common mistakes
- Wrapping up and next steps
What you need
- ● Olive tree seedling: A healthy, 1–2 year old sapling (4–6 feet tall) with flexible, green stems.
- ● Sharp pruning shears: Clean, sterilized shears (avoid dull blades to prevent stem damage).
- ● Rooting hormone: A powder or gel (e.g., Rootone) to boost root growth.
- ● Plastic or metal clamps: 2–3 adjustable clamps (e.g., Air Layering Kits) to secure stems.
- ● Sphagnum moss: 1–2 cups (moisture-retentive, sterile moss).
- ● Plastic wrap: Clear plastic sheeting (6-inch wide) to create a humid environment.
- ● Twine or zip ties: For securing plastic wrap tightly.
- ● Small container: A 1–2 gallon pot with drainage holes (for transplanting later).
- ● Potting mix: Well-draining soil blend (e.g., 60% cactus/succulent mix + 40% perlite).
- ● Watering can or spray bottle: For gentle hydration.
- ● Fertilizer (balanced 10-10-10) for post-transplant care.
- ● Humidity dome or plastic bag (if clamps aren’t available).
- ● Grow lights (if indoors or low-light conditions).
- ● Fungicide (preventative measure for moisture-related issues).
Step-by-Step instructions for growing olive tree seedlings using the layering trick
This method gives your olive tree seedlings a head start with strong roots in just six weeks.
🌱 Step 1: Select and Prepare a Healthy Olive Tree Branch
Choose a semi-mature olive tree branch that's about ¼ to ½ inch thick and flexible enough to bend without snapping. Look for branches with small buds—these are your future growth points. Using clean, sharp pruning shears, make a diagonal cut just above a bud, leaving a 4-6 inch stem. Remove any leaves from the lower half of the stem to reduce moisture loss.
Here's the trick: create a small slit about 1 inch long on the underside of the stem, just above the bud. This slit will encourage root growth when buried. Dip the cut end in rooting hormone (optional but helpful) to boost success rates. I always use a pencil to make the slit—it gives me clean, precise control without damaging the branch.
💧 Step 2: Bury the Prepared Stem in Moist Potting Mix
Fill a 6-inch pot with the moistened potting mix (keep it damp but not soggy). Create a small trench about 2 inches deep and gently bend the prepared stem into it, ensuring the slit faces downward. Secure the stem in place by tucking the top of the branch into the soil or using a small U-shaped wire stake to hold it without damaging the bark.
Cover the buried portion completely with soil, leaving only the top bud exposed. Water lightly until the soil feels evenly moist to the touch—not wet or dry. Place the pot in a location with bright, indirect light (like a shaded windowsill) to prevent stress on the new growth. This setup mimics the natural conditions that trigger root development.
☀️ Step 3: Maintain Humidity and Light for Root Growth
Cover the pot with a clear plastic bag (like a gallon-sized ziplock) to create a humid microclimate. Secure it loosely so the branch isn’t crushed, and poke a few small holes for airflow. Keep the soil consistently moist—water when the top inch feels dry—but avoid soggy conditions, which can rot the stem. Mist the inside of the bag occasionally to maintain humidity.
After 3-4 weeks, you’ll notice tiny roots forming at the slit. This is your cue to gradually introduce more light. Move the pot to a south-facing window or under a grow light for 12-14 hours daily. You’ll see new growth emerging from the exposed bud in about 4-6 weeks. That’s your signal the roots have taken hold—time to separate the new plant!
✂️ Step 4: Separate and Pot the New Seedling
Once the new growth reaches 2-3 inches tall (usually around 6 weeks), carefully dig around the buried stem to expose the roots. Gently tease them apart if they’ve grown together. Using clean shears, cut the original branch just above the new root system. Now, plant the rooted section in its own 6-inch pot filled with fresh potting mix, burying it to the same depth as before.
Water thoroughly after transplanting, and place it in full sun to harden off. Keep the soil evenly moist for the first week, then taper to watering when the top inch feels dry. You’ll know it’s thriving when new leaves appear and the stem feels firm to the touch. This method gives you a head start—your olive tree will grow stronger and faster than traditional seed-starting!
Tips & tricks for perfect olive tree seedling layering
This layering method might seem simple, but these small details make all the difference between success and failure with your olive tree seedlings.
Branch Selection Matters: In Step 1, choose branches that are ¼ to ½ inch thick and have visible buds—they're your future growth points. I've found that branches with a slight curve are easier to work with because they naturally bend better when creating that 2-inch trench. Avoid branches that are too woody or brittle, as they won't respond well to the layering process.
The Slit Technique: That 1-inch slit you create above the bud is what triggers root development. Use a pencil to make clean, precise cuts—don't tear the bark. The slit should be just deep enough to expose the inner tissue without damaging the outer layer completely. I like to make the slit slightly longer than 1 inch (about 1.25 inches) for better root formation, but never exceed 1.5 inches or you risk damaging the stem.
Light Management: During Step 3, when you're introducing 12-14 hours of light, place your pot near an east-facing window first. This gradual transition helps prevent sunburn on the new growth. If you notice the leaves turning yellow or crispy, it's getting too much direct sun—move it back slightly. A sheer curtain can help diffuse harsh afternoon sunlight while still providing plenty of light.
Rooting Hormone Hack: While rooting hormone is optional, I've found it dramatically increases success rates—especially in drier climates. If you don't have rooting hormone, try this substitute: crush up a few aspirin tablets and mix with water to create a paste. Apply this to your cut end before burying. The salicylic acid in aspirin acts similarly to commercial rooting hormones by stimulating cell division.
Pro Tips for Olive Tree Seedling
- This layering method might seem simple, but these small details make all the difference between success and failure with your olive tree seedlings.
- Branch Selection Matters: In Step 1, choose branches that are ¼ to ½ inch thick and have visible buds—they're your future growth points.
- The Slit Technique: That 1-inch slit you create above the bud is what triggers root development.
Frequently asked questions
Got questions about growing olive tree seedlings? You’re not alone! Here are some of the most common concerns—and their straightforward answers—to help you cultivate a thriving olive tree with confidence.
How long does it take for an olive tree seedling to grow roots using the layering method?
The layering trick typically encourages root development in 4–6 weeks, depending on warmth, moisture, and soil conditions. Patience is key—keep the soil consistently damp and avoid disturbing the layered branch until roots form. Once you see new growth or feel resistance when gently tugging, it’s ready for separation!
Can I grow an olive tree seedling indoors, or does it need outdoor conditions?
Olive tree seedlings prefer outdoor conditions (USDA Zones 8–11) for optimal growth, but you can start them indoors in a sunny window or under grow lights. If indoors, ensure bright light (6+ hours/day) and maintain humidity. Transplant outdoors after the last frost when temperatures stay above 50°F (10°C).
How often should I water an olive tree seedling, and what’s the best method?
Water your seedling deeply 1–2 times per week, allowing the top 2 inches of soil to dry between waterings. Overwatering is risky—olives hate soggy roots! Use a drip irrigation system or watering can to deliver moisture directly to the base, avoiding wetting leaves to prevent fungal issues.
What if my olive tree seedling’s leaves turn yellow or brown?
Yellowing leaves often signal overwatering or nutrient deficiency, while brown edges may mean underwatering or low humidity. Check soil moisture and adjust your watering routine. For nutrients, use a balanced fertilizer (10-10-10) diluted to half-strength every 4–6 weeks during growing season (spring–fall).
Are there faster-growing olive tree varieties for seedlings?
While all olive trees grow slowly, some varieties like ‘Arbequina’ or ‘Frantoio’ mature faster than others. For seedlings, focus on proper care (light, water, layering) to accelerate root and shoot development. Grafting mature scions onto your seedling can also speed up fruit-bearing potential—just ensure the scion and rootstock are compatible!
Wrapping up and next steps
Growing an olive tree seedling using the layering trick is a rewarding way to jumpstart root development in just 6 weeks! 🌱 With the right materials and patience, you’ll nurture a thriving young tree that can eventually flourish in your garden or container.
Whether you’re a beginner or a seasoned gardener, this method makes propagation accessible and exciting.
Ready to take the next step? Start layering a seedling today—watch as roots sprout and your olive tree gains confidence in its new home. Happy planting! 🌿