Lawn
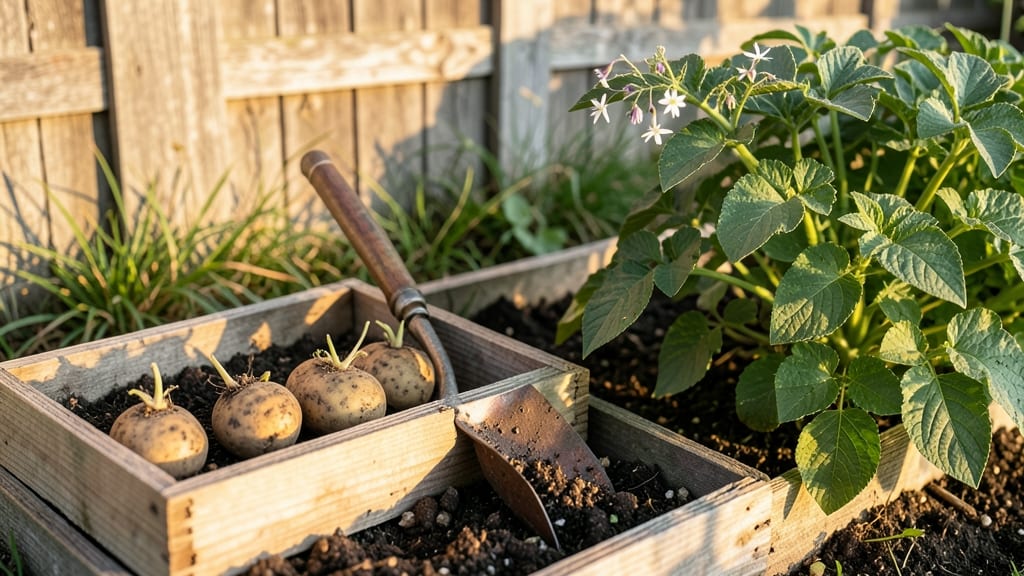
Chitting seed potatoes unlocks a faster harvest by giving your tubers a head start—those little white sprouts mean stronger plants and bigger yields. I’ve chitted hundreds of potatoes over the years, and the difference between a few weeks of growth and a full season of waiting is night and day.
The process is simple: just place your seed potatoes in a cool, bright spot and wait for those first green shoots to appear.
You don’t need fancy equipment—just a tray, some paper towels, and a sunny windowsill or basement corner. The key is keeping them in 50-60°F temperatures with indirect light; too much warmth or direct sun will turn those sprouts green and bitter.
Once you see 1-2 inch sprouts, they’re ready to plant, and you’ll notice they establish faster in the garden, resisting disease better than unchitted potatoes.
This method cuts down on planting time and gives you earlier harvests—sometimes up to two weeks ahead of schedule. The plants grow more vigorously, too, because those sprouts already have roots forming.
Plus, you’ll waste less seed potatoes since you can spot and discard any that rot or fail to sprout before they hit the soil.
Works for all potato varieties, whether you’re growing in containers or a full garden bed. The only rule? Start chitting 4-6 weeks before your last frost date—that’s when the magic happens. Ready to get those potatoes growing ahead of schedule?
📚 In This Guide
- What you need
- Instructions
- Tips and common mistakes
- Wrapping up and next steps
What you need
- ● Seed potatoes: 5–10 lbs (depending on your garden size), certified disease-free, and pre-chitted (with 1–2 inch sprouts). Choose varieties like Yukon Gold, Red Pontiac, or Fingerlings for best results.
- ● Containers or garden bed: Option 1: 5–10 gallon grow bags (1–2 per potato) or fabric pots for vertical growing.
- ● Option 2: A raised bed or in-ground plot (12–18 inches deep, with loose, well-draining soil).
- ● Potting mix or soil: Lightweight, well-draining mix (e.g., 60% peat moss, 30% perlite, 10% compost) or high-quality garden soil amended with compost.
- ● Fertilizer: Balanced organic fertilizer (10-10-10 or 5-5-5) or compost tea for a gentle nutrient boost.
- ● Gloves: A pair of gardening gloves to protect your hands from dirt and sharp potato edges.
- ● Trowel or hand fork: For planting and gently turning soil without damaging sprouts.
- ● Watering can or hose with a gentle spray nozzle: Avoid blasting sprouts—aim for deep but even moisture.
- ○ Mulch (optional): Straw or grass clippings to retain moisture and regulate soil temperature.
- ○ Plant labels (optional): To track varieties and planting dates.
Step-by-Step instructions for chitting seed potatoes
Here’s how to get your seed potatoes sprouting in just a few weeks—no fancy tools needed.
Choose and Prepare the Seed Potatoes
Pick medium-sized seed potatoes with no signs of disease or sprouting already. I like to select ones that feel firm but not hard—about the size of a golf ball. Place them in a cool, dark spot (like a cupboard) for 2-3 weeks before chitting. This lets any existing sprouts shrink back, so you get fresh, strong growth when you start.
Once you’ve stored them, give each potato a quick rinse under cool water to remove any dirt. Pat them dry with a paper towel—wet potatoes won’t sprout as well. Now they’re ready for the next step.
Position for Sprouting
Fill a shallow container (like a plastic tray or even a cardboard box) with 2-3 inches of water—just enough to cover the bottom. Arrange the potatoes in a single layer, eyes (the dimples) facing upward. The water should touch only the bottoms, not the sprouting parts. This keeps them hydrated without rotting.
Place the container in a bright, cool spot—think 50-60°F—like a sunny windowsill or under a grow light. Avoid direct sunlight or warmth, which can make the sprouts grow too fast and leggy. Check the water every 2-3 days—top it off if it evaporates. You’ll see tiny white sprouts in about 2-3 weeks.
Pot Up the Chitted Potatoes
Once your sprouts are 1-2 inches long, it’s time to plant. Fill 4-inch pots with light, well-draining potting mix—fill each pot to 1 inch below the rim. Make a small hole in the center of the soil with your finger, just deep enough to cover the bottom of the potato but leave the sprouts exposed.
Gently place the potato into the hole, sprouts facing up, and cover the base with soil. Press lightly to secure it, but don’t pack it down too tight. Water the soil until it’s moist but not soggy—you want the mix to feel like a damp sponge. Avoid wetting the sprouts themselves.
Provide Light and Care
Move the potted potatoes to a sunny windowsill or under grow lights for 12-14 hours of light daily. They’ll need moderate warmth (60-70°F) to keep growing. Water lightly every 3-4 days, letting the top inch of soil dry out between waterings. Overwatering here is the biggest mistake—it causes rot before the plants even get a chance to grow.
In about 4-6 weeks, your chitted potatoes will have strong stems and leaves—ready to transplant outdoors after the last frost. The key is patience: rushing the process leads to weak plants. Watch for deep green leaves and thick stems—that’s your sign they’re thriving.
Tips & tricks for perfect chitted seed potatoes
Here's what I've learned after growing dozens of healthy potato plants from chits—these tricks make all the difference for fast, vigorous growth.
Selection Matters: The 2-3 week pre-chitting storage period in Step 1 is crucial for eliminating weak sprouts. I've found that potatoes with existing sprouts often produce uneven growth. Look for firm, medium-sized potatoes—about the size of a golf ball—and avoid any with soft spots or green patches, which indicate disease or exposure to light.
Water Management: In Step 2, maintaining the 2-3 inches of water is an art. The water should only touch the bottoms of the potatoes, never the sprouting parts. I like to use a shallow tray with drainage holes to prevent over-saturation. Change the water every 2-3 days to prevent bacterial growth, even if it looks clean. This keeps your potatoes hydrated without risking rot.
Light and Temperature Balance: The bright, cool spot mentioned in Step 2 should ideally receive indirect light—direct sunlight can cause the sprouts to grow too quickly and become leggy. I've had the best results with a north-facing window or under grow lights set to provide 12-14 hours of light daily. The 50-60°F range is critical; warmer temperatures accelerate growth but can lead to weaker stems.
Potting Technique: When it's time to pot up in Step 3, use your finger to create a hole just deep enough to cover the bottom of the potato while leaving the sprouts exposed. I've found that using 4-inch pots gives the roots plenty of room to establish without overwhelming the plant. Press the soil lightly around the potato to secure it, but don't compact it too tightly—this prevents air pockets that could cause rot.
Pro Tips for Chitted Seed Potatoes
- Here's what I've learned after growing dozens of healthy potato plants from chits—these tricks make all the differenc...
- Selection Matters: The 2-3 week pre-chitting storage period in Step 1 is crucial for eliminating weak sprouts. I've f...
- Water Management: In Step 2, maintaining the 2-3 inches of water is an art. The water should only touch the bottoms o...
Frequently asked questions
Got questions about chitting seed potatoes? You’re not alone! Here are some of the most common queries—plus quick, practical answers to get you growing like a pro.
What exactly does "chitting" mean?
Chitting is the process of pre-sprouting seed potatoes in a cool, bright spot (like a windowsill) before planting. This jumpstarts growth, giving your tubers a head start and ensuring faster, stronger plants in the garden. Think of it as giving your potatoes a warm-up before the big race!
How long does it take to chit seed potatoes?
Chitting typically takes 4–6 weeks in ideal conditions (cool temps, 45–55°F, and indirect light). You’ll see tiny white sprouts (called "chits") emerge—once they’re ½-inch long, they’re ready to plant. Patience pays off for healthier, more vigorous plants!
Can I chit potatoes too early or too late?
Yes! Chit them too early (e.g., in winter), and the sprouts may grow leggy or weak. Chit too late (close to planting time), and you’ll miss the growth boost. Aim to start chitting 6–8 weeks before your last frost date for best results.
What if I don’t have time to chit—are there alternatives?
No chitting? No problem! Plant untreated seed potatoes directly into warm soil (after frost), but expect a 1–2 week delay in germination. For faster results, try pre-sprouting in a paper bag (place potatoes in a breathable bag near a sunny window for 2–3 weeks). Every little bit helps!
My chitted potatoes are sprouting unevenly—what’s wrong?
Uneven sprouting often happens due to uneven light exposure or temperature fluctuations. Rotate your potatoes weekly for balanced light, and keep them in a consistent 45–55°F environment. If sprouts turn green or leggy, reduce light slightly. A little TLC goes a long way!
Wrapping up and next steps
Growing your own potatoes from chitted seed potatoes is a rewarding way to kickstart a thriving garden—faster, healthier, and with fewer surprises! 🌱 Whether you're a seasoned gardener or just starting, these sprouted tubers give you a head start on the growing season, ensuring stronger plants and a bountiful harvest.
Now that you’re armed with the right knowledge, there’s no better time to dig in—literally! Grab those chits, prep your soil, and let nature do the rest. Happy planting! 🌿
Next step: Mark your calendar for planting day (usually 2-4 weeks before your last frost) and get ready to watch your garden transform!