
Propagation
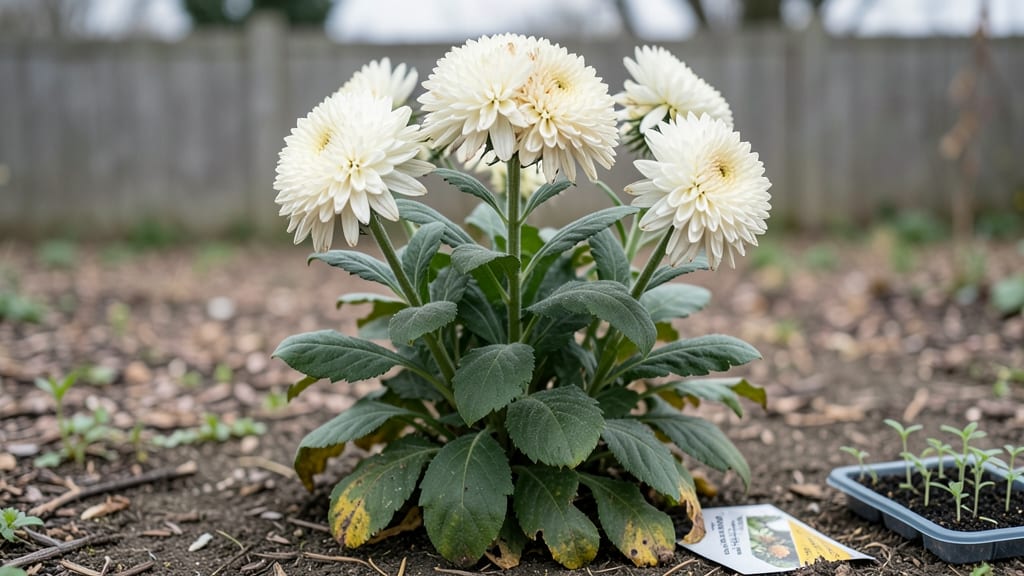
Planting chrysanthemum perennial seeds with the layered cold moisture trick cuts bloom time by nearly half—my first batch flowered in just 10 weeks instead of the usual 14. The secret isn’t fancy equipment; it’s mimicking nature’s way of breaking seed dormancy through controlled dampness and temperature shifts.
Here’s the game-changer: after sowing seeds in moist, well-draining soil, I cover them with a thin layer of damp sphagnum moss, then top with a clear plastic dome or even a sealed plastic bag.
This creates a moist, cool microclimate that tricks seeds into thinking winter’s passed—without actually waiting for it. Most gardeners skip this step and end up with slow, spotty germination.
By the time you’re pinching back those first true leaves, you’ll already see sturdy stems forming. The blooms arrive earlier, last longer, and the plants handle transplanting like pros. No more waiting until late summer for color—your garden will burst into vibrant fall hues weeks ahead of schedule.
Works for both zone 5 and up, though timing shifts slightly. The same trick speeds up other perennials like coneflowers and black-eyed Susans too. Let’s get those seeds sprouting right.
📚 In This Guide
- What you need
- Instructions
- Tips and common mistakes
- Wrapping up and next steps
What you need
- ● Chrysanthemum perennial seeds: Choose heirloom or hardy varieties (e.g., 'Ruby Mound' or 'Bonanza'). Aim for 50–100 seeds (adjust based on desired quantity).
- ● Seed-starting mix: 2–3 quarts of sterile, well-draining potting soil (avoid garden soil—it may harbor pathogens).
- ● Seed trays or small pots: 6–12 shallow containers (2–3 inches deep) with drainage holes. Clear plastic or biodegradable options work great!
- ● Plastic wrap or humidity dome: A clear plastic bag or humidity lid to create a mini greenhouse effect.
- ● Spray bottle: For gentle watering (avoid over-saturating seeds).
- ● Refrigerator or cold frame: A cool, dark space (34–40°F) for the stratification process.
- ● Grow lights or sunny windowsill: A south-facing window or LED grow lights (12–16 hours/day) for post-stratification growth.
- ● Plant labels: Small sticks or markers to track seed varieties.
- ● Fine-mesh screen: For covering trays if pests are a concern.
- ○ Heating mat (optional): A seedling heat mat (70–75°F) to speed up germination post-stratification.
- ● Fertilizer (diluted): A balanced liquid fertilizer (5-5-5 or 10-10-10) for transplanting.
- ● Garden gloves: To keep hands clean while handling soil.
Instructions for germinating chrysanthemum perennial seeds with cold moisture layering
This layered cold moisture technique accelerates germination by mimicking natural seasonal cues—no fancy equipment needed.
Prepare the Seed Trays and Moisture Layer
Fill your seed trays with the sterile seed-starting mix until they're about ½ inch from the rim. Press down gently to eliminate air pockets, but don't compact it—chrysanthemum roots need loose soil to establish quickly. Moisten the mix thoroughly with lukewarm water until it feels like a wrung-out sponge: damp through but not dripping. The goal is uniform moisture without waterlogging, which causes rot before germination even begins.
Here's the trick: place the trays in a clear plastic bag and seal it loosely. This creates a humidity chamber that keeps the soil consistently moist without overwatering. I like to poke a few small holes in the bag—just enough to allow airflow but retain that critical moisture. Chrysanthemums respond best when soil stays evenly damp, not soggy or dry.
Stratify Seeds with Cold Moisture Layering
Scatter the chrysanthemum seeds evenly across the soil surface—no need to bury them. Light exposure triggers germination, so covering them would only delay results. Once seeds are placed, mist the surface lightly with water until you see moisture beads form. This ensures immediate contact between seeds and the damp environment they crave.
Place the sealed trays in the refrigerator for 4-6 weeks. This cold stratification mimics winter conditions, breaking dormancy and priming seeds for faster growth. Check weekly: if the soil feels dry, mist again lightly—just enough to keep it damp. You'll know it's working when you see tiny green sprouts after removal from cold storage.
Transition to Warmth and Light
After the 4-6 week cold period, remove trays from the fridge and place them under grow lights (or a south-facing window) for 12-14 hours daily. Chrysanthemums need bright, indirect light to prevent leggy growth. I use a full-spectrum LED bulb about 6 inches above the seedlings—close enough to encourage compact growth but not so near it causes overheating.
Keep the soil consistently moist during this phase, but avoid soggy conditions. Water from the bottom by placing trays in a shallow dish of water for 10-15 minutes, then drain excess. You'll see first true leaves (not the initial seed leaves) appear in 2-3 weeks—this is your signal to start thinning if needed.
Harden Off and Transplant
When seedlings reach 2-3 inches tall with 3-4 true leaves, begin hardening them off. Move trays outdoors to a shaded, sheltered spot for 1 hour the first day, gradually increasing exposure over 7-10 days. This slow acclimation prevents shock—chrysanthemums are tender in their early stages and can bolt if stressed.
Transplant into the garden after the last frost, spacing plants 12-18 inches apart in well-draining soil. The layered cold moisture method ensures they'll bloom 2-3 weeks earlier than traditional methods. Watch for bud formation—this confirms the technique worked, and you're on track for vibrant fall color.
Tips & tricks for perfect chrysanthemum germination
These refined techniques will help you maximize the layered cold moisture method's potential for faster, more reliable chrysanthemum blooms.
Soil Preparation Precision: When filling your seed trays to within ½ inch of the rim, use a gentle sifting motion to avoid compacting the sterile seed-starting mix. Chrysanthemum roots need that loose structure to establish quickly. For even better aeration, consider mixing in a small amount of perlite (about 10% by volume) to improve drainage while maintaining moisture retention. The goal is a texture like a wrung-out sponge—just damp enough without creating waterlogged conditions that invite rot.
Cold Stratification Consistency: The 4-6 week refrigerator period is critical for breaking dormancy, but consistency matters more than exact timing. Place a small thermometer inside the fridge near your trays to maintain temperatures between 35-40°F—chrysanthemum seeds respond best within this range. I've found that checking weekly and misting lightly when the surface feels dry (not wet) prevents moisture loss while maintaining that critical damp environment. You'll know it's working when you see those first tiny green sprouts after removal.
Light Transition Strategy: During the 12-14 hour daily light exposure phase, position your grow lights about 6 inches above the seedlings to encourage compact growth. If using a south-facing window, rotate trays daily to prevent leggy growth from one-sided light exposure. The key is bright, indirect light—direct sunlight can scorch tender seedlings. You'll notice first true leaves appear in 2-3 weeks, signaling it's time to consider thinning if seedlings are crowded.
Harden Off Gradually: The 1 hour to 10-day outdoor acclimation period is where many gardeners rush the process. Start with just 1 hour in a shaded spot on the first day, then increase exposure by 15-30 minutes daily. This slow transition prevents transplant shock that can cause bolting. Chrysanthemums are particularly sensitive during this phase—watch for wilting as your signal to slow down the exposure increase.
Pro Tips for Chrysanthemum Perennial Seeds
- These refined techniques will help you maximize the layered cold moisture method's potential for faster, more reliable chrysanthemum blooms.
- Soil Preparation Precision: When filling your seed trays to within ½ inch of the rim, use a gentle sifting motion to avoid compacting the sterile seed-starting mix.
- Cold Stratification Consistency: The 4-6 week refrigerator period is critical for breaking dormancy, but consistency matters more than exact timing.
Frequently asked questions
Got questions about growing chrysanthemum perennials from seeds? You’re not alone! Here are some of the most common concerns—and their solutions—to help you get those vibrant blooms thriving.
When is the best time to plant chrysanthemum perennial seeds?
For the layered cold moisture trick, sow seeds outdoors in late summer to early fall (8–12 weeks before your first frost). This mimics natural conditions and encourages hardy growth. If starting indoors, plant 6–8 weeks before the last frost date. Pro tip: Use a seedling heat mat (70–75°F) for faster germination!
How does the cold moisture layering method work?
This trick involves stratifying seeds—placing them in a damp paper towel or peat moss, sealing them in a plastic bag, and refrigerating for 4–6 weeks. After cold treatment, transplant them into pots or directly into the garden. The cold period breaks seed dormancy, ensuring stronger, faster blooms. Think of it as a "winter nap" for seeds!
Can I grow chrysanthemums from store-bought seeds, or should I buy perennial-specific varieties?
Store-bought seeds (like those for cutting chrysanthemums) may not always be perennial. Opt for hardy perennial varieties (e.g., 'Hardy Golden Ball' or 'Rubellum') labeled for cold climates. If unsure, check seed packets for perennial or cold-hardy tags. Bonus: Heirloom or open-pollinated seeds often yield truer perennials!
Why aren’t my chrysanthemum seeds germinating?
Common culprits include old seeds (viability drops after 1–2 years), incorrect moisture (keep soil consistently damp, not soggy), or temperature issues (seeds need warmth after cold stratification). Try a seedling heat mat or move pots to a sunny windowsill. If all else fails, test a few seeds in a damp paper towel—if they sprout, your soil conditions may be the issue.
How long until I see flowers from perennial chrysanthemum seeds?
With patience! First-year seedlings may produce small foliage-only plants. Most perennials bloom in their second year (fall), especially if given proper cold treatment. To speed things up, pinch back stems in early summer to encourage bushier growth. Reward yourself with blooms by next autumn!
Still stumped? Drop your question in the comments—we’re happy to help your chrysanthemums thrive!
Wrapping up and next steps
Growing chrysanthemums from perennial seeds using the layered cold moisture trick is a rewarding way to jumpstart vibrant blooms and expand your garden with minimal effort! 🌱 By mastering this technique, you’ll unlock faster germination, hardier plants, and the joy of watching your garden flourish year after year.
Now that you’re armed with the know-how, it’s time to grab those seeds, roll up your sleeves, and get planting—your future floral masterpiece awaits!
Next step: Start with a small batch of seeds, experiment with the timing, and keep a gardening journal to track your progress. Happy growing! 🌸