
Propagation
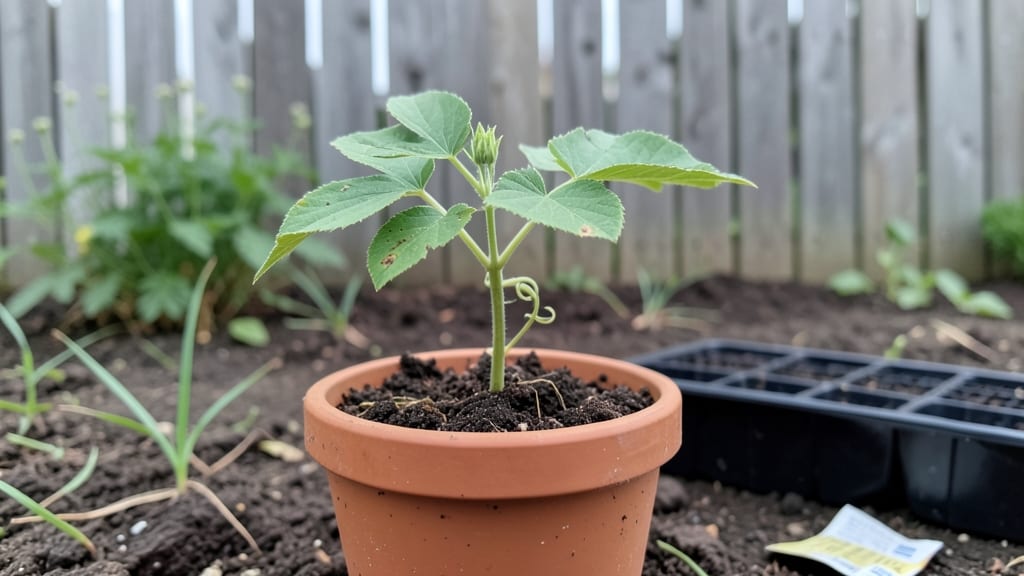
Growing clematis from seed is a thrilling challenge—those first sprouts emerge when you nail the moisture-controlled balance. I’ve struggled with dampness ruining seeds or them drying out before germinating, but once I cracked the timing, my seedlings came up strong and fast.
The key? Mimicking nature’s slow, steady water release without turning the soil into a swamp. ✨
You’ll need a shallow tray, a mix of peat and perlite to keep things airy, and a spray bottle for precision watering—no heavy-handed soaking here. Temperature matters too: keep seeds between 60-68°F for consistent germination.
Most home gardeners overlook this, but it’s what separates a patchy tray from a uniform stand of seedlings ready for transplanting in 4-6 weeks.
By the time you’re pinching back those first true leaves, you’ll already see the vine’s signature growth habit taking shape. The real payoff? Those first blooms arrive 12-18 months after sowing—earlier than many expect, if you avoid the common pitfall of overwatering.
The trick is patience with the early stages; once established, these plants reward you with vibrant green climbers and dramatic flowers for years.
Works in partial shade or full sun, though morning light is ideal for seedlings. Adapt the timing to your zone—sow indoors 8-10 weeks before last frost, or direct-sow in spring when soil warms. Here’s how to keep them thriving from day one.
📚 In This Guide
- What you need
- Instructions
- Tips and common mistakes
- Wrapping up and next steps
What you need
- ● Clematis seeds: Choose fresh, high-quality seeds from a reputable supplier. Aim for at least 10-20 seeds to increase your chances of success.
- ● Seed-starting mix: Use a well-draining, sterile peat-based or coconut coir mix (avoid garden soil—it can harbor diseases). A 10-12 inch tray or small pots (2-3 inches deep) will work.
- ● Containers: Opt for seed trays with drainage holes or small plastic pots (2-3 inches in diameter). Clear plastic domes or plastic wrap will help maintain humidity.
- ● Watering can or spray bottle: A fine-mist spray bottle ensures gentle hydration without disturbing seeds.
- ● Grow lights or sunny windowsill: Clematis seeds need bright, indirect light (12-16 hours/day). A full-spectrum LED grow light is ideal if natural light is limited.
- ○ Heat mat (optional but helpful): A seedling heat mat (70-75°F) speeds up germination for tropical clematis varieties.
- ● Small hand trowel or spoon: For gently pressing seeds into the soil.
- ● Labels and markers: To track seed varieties and planting dates.
- ● Humidity tray or clear bag: Helps maintain moisture levels during germination.
- ● Fine-mesh screen or paper towels: Useful for stratification (if cold-treatment is required for your seed type).
- ● Fertilizer (diluted): A balanced liquid fertilizer (5-5-5 or 10-10-10) can be applied after the first true leaves appear.
- ● 💡 Sterilize tools: Wipe containers and tools with rubbing alcohol to prevent fungal issues.
- ○ 🌡️ Pre-soak seeds (optional):
- ● ✨ Test soil moisture: Keep the mix consistently moist but not soggy—think damp sponge, not swamp!
Step-by-step instructions for growing clematis from seed
Here’s how to coax clematis from seed into vigorous plants with controlled moisture—key to fast, reliable germination.
🌱 Step 1: Stratify Seeds for Germination
Clematis seeds need cold stratification to break dormancy. Place the seeds in a sealed plastic bag with dampened sphagnum moss (just enough moisture to feel like a wrung-out sponge). Store the bag in your refrigerator’s crisper drawer for 8-12 weeks. Check weekly—if the moss dries, mist it lightly and reseal.
This cold treatment mimics winter conditions, tricking seeds into thinking spring has arrived. I like to label the bag with the date to track progress. After 12 weeks, remove the bag and let it sit at room temperature for 1-2 weeks—this final warm-up jumpstarts germination.
💧 Step 2: Prepare Moisture-Retentive Soil Mix
Fill 4-inch pots with a blend of 50% peat moss and 50% perlite (this mix stays moist without suffocating roots). Water the mix until it’s evenly damp but not soggy—think of a wrung-out sponge. Tap the pots gently to settle the soil, leaving ½ inch of space at the rim for watering.
Clematis roots are sensitive to drought, so this light, airy mix prevents compaction while holding moisture. I like to pre-warm the soil mix for an hour under a grow light before planting—just enough to encourage early root activity.
☀️ Step 3: Sow Seeds and Maintain Humidity
Plant 1-2 seeds per pot at a depth of ¼ inch, pressing lightly to ensure contact with soil. Cover the pots with clear plastic wrap to trap humidity—clematis seeds thrive in 80-90% humidity during germination. Place the pots in a warm spot (65-75°F) out of direct sunlight.
Check daily for condensation on the plastic. If it fogs up, the humidity is perfect; if it stays clear, mist the soil lightly and reseal. Germination takes 4-8 weeks, so patience is key. I’ve found that keeping the soil consistently moist (never dry, never waterlogged) is the secret to fast, even sprouting.
🌿 Step 4: Transition to Light and Fertile Soil
Once seedlings show first true leaves (not the initial seed leaves), remove the plastic and move pots to bright, indirect light. After 4 weeks, transplant into individual 6-inch pots with standard potting mix amended with compost. Clematis are heavy feeders, so mix in 1 tablespoon of 10-10-10 fertilizer per pot.
You’ll notice new growth within 2 weeks—this is your cue to gradually introduce morning sun (2-3 hours daily). Avoid full sun until seedlings are 3-4 inches tall, or they’ll scorch. I like to harden off seedlings by placing them outside in dappled shade for 1 hour daily, increasing time over 10 days.
⏰ Step 5: Overwinter and Plant Outdoors
After the first growing season, let young clematis plants go dormant naturally in pots. Move them to a cool garage or basement (40-50°F) and reduce watering to once every 2-3 weeks. In early spring, repot into 1-gallon containers with fresh potting mix and slow-release fertilizer. Plant outdoors after the last frost, choosing a sheltered spot with afternoon shade.
Clematis take 2-3 years to bloom from seed, but the wait is worth it for disease-resistant, vigorous plants. The key to fast blooms? Consistent moisture—never let soil dry out completely, and mulch heavily in summer to retain moisture. You’ll see the first flowers by Year 3 if you keep conditions steady.
Tips & tricks for perfect clematis germination
Mastering clematis from seed isn't just about patience—it's about precision with moisture and timing. Here's how to optimize every step for fast, reliable sprouting.
Stratification Success: The 8-12 week cold stratification period is non-negotiable for clematis seeds. I've found that placing the sealed bag in the refrigerator's crisper drawer (around 40°F) creates the most consistent conditions. If your fridge runs warmer, consider using a seed stratification fridge or a cool basement corner. During this time, check the moss weekly—it should feel like a wrung-out sponge, not dripping wet. Overly wet moss can suffocate seeds, while dry moss halts germination.
Soil Prep Technique: When preparing your 50/50 peat moss and perlite mix in Step 2, pre-warming it under a grow light for an hour creates the perfect environment for early root activity. This small step significantly speeds up germination by mimicking spring conditions. For even better results, I recommend using a heat mat set to 70-75°F during germination—just place your pots on top after sowing. This maintains consistent warmth at the roots without overheating.
Humidity Management: The clear plastic wrap in Step 3 isn't just for looks—it creates that critical 80-90% humidity environment. Here's my pro tip: Instead of just covering with plastic, create a mini greenhouse by placing the pots on a tray with a thin layer of pebbles and water. This elevates the pots slightly and prevents root rot from sitting in water. Check daily for condensation—if it's foggy inside, you're golden. If it's clear, mist the soil lightly and reseal immediately.
Light Transition Strategy: When moving seedlings to bright indirect light in Step 4, I recommend using a grow light on a timer for 12 hours daily during the first 2 weeks. This controlled light exposure prevents leggy growth while providing enough energy for strong development. Once you introduce morning sun, start with just 1 hour daily—gradually increasing to 2-3 hours over 10 days is crucial. I've seen many growers rush this step and end up with scorched seedlings.
Pro Tips for Clematis From Seed
- Mastering clematis from seed isn't just about patience—it's about precision with moisture and timing.
- Stratification Success: The 8-12 week cold stratification period is non-negotiable for clematis seeds.
- Soil Prep Technique: When preparing your 50/50 peat moss and perlite mix in Step 2, pre-warming it under a grow light for an hour creates the perfect environment for early root activity.
Frequently asked questions
Got questions about growing clematis from seed? You’re not alone! Here are some of the most common concerns—and their answers—to help you succeed with moisture-controlled sprouting.
How long does it take for clematis seeds to germinate?
Germination can take anywhere from 2 weeks to 6 months, depending on the variety and conditions. Most seeds need stratification (cold treatment) first—place them in the fridge for 4–8 weeks before sowing. Patience is key, but consistent moisture (not soggy!) keeps them happy.
Do I really need to stratify clematis seeds?
Yes! Stratification mimics winter’s cold spell, breaking seed dormancy. For best results, mix seeds in a damp paper towel, seal in a plastic bag, and refrigerate for 4–8 weeks. Skipping this step often leads to slow or no germination. Think of it as a wake-up call for your seeds!
What’s the best moisture level for sprouting clematis seeds?
Keep the soil or growing medium consistently moist but never waterlogged. Overwatering causes rot, while dryness halts growth. A spray bottle or bottom-watering tray works well. Test moisture by touching the soil—it should feel like a wrung-out sponge, not mud.
Can I grow clematis from seed indoors, or do they need outdoor conditions?
Start indoors under grow lights (12–16 hours/day) for faster germination, then transplant outdoors after the last frost. Seedlings need bright, indirect light to avoid leggy growth. Harden them off gradually before moving to the garden—think of it as seedling boot camp!
What if my clematis seeds don’t sprout after months?
Don’t give up! Some seeds take over a year to germinate. Check for mold or pests, and ensure your setup isn’t too hot/dry. Try scarifying (lightly nicking the seed coat) or a second stratification cycle. Nature’s timeline isn’t always ours—keep trying!
Wrapping up and next steps
Growing clematis from seed is a rewarding journey that combines patience with the joy of nurturing life from the smallest beginnings. By mastering moisture control, light exposure, and gentle care, you’ll unlock the potential for vibrant blooms that transform your garden into a living masterpiece. 🌱✨
Ready to dive deeper? Start by selecting your favorite clematis varieties and experimenting with these techniques—your future garden (and pollinators!) will thank you. Happy growing!