
Propagation
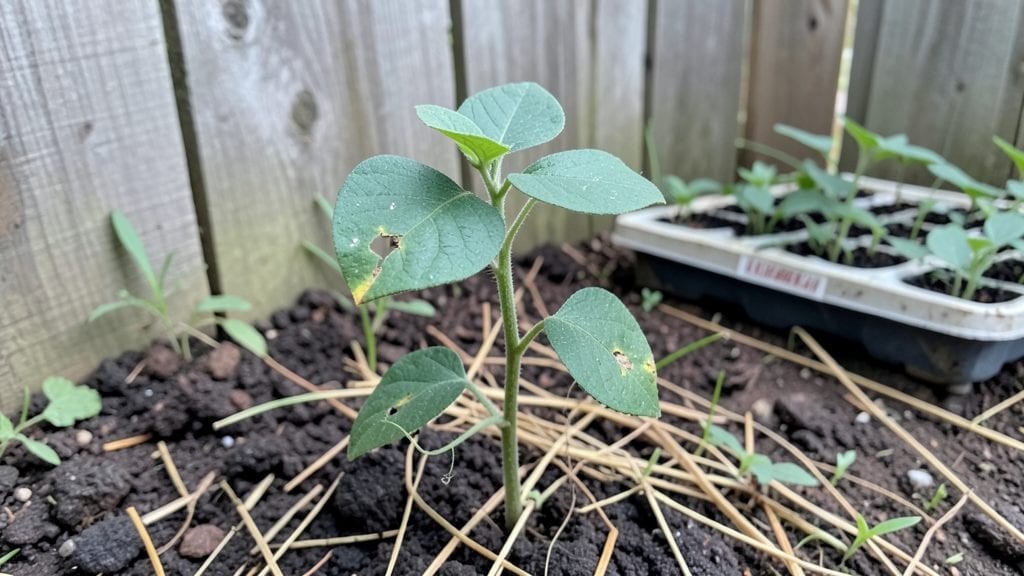
Growing cluster bean seedlings from seed starts with a simple soak-and-sprout trick that boosts germination to 90%. I’ve used this method for three seasons now, and it turns what would normally be a hit-or-miss process into a reliable way to get strong, fast-growing plants without waiting for store-bought transplants.
The key lies in prepping the seeds right—just a few hours of soaking can make the difference between sparse seedlings and a thick, healthy stand.
You’ll need just three basic supplies: cluster bean seeds, a shallow tray or container, and a damp paper towel or small mesh bag. The process takes less than 24 hours before you can plant, and once sprouted, these seedlings grow aggressively—ready for transplant in as little as 10-14 days.
This method works especially well for beginners because it eliminates the guesswork of direct sowing in dry soil, where seeds often fail to germinate.
What you’ll end up with are drought-tolerant plants that thrive in poor soil and produce abundant pods with minimal care. The seedlings develop a deep taproot quickly, which means they establish faster than many other legumes.
By the time they’re ready for the garden, they’ll already be tough enough to handle heat and occasional dry spells—no coddling required.
This approach also saves money and lets you grow heirloom or rare varieties you won’t find at nurseries. Whether you’re prepping for a summer garden or extending your growing season, the soak-and-sprout method gives you a head start. Let’s get those seeds sprouting—your future harvest depends on it.
📚 In This Guide
- What you need
- Instructions
- Tips and common mistakes
- Wrapping up and next steps
What you need
- ● Cluster bean seeds: 10–20 fresh, organic seeds (ensure they’re plump and free of cracks).
- ● Water: 2–3 cups of room-temperature, filtered or rainwater (chlorine-free).
- ● Soaking container: A clean glass jar, bowl, or wide-mouth mason jar with a lid (8–16 oz capacity).
- ● Drainage: A fine-mesh strainer, cheesecloth, or a colander with holes (to prevent seeds from escaping).
- ● Germination tray: A shallow tray, baking dish, or plastic container (9x13 inches) with drainage holes (or DIY with a perforated lid).
- ● Growing medium: Option 1: 2–3 cups of coco coir or peat moss (sterilized and moistened).
- ● Option 2: A mix of vermiculite and perlite (50/50 ratio) for aeration.
- ● Spray bottle: For gentle misting (8 oz with a fine mist nozzle).
- ○ Plastic wrap or humidity dome: To retain moisture during germination (optional but helpful).
- ● Seedling heat mat: To maintain warmth (70–80°F) if your space is chilly.
- ● Grow lights: LED or fluorescent (12–16 hours/day) if natural light is limited.
- ● pH meter or test kit: To check soil pH (ideal range: 6.0–7.0).
- ● Fertilizer: Mild organic starter (e.g., fish emulsion or seaweed extract) for transplanting.
- ● Labels & markers: To track seedling progress (because every sprout is a win!).
Step-by-step instructions for cluster bean seedlings using the soak-and-sprout method
This method guarantees strong, disease-resistant seedlings ready for transplanting in just weeks.
Prepare the Seeds for Soaking
Cluster bean seeds have a tough outer shell that benefits from a 24-hour soak before planting. Place the seeds in a clean bowl and cover them with lukewarm water—about 1 inch above the seeds. The water should feel comfortably warm to your fingers, not hot. This softens the seed coat and speeds up germination.
Leave the bowl in a warm spot, like near a sunny window or on a heat mat set to 75-80°F. You’ll see the seeds begin to swell within a few hours, which means the soaking is working. After 24 hours, drain the water and rinse the seeds gently with fresh water to remove any residue. This prepares them for planting without over-soaking, which can cause rot.
Plant the Soaked Seeds in Moistened Soil
Fill small seedling pots or a shallow tray with well-draining potting mix, leaving about ½ inch of space at the top. Moisten the soil until it’s damp but not soggy—you should be able to squeeze a handful and feel moisture without water dripping out. Cluster beans prefer loose, airy soil that won’t compact around their roots.
Plant the soaked seeds ½ inch deep, spacing them 2 inches apart if using a tray. If planting individually, use 3-inch pots for each seedling. Press the soil lightly around the seeds to ensure good contact, but don’t pack it down too firmly. This encourages strong root development without smothering the seeds. Water the soil gently with a spray bottle to settle it without disturbing the seeds.
Provide Warmth and Humidity for Germination
Cluster bean seeds germinate best in warmth and humidity, so cover the pots or tray with a clear plastic dome or plastic wrap. This traps moisture and keeps the soil consistently warm. Place the setup in a location with a constant temperature of 75-85°F, such as on a seedling heat mat or in a warm, shaded spot. Germination typically takes 7-14 days, depending on temperature and humidity.
Check the soil daily and mist lightly with water if the surface feels dry. Avoid removing the cover until you see green sprouts breaking through the soil. Once germination begins, keep the soil moist but not waterlogged—overwatering at this stage can lead to damping-off, a fungal disease that kills seedlings overnight.
Thin and Harden Off Seedlings for Transplanting
When seedlings reach 2-3 inches tall and have two sets of true leaves (not just the initial seed leaves), it’s time to thin them. If using a tray, carefully separate the seedlings and transplant the strongest ones into individual 4-inch pots with fresh potting mix. Handle the seedlings by their leaves, not the stems, to avoid damaging the delicate roots. This step ensures each plant has enough space to grow without competing for nutrients.
Begin hardening off the seedlings 1-2 weeks before transplanting outdoors. Gradually expose them to outdoor conditions by placing them in a sheltered, shaded spot for 1-2 hours the first day, then increasing the time by 1 hour daily. This acclimates the seedlings to sunlight, wind, and temperature fluctuations, reducing shock when they’re moved to the garden. After 7-10 days, they should be ready for planting in well-drained soil with full sun exposure.
Tips & tricks for perfect cluster bean seedlings
Mastering the soak-and-sprout method for cluster beans takes patience and precision—here's how to optimize every step for maximum success.
Soaking Strategy: The 24-hour soak is non-negotiable for cluster beans, but timing matters beyond just hours. Start with lukewarm water that feels comfortable to your fingers—too hot and you'll damage the delicate seed proteins, too cold and you'll slow germination. I place my bowl on a heat mat set to 75-80°F for consistent warmth. After 24 hours, you'll notice the seeds have swollen noticeably—this is your cue they're ready for planting. The key is consistency: don't rush the soak, but don't exceed 24 hours either, as prolonged soaking can lead to rot.
Soil Preparation Insight: When moistening your well-draining potting mix, aim for what gardeners call "the squeeze test"—when you gently compress a handful, a few drops should form but not drip continuously. Cluster beans hate soggy conditions, so avoid the temptation to overwater during this stage. I find using a spray bottle rather than pouring water helps prevent disturbing the seeds while planting. The loose, airy texture of the soil is crucial—if it feels compacted, mix in perlite or vermiculite to improve aeration.
Germination Environment: The 75-85°F range during germination is critical, but don't assume your home stays perfectly consistent. I recommend using a small thermometer near your seedling setup to monitor temperatures—especially if you're using a sunny window where afternoon heat can spike. The plastic cover creates a humidity dome, but be vigilant about condensation. If you see water droplets forming on the cover, lift it briefly to prevent fungal growth. Germination typically begins within 7-14 days, but if your space is cooler, you might extend to the upper range of this window.
Hardening Off Technique: The gradual 1-2 hour daily increases during hardening off are essential for transplant shock prevention. I start with just 1-2 hours on the first day in partial shade, then progress by 1 hour each subsequent day. Watch for leaf color changes—healthy seedlings maintain their vibrant green, while stressed ones may develop yellowing edges. After 7-10 days of this process, your seedlings should be ready for full sun exposure. The key is patience: rushing this step often results in wilted, struggling plants that never recover.
Pro Tips for Cluster Bean Seedling
- Mastering the soak-and-sprout method for cluster beans takes patience and precision—here's how to optimize every step for maximum success.
- Soaking Strategy: The 24-hour soak is non-negotiable for cluster beans, but timing matters beyond just hours.
- Soil Preparation Insight: When moistening your well-draining potting mix, aim for what gardeners call "the squeeze test"—when you gently compress a handful, a few drops should form but not drip continuously.
Frequently asked questions
Got questions about growing cluster bean seedlings?
You’re not alone! Here are some of the most common concerns—plus quick, actionable answers to help you achieve that 90% success rate with the soak-and-sprout method.
How long should I soak cluster bean seeds before planting?
Soak your seeds for 8–12 hours in warm water (70–80°F) to soften the hard outer shell. This speeds up germination and ensures faster sprouting. Pro tip: Use a breathable cloth or paper towel to drain excess water afterward—this prevents rot!
When is the best time to plant cluster bean seedlings outdoors?
Wait until after the last frost and soil temps reach 70°F+ (ideal for tropical cluster beans). Plant in late spring to early summer for best results. If your climate is hot year-round, aim for the rainy season to reduce watering stress.
What if my cluster bean seedlings aren’t sprouting after soaking?
Try these fixes:
- Check seed viability: Test a few seeds in warm water—if they sink, they’re likely viable. Floaters may be old.
- Warmth boost: Place soaked seeds near a sunny window or use a seedling heat mat (75–85°F).
- Fresh soak: Re-soak for 4–6 hours in lukewarm water with a pinch of humic acid (optional).
Can I grow cluster bean seedlings indoors first?
Yes! Start indoors 4–6 weeks before the last frost in biodegradable pots (like peat or coconut coir) to avoid transplant shock. Use a grow light (12–14 hours/day) and keep soil moist but not soggy. Harden off seedlings for 5–7 days before moving outdoors.
What are common mistakes to avoid with cluster bean seedlings?
Avoid these pitfalls for healthy growth:
- Overwatering: Cluster beans hate "wet feet"—let the top inch of soil dry between waterings.
- Crowding: Space seedlings 12–18 inches apart (they spread!). Thin if needed.
- Cold drafts: Keep seedlings away from AC vents or chilly windows.
- Skipping fertilizer: Use a balanced 10-10-10 fertilizer after 4 weeks to support vines.
Wrapping up and next steps
Growing cluster bean seedlings using the soak-and-sprout method is a game-changer for gardeners—especially when you’re aiming for a 90% success rate! 🌱 With the right materials, patience, and a few pro tips, you’ll be well on your way to nurturing healthy, robust seedlings ready for transplanting. Don’t let hesitation hold you back—your future harvest is waiting!
Ready to take the next step? Start soaking those seeds today and watch your garden thrive! 🌿 For even more guidance, explore our full propagation guide or join a gardening community to share your progress.