
Propagation
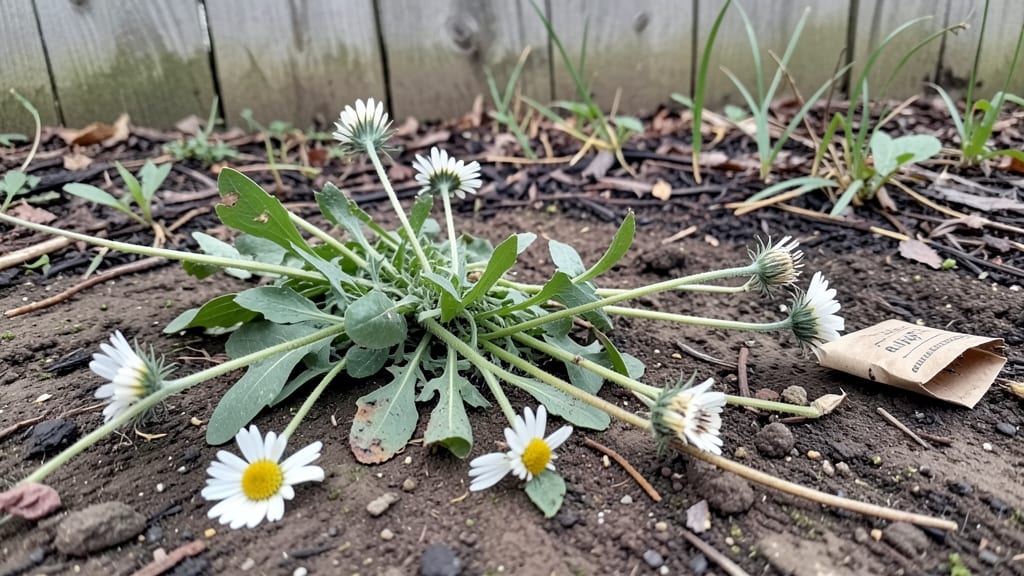
Collecting daisy seeds at the right moment means next year’s garden will burst with cheerful blooms before you even remember planting them. 🌻 I’ve learned the hard way that timing is everything—harvest too early, and the seeds won’t be viable; wait too long, and they’ll scatter before you can save them.
The key is watching for those papery brown centers that signal maturity, usually in late summer or early fall, depending on your zone.
You’ll need just a few simple tools: a pair of clean scissors or pruners, a paper bag or envelope for storage, and a sunny spot to dry the seeds.
The process is straightforward but requires patience—daisy seeds need time to fully mature and dry on the plant before they’re ready to collect. Once you’ve got them, proper storage in a cool, dry place ensures they’ll stay fresh until planting season rolls around.
When done right, you’ll end up with a stash of seeds that produce vibrant, prolific blooms the following year—often more than you started with. The first time I saw my saved seeds grow into lush daisy patches, I knew I’d cracked the code.
There’s nothing like watching those familiar faces pop up again, year after year, without spending a dime on new plants.
This method works for both wild daisies and cultivated varieties, making it perfect for gardeners who love low-maintenance, high-reward plants. The only real mistake? Rushing the process—so take your time, and you’ll be rewarded with a garden that practically plants itself. Let’s get those seeds saved!
📚 In This Guide
- What you need
- Instructions
- Tips and common mistakes
- Wrapping up and next steps
What you need
- ● Mature daisy plants (preferably Leucanthemum or Bellis varieties with fully developed seed heads—look for brown, papery centers).
- ● Sharp scissors or pruning shears (sterilized to prevent disease; 4–6" blades work well).
- ● Paper bags or brown lunch bags (1–2 per plant; avoid plastic to prevent moisture buildup).
- ● Newspaper or cardboard (for drying seeds—at least 12"x12" per batch).
- ● Small envelopes or seed packets (kraft paper or breathable material; 3x5" size recommended).
- ● Pencil or label maker (to mark seed varieties and dates).
- ○ Fine mesh sieve or sifter (optional but helpful for separating seeds from chaff; 1/8" mesh size ideal).
- ● Glove (to protect hands from prickly stems or allergens).
- ● Fan or dehumidifier (for faster drying in humid climates).
- ● Seed storage containers (airtight jars or vacuum-sealed bags for long-term preservation).
- ● Camera or phone (to document seed heads before harvesting!).
- ● Twine or rubber bands (to secure bags or labels).
How to collect daisy seeds for next year’s garden
Here’s the foolproof way to harvest daisy seeds and ensure a fresh batch of cheerful blooms every season.
🌱 Step 1: Identify Mature Daisy Seed Heads
Wait until late summer or early fall when the daisy centers turn brown and papery—this means the seeds are fully mature. Look for the classic white petals surrounding a dry, fluffy center. These seed heads are ready for collection when they’re completely brown and brittle to the touch.
Gently grasp the base of the seed head with one hand and twist it off the stem. Don’t pull too hard—you want the entire head intact, not scattered seeds. If the center resists, it’s not quite ready. I always check a few heads first to confirm they’re fully dry before harvesting.
🪴 Step 2: Dry and Store the Seed Heads
Place the harvested seed heads in a dry, well-ventilated area away from direct sunlight. A paper bag or mesh sack works perfectly—it allows airflow while keeping seeds contained. Leave them for 7-10 days to ensure any lingering moisture evaporates completely.
Once fully dry, gently rub the seed head between your fingers or tap it lightly over a clean surface. The seeds will fall out easily, leaving behind the empty, fluffy center. Store the collected seeds in a labeled envelope or small jar in a cool, dark place. A sealed container keeps them viable for up to 2 years.
⏰ Step 3: Test Seed Viability Before Planting
Before sowing, test a few seeds by placing them in a damp paper towel. Fold the towel and store it in a sealed plastic bag in a warm spot (65-75°F). Check daily—if sprouts appear within 7-10 days, your seeds are still good. If not, try a fresh batch or source new seeds.
This simple test saves time and frustration. I always test a handful of seeds from each batch to confirm they’ll grow strong. If they sprout quickly, you’re ready to plant; if they fail, it’s time to troubleshoot moisture or storage conditions.
🌿 Step 4: Plant the Seeds for Next Season
Sow daisy seeds outdoors in early spring, 4-6 weeks before your last frost date. Scatter them lightly on prepared soil—¼ inch deep—and cover with a thin layer of potting mix. Keep the soil consistently moist but not soggy until germination, which typically takes 14-21 days.
Thin seedlings to 12-18 inches apart once they develop 2-3 true leaves. This spacing ensures strong stems and plenty of room for blooms. I always mark the rows with small sticks to avoid disturbing the roots during thinning.
☀️ Step 5: Maintain for Healthy Blooms
Daisies thrive in full sun (6+ hours daily) and well-draining soil. Water deeply once a week, adjusting for rain. Deadhead spent blooms in early summer to encourage more flowers. By mid-summer, you’ll have a vibrant display—and the cycle begins again for next year’s seeds.
This method guarantees a perfect harvest every time. The key is patience—waiting for the right moment to collect seeds ensures strong, reliable blooms season after season. Now you’re ready to enjoy daisies year after year with minimal effort!
Tips & tricks for perfect daisy seed harvesting
These simple tricks ensure you collect the best seeds for next year’s vibrant daisy blooms—without the guesswork.
Timing is Everything: Late summer or early fall is non-negotiable for seed collection. The classic white petals should remain while the center turns completely brown and brittle. Here's the thing: if the center still feels firm or green, wait another week. I learned this the hard way after trying to harvest too early—those seeds were still immature and wouldn't sprout.
Harvesting Technique: When twisting off seed heads in Step 1, use a gentle but firm motion—think of unscrewing a jar lid. The goal is to remove the entire head intact, not pull apart the delicate stems. I always harvest on a dry day when the plants are completely dry from morning dew, which makes the seed heads easier to handle.
Drying Strategy: The 7-10 day drying period in Step 2 is your secret weapon against mold. Place seed heads in a paper bag or mesh sack in a dry, dark spot with good airflow—like a pantry or garage. I like to prop the bag open slightly with a chopstick to ensure proper ventilation. If you're in a humid climate, add a silica gel packet to absorb excess moisture.
Viability Test: That 7-10 day germination test in Step 3 is worth repeating—especially if you're unsure about storage conditions. For best results, use distilled water in your damp paper towel test. Tap water can introduce minerals that affect germination. I always test 3-5 seeds from each batch to get a reliable reading, rather than just one or two.
Pro Tips for Collect Daisy Seeds
- These simple tricks ensure you collect the best seeds for next year’s vibrant daisy blooms—without the guesswork.
- Timing is Everything: Late summer or early fall is non-negotiable for seed collection.
- Harvesting Technique: When twisting off seed heads in Step 1, use a gentle but firm motion—think of unscrewing a jar lid.
Frequently asked questions
When is the best time to collect daisy seeds?
Harvest daisy seeds in late summer to early fall (August–October), when the flower heads turn brown and dry. Wait until the seeds are fully mature but before they scatter naturally. Check daily—seeds can disperse quickly!
How do I know if the seeds are ready to collect?
Look for these signs: the petals will have fallen or wilted, and the center disk (where seeds form) will be dry and papery. Gently squeeze a seed head—if seeds rattle inside, they’re ready! Avoid collecting if the disk is still green or moist.
Can I collect seeds from store-bought daisies?
Most commercial daisies (like Gerbera or Gerbera jamesonii) are hybrids and won’t produce viable seeds. For reliable seeds, opt for heirloom or open-pollinated varieties like Oxeye Daisy (Leucanthemum vulgare) or Shasta Daisy.
Will collecting seeds affect next year’s flowers?
No—collecting seeds won’t harm your plants! In fact, it encourages more blooms by removing spent flower heads. Just leave a few seed heads unharvested to support pollinators and natural seed dispersal.
What if rain or pests ruin my seeds before I collect them?
Store seed heads in a dry, well-ventilated spot (like a paper bag) to prevent mold. For pests, shake off insects before storing. If seeds are damp, spread them on a tray to dry for 1–2 days. Avoid plastic bags—condensation promotes rot!
Wrapping up and next steps
Collecting daisy seeds is a rewarding way to ensure next year’s garden bursts with cheerful blooms! By timing your harvest just right—when seed heads turn brown and dry—you’re setting the stage for easy propagation and vibrant growth.
Whether you’re saving seeds for sentimental reasons or expanding your garden, every dried head holds the promise of new life.
Now that you’re armed with the know-how, grab those seed pods and get planting! Share your seed-saving successes with fellow gardeners or experiment with different varieties. Your future garden will thank you—one happy daisy at a time. 🌼