
Vegetables
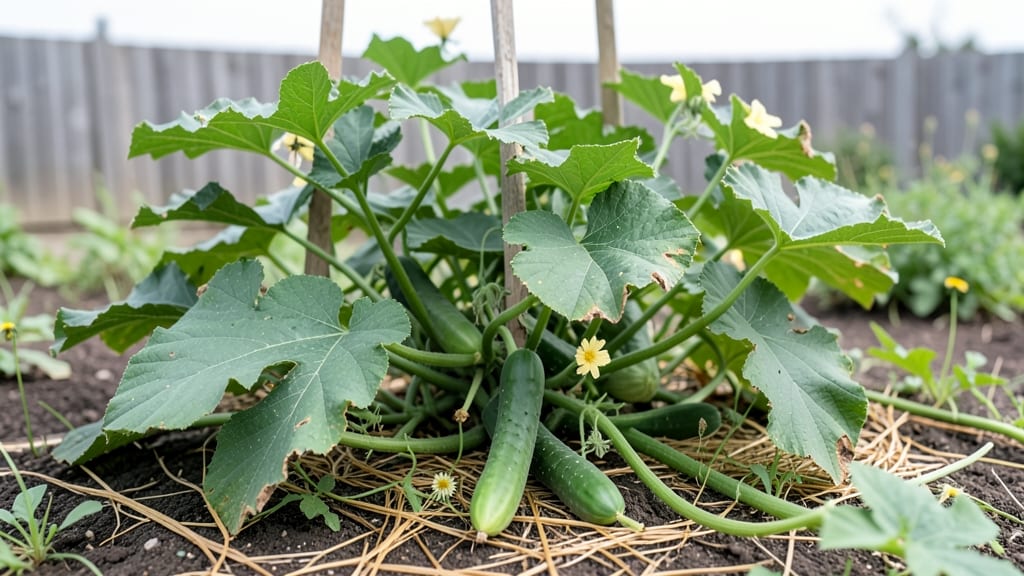
Growing cucumbers from seeds feels like unlocking a secret garden—those first pale green tendrils breaking through the soil are the reward for doing things just right. 🌱 I’ve started hundreds of cucumber seeds, and the difference between a wimpy sprout and a vigorous one comes down to two things: soil warmth and patience.
Most beginners rush germination, but cucumbers need cozy conditions to wake up fast.
The good news? You don’t need fancy equipment—just a warm spot (like a sunny windowsill or heat mat), moist seed-starting mix, and a shallow container. Plant seeds ½ inch deep, keep them consistently damp, and watch for sprouts in 5–10 days (sometimes faster with a little bottom heat).
The key is consistency: cucumbers hate drying out, but they also despise soggy soil. My trick? Stick a finger in the mix—if it’s dry an inch down, it’s time to water.
By the time you’re transplanting seedlings, you’ll have stocky, dark-green plants ready to handle outdoor life. They’ll climb, sprawl, or bush out depending on the variety, and with the right support, you’ll be harvesting crisp cucumbers in just 50–60 days.
The first bite from your own plants? That’s the real payoff—nothing beats it.
Works for backyard gardens, containers, or even trellises on a balcony. Let’s get those seeds sprouting strong!
📚 In This Guide
- What you need
- Instructions
- Tips and common mistakes
- Wrapping up and next steps
What you need
- ● Cucumber seeds: Choose heirloom, hybrid, or disease-resistant varieties (e.g., 'Straight Eight,' 'Marketmore,' or 'Armenian'). Buy 50–100 seeds for a small harvest or 200+ seeds for a larger garden.
- ● Seed-starting trays or biodegradable pots: 50–100 cell trays (2–3 inches deep) or 4-inch pots for transplanting. Biodegradable options reduce transplant shock!
- ● High-quality seed-starting mix: 1–2 bags (sterile, peat-based or coco coir blend with perlite). Avoid garden soil—it’s too dense for germination!
- ● Grow lights or sunny windowsill: A full-spectrum LED grow light (12–16 hours/day) or a south-facing window (6–8 hours of sunlight).
- ○ Misting bottle or spray nozzle: Keeps seeds moist without overwatering. Optional: A humidity dome or plastic wrap for extra warmth.
- ○ Heat mat (optional but recommended): A seedling heat mat (70–80°F) speeds up germination by 30–50%—cucumbers love warmth!
- ● Fertilizer: A balanced, water-soluble fertilizer (e.g., 5-5-5 or 10-10-10) for post-germination growth. Dilute to half-strength for seedlings.
- ● Seedling labels: Small sticks or plant tags to track varieties (especially if growing multiple types!).
- ● Fungicide (preventative): A copper-based spray or neem oil to guard against damping-off disease.
- ● Compost or worm castings: Mix 10–20% compost into the soil later for nutrient-rich growth.
- ● Trellis or stakes: Cucumbers are vining plants! A 5–6 foot tall trellis saves space and improves airflow.
- ● pH test kit: Cucumbers thrive in pH 6.0–6.8. Adjust soil with lime (to raise pH) or sulfur (to lower it) if needed.
Step-by-Step instructions for growing cucumbers from seeds
Here's the foolproof method I've used for years to get cucumbers sprouting in days instead of weeks.
🌱 Step 1: Pre-Soak Seeds to Jumpstart Germination
Place your cucumber seeds in a small bowl and cover them with lukewarm water—about 70-75°F—for 8-12 hours. This softens the seed coat and triggers faster germination. I like to use a shallow dish so I can monitor them easily. After soaking, drain the water completely and let the seeds sit wrapped in a damp paper towel overnight.
You'll see the seeds plump up noticeably—this is your signal they're ready. The reason we soak is that cucumber seeds have tough outer shells that slow down sprouting naturally. A good soak ensures you'll see those first green shoots within 3-5 days instead of waiting two weeks.
🪴 Step 2: Prepare Containers and Planting Medium
Fill your 4-inch deep containers with moistened seed-starting mix—we're using 4 gallons total for our four plants. Press the mix down lightly so it's firm but not compacted. I like to make a small indentation with my finger about ½ inch deep for each seed. This ensures consistent planting depth.
Cucumbers hate soggy roots, so make sure your containers have drainage holes. If they don't, drill a few extra—cucumber roots rot quickly in waterlogged soil. Once your mix is evenly moist but not dripping, you're ready to plant your pre-soaked seeds.
💧 Step 3: Plant Seeds and Maintain Ideal Moisture
Drop 1-2 seeds per container into each indentation, then cover lightly with just enough mix to hide them completely. Press gently to ensure good seed-to-soil contact. Water immediately with a spray bottle until the surface looks uniformly damp. Here's the thing—cucumber seeds need consistent moisture to germinate, but they'll rot if kept too wet.
Place your containers in a warm location—75-85°F is ideal. I use a seedling heat mat under my trays, which cuts germination time by nearly half. Watch for condensation on the container sides—this tells you the humidity is perfect. Once you see the first sprouts, move them to bright light immediately—even a sunny windowsill works if it gets at least 6 hours of direct sun daily.
☀️ Step 4: Provide Light and Prevent Leggy Growth
Within 3-5 days, your cucumber seedlings will emerge with first true leaves. This is when you need to act fast—move them under grow lights if natural light isn't sufficient. I position my lights 2-3 inches above the plants and keep them on for 14-16 hours daily. The moment you see seedlings stretching toward the light with pale stems, raise the lights immediately.
Leggy cucumber seedlings rarely recover. You'll know your light is perfect when plants grow compact and dark green with leaves spaced 1 inch apart. If you're using a south-facing window, rotate containers quarter-turn daily so they don't lean toward the light.
✂️ Step 5: Transplant and Support Vines
When seedlings develop 4-5 true leaves (about 3-4 weeks after planting), it's time to transplant. Choose a sunny outdoor location with full sun exposure and well-draining soil. I plant mine 12 inches apart in rows 3 feet apart to allow for proper air circulation—this prevents powdery mildew.
Cucumbers are vigorous climbers, so install trellises or stakes at planting time. I use 5-foot tall bamboo stakes for each plant. The moment vines reach 6 inches, gently weave them around the support. This encourages upward growth and keeps fruits off the ground, reducing rot risk. Water deeply at the base after transplanting to help roots establish quickly.
Tips & tricks for perfect cucumber seed germination
A few subtle adjustments can transform your cucumber seed germination from a frustrating wait into a rewarding 3-5 day process. Here's what I've learned after watching hundreds of seedlings emerge.
Temperature Precision: That 70-75°F water temperature in Step 1 is non-negotiable—any cooler and germination slows dramatically, any warmer and you risk damaging delicate seed membranes. I use a kitchen thermometer to verify my water temp, especially in cooler climates. After soaking, maintain that 75-85°F range for your containers by placing them on a seedling heat mat or near a warm south-facing window. The difference between 75°F and room temperature (often 68°F) can mean the difference between sprouts in 3 days versus 2 weeks.
Moisture Management: In Step 3, the "uniformly damp" surface is your target—not soggy, not dry. I test moisture by squeezing a handful of soil—it should hold together but not drip water. The key is creating a microclimate where seeds stay consistently moist without becoming waterlogged. After watering, I cover containers with clear plastic wrap (temporarily) to trap humidity, then remove it once sprouts appear. This creates the ideal greenhouse effect without overwatering.
Light Transition Strategy: The moment you see those first true leaves in Step 4, move seedlings to bright light immediately—even artificial grow lights work in a pinch. I've seen seedlings go from compact and healthy to leggy and weak in just 24 hours when light was delayed. For windowsill growers, rotate containers daily to prevent leaning. The goal is to keep those young plants growing vertically, not stretching toward the light source.
Transplant Timing: Waiting for 4-5 true leaves (Step 5) ensures your cucumbers have developed strong root systems before handling. I check by gently tugging on seedlings—if they resist, they're ready. For outdoor transplanting, do it on an overcast day or in late afternoon to reduce transplant shock. The roots will establish more quickly in cooler conditions, giving you a head start on the growing season.
Pro Tips for Cucumbers From Seeds
- A few subtle adjustments can transform your cucumber seed germination from a frustrating wait into a rewarding 3-5 day process.
- Temperature Precision: That 70-75°F water temperature in Step 1 is non-negotiable—any cooler and germination slows dramatically, any warmer and you risk damaging delicate seed membranes.
- Moisture Management: In Step 3, the "uniformly damp" surface is your target—not soggy, not dry.
Frequently asked questions
Got questions about growing cucumbers from seeds? You’re not alone—gardeners often wonder about timing, tricks, and troubleshooting. Here are answers to the most common queries to help you grow like a pro!
How long does it take for cucumber seeds to germinate?
With the right conditions (warm soil, moisture, and light), cucumber seeds typically sprout in 3–10 days. Speed up germination by soaking seeds in warm water for 4–6 hours before planting or using a heat mat. If soil stays too cold (<50°F/10°C), germination can stall for weeks.
Can I plant cucumber seeds directly in the garden, or should I start indoors?
Cucumbers hate cold, so direct-sow seeds only after the last frost when soil is at least 60°F (15°C). For early starts in cooler climates, sow 2–3 seeds in biodegradable pots indoors 3–4 weeks before transplanting. Just avoid disturbing roots when moving them outside!
Why aren’t my cucumber seeds sprouting? Troubleshooting tips!
Check these common culprits:
- Cold soil: Cucumbers need warmth—wait until soil is consistently 60°F+.
- Damp but not wet: Overwatering can rot seeds; keep soil moist (not soggy).
- Old seeds: Store-bought seeds last 5–7 years, but homemade seeds may lose viability faster.
- Depth issues: Plant seeds ½ inch deep—too shallow = dry, too deep = weak sprouts.
What’s the fastest way to get cucumbers to grow bigger and faster?
Boost growth with these pro tips:
- Fertilize lightly: Use a balanced 10-10-10 fertilizer when vines appear, then switch to high-nitrogen (like fish emulsion) for leafy growth.
- Water deeply: Cucumbers need 1–2 inches of water weekly—drip irrigation prevents stress.
- Maximize sunlight: Plant in full sun (6+ hours/day); shade slows fruit production.
- Prune wisely: Pinch off early flowers if seedlings are small to redirect energy to vines.
Can I grow cucumbers from store-bought seeds, or do I need heirloom seeds?
Yes! Many store-bought cucumbers (like Persian or English types) are hybrid seeds and will grow just fine. Heirloom seeds offer more variety and often better flavor, but hybrids are bred for disease resistance and consistency. Pro tip: Save seeds from organic, untreated cucumbers for next year!
Wrapping up and next steps
Growing cucumbers from seeds is a rewarding journey that brings fresh, homegrown goodness to your table! With the right speed-germination tricks—like soaking seeds, maintaining warmth, and providing consistent moisture—you’ll unlock a bountiful harvest in no time. 🌱
Now that you’re armed with these proven secrets, why not take the next step? Start with a small batch of seeds, experiment with these techniques, and watch your garden thrive. Happy planting—your future salads (and pickles!) will thank you! 🥒✨