
Propagation
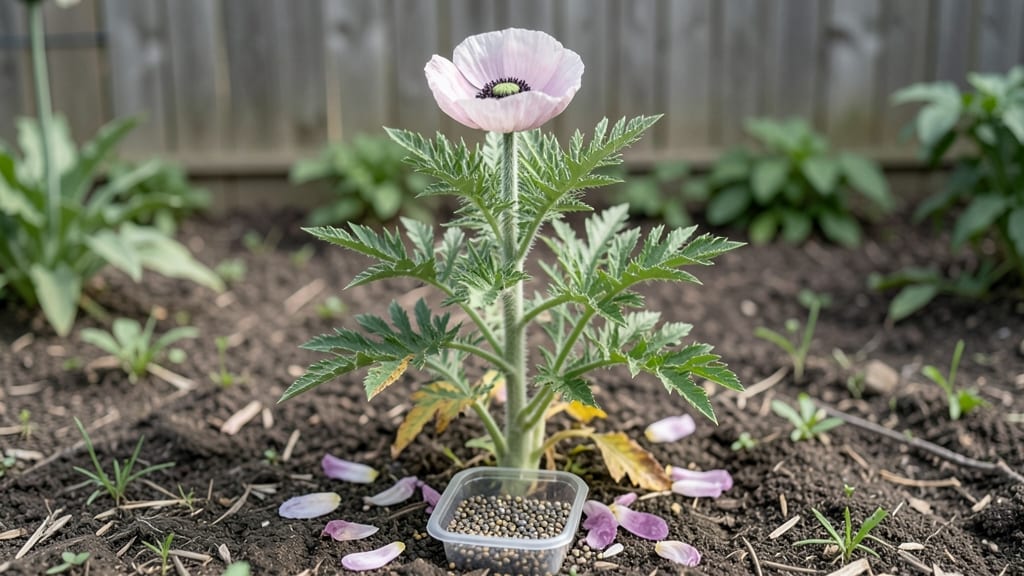
Cultivating poppy seeds from seed to pod is like unlocking a secret garden of delicate blooms and edible treasures—if you get the timing right, you can enjoy fresh seeds year-round. 🌻 I’ve grown both ornamental poppies and the edible varieties, and the key is patience: those papery blooms hide seeds that take months to mature properly.
The payoff? Crisp, nutty poppy seeds straight from your own plants, plus stunning flowers that last just a single day but make every spring worth it.
You’ll need well-draining soil (poppies hate soggy roots), a sunny spot with at least 6 hours of direct light daily, and a light touch when handling seeds—these tiny specks need just barely enough pressure to take root.
For outdoor planting, aim for early spring or late summer; indoors, start seeds 8-10 weeks before your last frost under grow lights. The trickiest part? Thin seedlings properly to avoid overcrowding, or you’ll end up with leggy, weak plants that flop instead of flowering.
By midsummer, you’ll watch those familiar poppy blooms unfurl—each one a fleeting but glorious promise of harvest. The seeds ripen inside the pods, turning from green to brown and finally splitting open when ready. Collect them before they scatter, then dry and store for baking or sprinkling on salads.
With the right care, you could be harvesting seeds by late summer or early fall, depending on your variety and climate.
Works for both garden beds and containers, though taller varieties need staking to prevent flopping. If you’re growing edible poppies, choose California or blue poppies—they’re the easiest for beginners and produce the best-tasting seeds.
For ornamental types, Icelandic poppies are hardier and bloom prolifically. Here’s how to set it up without the guesswork!
📚 In This Guide
- What you need
- Instructions
- Tips and common mistakes
- Wrapping up and next steps
What you need
- ● Poppy Seeds: Choose Papaver somniferum (opium poppy) or Papaver rhoeas (corn poppy) seeds. Buy from a reputable seed supplier (1–2 oz per 10 sq ft).
- ● Growing Medium: Soil: Well-draining potting mix or garden soil (amend with perlite/sand for aeration).
- ● Containers: 6–12" pots (for indoor/container growing) or a sunny garden bed (6–12" spacing for outdoor plants).
- ● Sunlight: Full sun (6+ hours daily). Use a grow light if indoors.
- ● Water: Drip irrigation or a watering can with a fine rose.
- ● Hand Trowel or Transplanter – For planting seeds (1–2" deep).
- ● Pruning Shears – To trim dead foliage or harvest pods.
- ● Gloves – Protect hands from sap (especially for Papaver somniferum).
- ● Harvesting Bag or Bowl – For collecting seeds/pods.
- ○ pH Tester (Optional) – Ideal soil pH: 6.0–7.5.
- ○ Fertilizer (Optional) – Low-nitrogen, balanced fertilizer (e.g., 5-5-5) for established plants.
- ● Patience: Poppies grow fast but need consistent care (2–3 months to maturity).
- ● Legal Check: Verify local laws—Papaver somniferum may be restricted in some areas.
- ● Space: Outdoor plants need 12–18" of vertical space (tall varieties!).
Step-by-Step instructions for cultivating poppy seeds
Here's how I grow vibrant poppies that produce bountiful seeds—no matter the season.
🌱 Step 1: Prepare the Soil and Plant Seeds
Poppy seeds thrive in well-draining soil, so I start by mixing 2 parts potting mix with 1 part perlite to prevent waterlogging. Fill your containers to within ½ inch of the rim—poppies hate soggy roots. Gently press the soil down to remove air pockets, then create shallow furrows about ¼ inch deep.
Sow seeds ½ inch apart in the furrows, covering them lightly with soil. Don’t bury them too deep—they need light to germinate. Water gently with a spray bottle until the soil looks evenly moist but not wet. Place the containers in a warm spot, ideally 65-75°F, and keep them consistently moist until germination.
☀️ Step 2: Provide Light and Thin Seedlings
Once seedlings emerge—usually within 7-14 days—move them to a location with full sun (6+ hours daily). Poppies grow fast, so I use a grow light if natural light is insufficient. You’ll see the first true leaves appear in about 2 weeks—this is your cue to thin seedlings to 3 inches apart.
Thinning prevents overcrowding, which weakens plants and reduces seed production. Use small scissors to snip excess seedlings at soil level, leaving the strongest ones. Water the base of the remaining plants to avoid disturbing roots. If you notice yellowing leaves, it’s a sign of overwatering—poppies prefer slightly dry soil.
💧 Step 3: Maintain Water and Fertility
Poppies are drought-tolerant once established, but young plants need consistent moisture. Water deeply every 3-4 days until the soil feels dry 1 inch below the surface. Avoid wetting the leaves to prevent fungal diseases. After the first month, reduce watering to once a week unless the weather is extremely hot.
Feed plants with a balanced, water-soluble fertilizer (10-10-10) diluted to half-strength every 4 weeks. Stop fertilizing once buds form—too much nitrogen encourages leafy growth over seed production. Watch for blooms, which typically appear 8-10 weeks after sowing. Deadhead spent flowers by snipping them off at the base to redirect energy to seed development.
✂️ Step 4: Harvest and Store Seeds
When seed pods turn brown and dry—usually 6-8 weeks after flowering—they’re ready for harvest. Gently twist the pods to release seeds, or place them in a paper bag for a few days to dry completely. Poppy seeds are sensitive to moisture, so store them in an airtight container in a cool, dry place.
If you want to replant, sow fresh seeds immediately—they lose viability quickly. For year-round harvesting, stagger plantings every 2-3 weeks to ensure a continuous supply. You’ll know seeds are fresh when they’re plump and dark—avoid using shriveled or discolored seeds for planting.
Tips & tricks for perfect poppy seed cultivation
Growing poppy seeds successfully takes patience and attention to detail—but these tricks will help you avoid common pitfalls and maximize your harvest.
Soil Mixture Matters: The 2:1 ratio of potting mix to perlite is crucial for preventing waterlogging, which poppies absolutely hate. If you don't have perlite, coarse sand works in a pinch, but it won't drain quite as well. I've also found that adding a handful of compost to the mix gives seedlings a gentle nutrient boost without overwhelming them. The key is keeping that soil fluffy and airy—poppies need their roots to breathe!
Light is Non-Negotiable: Those 6+ hours of full sun in Step 2 are absolutely critical for strong plants. If you're using artificial light, position it just 6 inches above the seedlings and keep it on for 12-14 hours daily. I've seen poppies grow leggy and weak when they don't get enough light—don't make my mistake! Also, rotate your containers every few days so all sides get even exposure.
Thinning Timing is Everything: When you see those first true leaves appear after about 2 weeks, that's your perfect window to thin to 3 inches apart. I use clean scissors to snip at soil level—this prevents disturbing the roots of the plants you're keeping. If you wait too long, the roots will tangle and make thinning more traumatic for the plants. The goal is to give each plant enough space to develop strong stems for those seed pods.
Fertilizer Strategy: That half-strength 10-10-10 fertilizer every 4 weeks is your secret weapon for healthy growth, but timing is everything. Stop fertilizing as soon as you see buds forming—too much nitrogen at this stage will make your plants focus on leaves instead of seed production. I've learned this the hard way after ending up with beautiful foliage but no pods! Once buds appear, let nature take its course and redirect that energy to seed development.
Pro Tips for Cultivating Poppy Seeds
- Growing poppy seeds successfully takes patience and attention to detail—but these tricks will help you avoid common pitfalls and maximize your harvest.
- Soil Mixture Matters: The 2:1 ratio of potting mix to perlite is crucial for preventing waterlogging, which poppies absolutely hate.
- Light is Non-Negotiable: Those 6+ hours of full sun in Step 2 are absolutely critical for strong plants.
Frequently asked questions
Got questions about growing poppy seeds? You’re not alone—this delicate yet rewarding process can raise a few curiosities! Below, we’ve rounded up the most common queries to help you cultivate confidence (and poppies) like a pro.
Can I grow poppy seeds indoors year-round?
Yes! Poppy seeds thrive indoors with proper lighting (a sunny windowsill or grow lights) and temperatures between 60–70°F (15–21°C). Just ensure pots have drainage holes to prevent root rot. Start seeds 6–8 weeks before your last frost if transplanting outdoors later. Pro tip: Use a heat mat to speed up germination—poppies love warmth!
How long does it take for poppy seeds to germinate?
Germination usually takes 7–14 days, but patience is key—some stubborn seeds may take up to 3 weeks. Keep soil consistently moist (not soggy) and maintain warmth. If seeds haven’t sprouted in 3 weeks, try lightly nicking the seed coat with sandpaper to encourage growth. Troubleshooting: Overwatering or cold soil can delay germination.
Are there any alternatives to traditional poppy seeds for cultivation?
If you’re after similar aesthetics or flavors, try California poppies (Eschscholzia) (drought-tolerant and easy) or cornflower (Centaurea cyanus) for vibrant blooms. For culinary uses, blue poppy (Meconopsis) seeds offer a milder taste. Just note: not all alternatives yield edible seeds—always research before harvesting!
What should I do if my poppy plants develop mold or pests?
Poppies are generally pest-resistant, but powdery mildew or aphids can appear in humid conditions. Improve airflow, avoid overhead watering, and treat with neem oil or insecticidal soap if needed. For mold, remove affected leaves and reduce moisture. Prevention tip: Space plants 12–18 inches apart to minimize fungal risks.
When is the best time to harvest poppy seeds?
Harvest seeds when the pods turn brown and papery but haven’t split open—usually 6–8 weeks after flowering. Cut pods with scissors, dry them in a paper bag for 1–2 weeks, then shake out the seeds. Timing matters: Wait too long, and seeds scatter; harvest too early, and they won’t be viable.
Wrapping up and next steps
Cultivating poppy seeds is a rewarding journey that blends patience, care, and a touch of creativity. Whether you’re growing them for their delicate blooms, edible seeds, or even medicinal uses, the key lies in understanding their needs—from soil prep to harvesting at the right time.
With the right conditions and a little green thumb, you can enjoy a year-round harvest of these versatile plants!
Ready to take the next step? Start small—grow a few plants in containers or your garden—and experiment with varieties. Before you know it, you’ll be sharing your homegrown poppy seeds with friends or even selling them! 🌱✨