Propagation
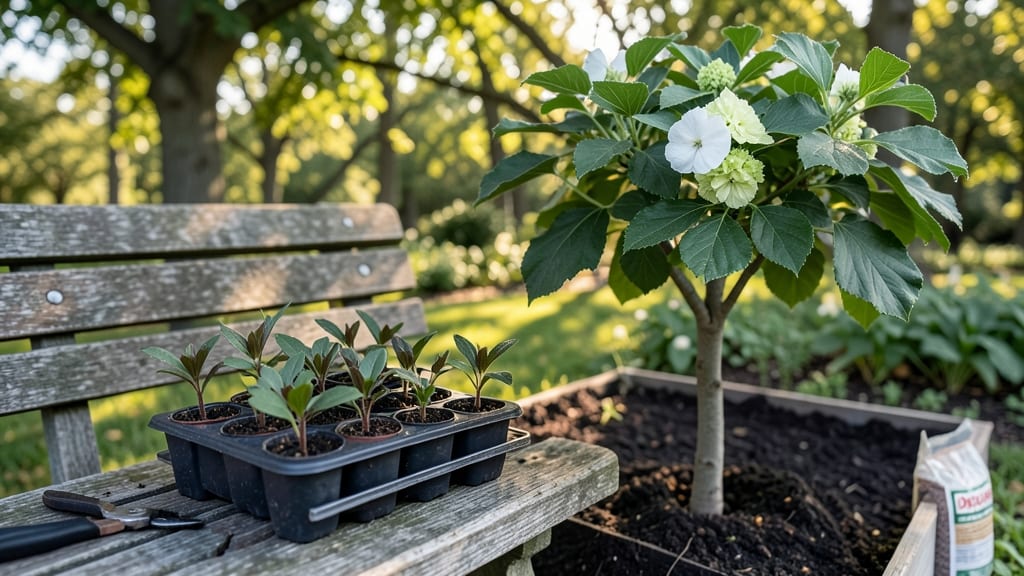
Growing Davidia involucrata seeds means unlocking the rare beauty of the handkerchief tree—though it’s a patience test wrapped in a challenge. 🌱 This species rarely germinates easily, but layering moisture and cold just right can coax those stubborn seeds to life.
I’ve spent years refining the process after my first batch took nearly a year to crack open, and I’m sharing exactly how to skip the guesswork.
The key lies in mimicking nature’s rhythm: a moist, well-draining mix of peat and perlite, followed by 3-4 months of cold stratification in a sealed bag. You’ll need a reliable seed source (nursery or trusted collector), a spray bottle for gentle hydration, and a fridge for the chill phase.
Most gardeners give up here—but that’s where the magic happens.
When germination finally kicks in, you’ll see tiny sprouts pushing through in spring, ready for transplant into individual pots. The seedlings grow slowly at first, but with consistent moisture and bright indirect light, they’ll reward you with glossy leaves and that signature "handkerchief" bloom in 5-7 years.
It’s a long game, but the payoff is worth every wait.
This method works best in USDA Zones 7-9, though container-grown plants can be overwintered indoors. If you’re in a colder zone, start seeds early and protect young trees with burlap wraps. The real trick? Treating each seed like a tiny treasure—because they are.
📚 In This Guide
- What you need
- Instructions
- Tips and common mistakes
- Wrapping up and next steps
What you need
- ● Davidia involucrata seeds: 5–10 fresh, viable seeds (preferably harvested in fall or purchased from a reputable supplier).
- ● Stratification medium: Option 1: Damp peat moss (1–2 cups) or coco coir (moisture-retentive and sterile).
- ● Option 2: A mix of sand and peat moss (50/50 ratio, 2 cups total).
- ● Containers: Two small, breathable pots (4–6 inches deep) with drainage holes, or a single larger tray with a lid (for humidity control).
- ● Plastic wrap or humidity dome: To maintain moisture during stratification (clear plastic wrap or a propagator lid).
- ● Refrigerator or cold frame: A space that maintains 35–45°F (2–7°C) for 6–12 weeks.
- ● Seed-starting mix: A well-draining blend (e.g., 50% perlite + 50% potting soil, 2–3 cups).
- ● Spray bottle: For gentle watering (avoid soaking the mix).
- ● Fine-mesh sieve: Helps sift stratification medium for even moisture.
- ○ pH meter or test kit: Optional, but useful to check soil pH (ideal range: 5.5–6.5).
- ● Grow lights or sunny windowsill: For post-stratification growth (12–16 hours of light daily).
- ○ Heat mat (optional): If your home is chilly (70–75°F / 21–24°C ideal for germination).
- ● Labeling tags: To track seed varieties and planting dates.
- ○ Fungicide (optional): A light dose of mycorrhizal inoculant or neem oil to prevent mold.
Step-by-Step instructions for germinating Davidia involucrata seeds
Here's how to coax these finicky seeds into life with the right moisture and cold treatment.
🌱 Step 1: Prepare Seeds for Stratification
Davidia seeds need moist cold treatment to break dormancy. Start by soaking the seeds in lukewarm water for 24 hours—this softens the tough outer shell. Place them in a clean jar or bowl and let them sit undisturbed. You'll see the water turn slightly cloudy as the seeds absorb moisture.
After soaking, drain the water and wrap the seeds in a damp paper towel. Twist the towel tightly around them to maintain even moisture—it should feel damp like a wrung-out sponge, not dripping wet. This moisture layer is critical for successful stratification.
❄️ Step 2: Cold Stratify for 6-8 Weeks
Place the wrapped seeds in a sealed plastic bag with a few air holes poked in the top. Store them in your refrigerator's crisper drawer, where temperatures hover around 35-40°F. Check the seeds every 2 weeks—they should remain moist but not soggy.
This cold period mimics winter conditions and signals the seed it's time to grow. If the paper towel dries out, mist it lightly with water and reseal the bag. After 6-8 weeks, the seeds will be ready for planting—you'll notice slight swelling or tiny cracks in the seed coat.
🌱 Step 3: Plant Stratified Seeds in Moist Medium
Fill small pots with a light, well-draining mix—I use a blend of 50% peat moss and 50% perlite. Moisten the mix until it's damp but not saturated, then press the stratified seeds ½ inch deep into the soil. Space them 1 inch apart to allow room for growth.
Cover the pots with clear plastic wrap to maintain humidity, but leave them in a bright, indirect light spot. Avoid direct sunlight at first—you want the soil to stay consistently moist without overheating. Mist the soil lightly every 3-4 days to prevent drying.
☀️ Step 4: Transition to Warmth and Light
Once you see first true leaves (about 4-6 weeks after planting), remove the plastic wrap and move the pots to a sunny window or under a grow light. Davidia seedlings thrive in bright, indirect light—too much direct sun can scorch tender leaves.
Water when the top inch of soil feels dry, but avoid letting the soil stay soggy. Overwatering at this stage can cause root rot, which is fatal for young seedlings. You'll know you're doing it right when the soil stays lightly moist but never waterlogged.
🪴 Step 5: Gradually Acclimate Seedlings
After 8-10 weeks, when seedlings have 3-4 sets of leaves, it's time to harden them off. Start by placing them outside in a shaded, sheltered spot for 1-2 hours the first day. Gradually increase their outdoor time over 2 weeks, eventually moving them to full sun.
This slow transition prevents shock and helps the seedlings adjust to outdoor conditions. Once hardened off, they're ready for permanent planting in the garden. Choose a spot with partial shade and well-draining soil—Davidia thrives in cooler climates and can take years to mature.
Tips & tricks for perfect Davidia involucrata germination
These simple strategies will help you navigate the delicate balance of moisture and temperature that Davidia seeds demand.
Moisture Matters in Step 1: During the initial 24-hour soak, use lukewarm water—too hot can damage the seed coat while cold water won't soften it properly. I like to use a jar with a loose lid so condensation can escape, preventing mold. After draining, gently squeeze the paper towel to remove excess water before wrapping—this prevents soggy conditions that can lead to rot.
Temperature Consistency in Step 2: The refrigerator's crisper drawer maintains that perfect 35-40°F range, but every fridge varies. If your crisper runs cooler, consider using a seedling heat mat set to low (around 40°F) inside the fridge for more consistent warmth. The key is maintaining that steady chill without freezing—Davidia seeds need cold, not ice.
Visual Cues for Step 3 Success: When planting your stratified seeds, look for those tiny cracks in the seed coat as your signal they're ready. These cracks indicate the seed has absorbed moisture and started the germination process. Also, make sure your peat moss/perlite mix stays damp but never wet—it should feel like a wrung-out sponge. Overwatering here is the #1 cause of seedling failure.
Light Transition Strategy in Step 4: Davidia seedlings are sensitive to light changes, so when moving them to brighter conditions after 4-6 weeks, do it gradually. Start with morning sun only, then gradually increase exposure. I've seen seedlings get sunburned when moved too quickly from indirect to direct light. A simple grow light on a timer works wonders for consistent, gentle illumination.
Pro Tips for Davidia Involucrata Seeds
- These simple strategies will help you navigate the delicate balance of moisture and temperature that Davidia seeds de...
- Moisture Matters in Step 1: During the initial 24-hour soak, use lukewarm water—too hot can damage the seed coat whil...
- Temperature Consistency in Step 2: The refrigerator's crisper drawer maintains that perfect 35-40°F range, but every ...
Frequently asked questions
about growing Davidia involucrata (handkerchief tree) from seeds—because patience and precision pay off!How long does it take for Davidia involucrata seeds to germinate?
Germination can take anywhere from 3 to 12 months—sometimes even longer! The key is consistency: keep seeds in a moist, cold (stratified) environment (40–50°F) for at least 6 months before expecting sprouts. Patience is part of the charm!
What if my seeds don’t germinate after stratification?
Don’t lose hope! Try these troubleshooting steps:
- Check moisture levels: Seeds should stay damp but not soggy—use a spray bottle to adjust.
- Verify stratification: Ensure they’ve been in the fridge (or cold, moist sand) for 6+ months.
- Test viability: Soak a few seeds in water for 24 hours—if they sink, they’re likely still alive.
- Try warmth: After stratification, move seeds to 70–75°F to encourage sprouting.
Can I grow Davidia involucrata from seeds indoors?
Yes! Start seeds indoors in spring after stratification. Use a well-draining seed-starting mix and place pots in a sunny window or under grow lights. Keep humidity high (cover with plastic wrap if needed) and transplant seedlings outdoors after the last frost when they’re 2–3 inches tall.
Are there faster alternatives to growing from seed?
If you’re eager for a mature tree, consider:
- Grafted plants: Nurseries sometimes sell young grafted Davidia trees (though they’re rare and pricey).
- Layering or cuttings: Mature trees can be propagated via air layering (more reliable than cuttings).
- Patience hack: Buy a small tree from a specialty grower—just confirm it’s USDA Zone 4–8 hardy!
Why are my seedling leaves turning yellow?
Yellowing leaves (chlorosis) often signal:
- Overwatering: Davidia seeds hate soggy soil—let the top inch dry between waterings.
- Nutrient deficiency: Use a balanced fertilizer (10-10-10) lightly once seedlings sprout.
- Pests: Check for aphids or fungus gnats—spray with neem oil if needed.
- Light stress: Too much direct sun can scorch young leaves; provide partial shade.
Wrapping up and next steps
Growing Davidia involucrata from seeds is a rewarding challenge that combines patience with precise care—especially when it comes to layering moisture and chill. By mimicking nature’s conditions with stratification and consistent humidity, you’re setting the stage for those iconic "handkerchief tree" blooms to thrive. 🌱
Ready to take the next step? Start with a small batch of seeds, experiment with your stratification setup, and document your progress. Every gardener’s journey begins with a single seed—yours could soon be the story of a Davidia involucrata success!