
Propagation
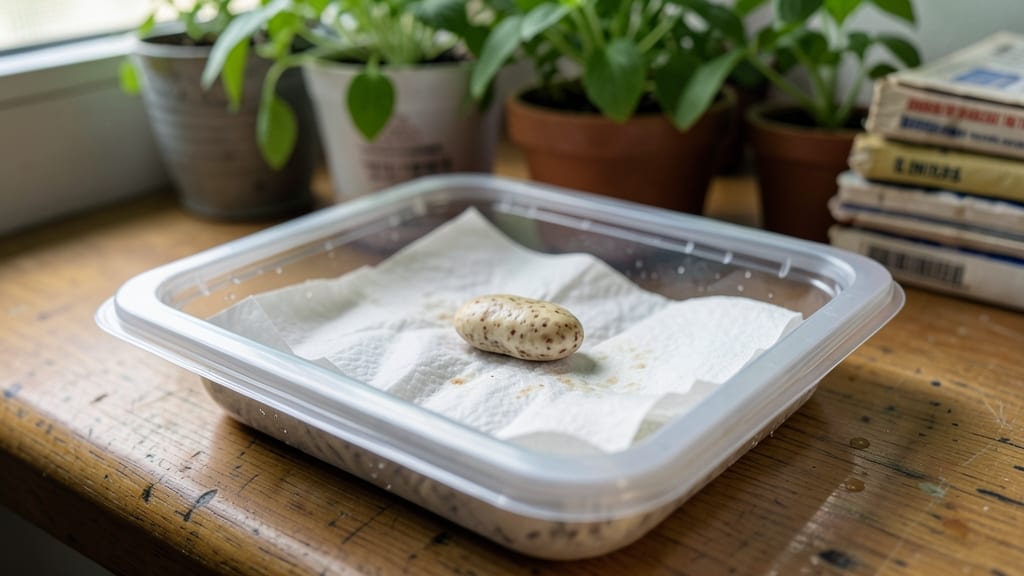
To define seed germination, we’re talking about that moment when a seed cracks open and sprouts into life—like nature’s own magic trick, but with roots in real science. 🌱 I’ve watched this miracle happen hundreds of times.
The seed soaks up water, swells, and then cracks open to send out a root, all while you’re waiting with bated breath for that first green shoot.
This process depends on four key things: water to kickstart the action, oxygen to keep the seed breathing, just the right temperature to speed things along, and sometimes light to guide the sprout upward.
Too cold or too hot? The seed might just sit there, waiting for better conditions. Too dry, and it’ll never get going at all.
Understanding germination helps you time your plantings perfectly—knowing when to start seeds indoors or when to sow them directly in the garden. You’ll see faster, stronger sprouts and fewer disappointments when you match the seed’s needs to your growing conditions.
Once you grasp these basics, you’ll troubleshoot like a pro—whether it’s adjusting your seed-starting setup or choosing the right varieties for your climate. The science isn’t complicated; it’s just about giving your seeds the right conditions to thrive.
📚 In This Guide
- What you need
- Instructions
- Tips and common mistakes
- Wrapping up and next steps
What you need
- ● Seeds: Choose fresh, high-quality seeds (check the packet for germination rates—aim for 90%+ for best results). Quantity: 5–10 seeds (for testing) or 20+ (for larger projects).
- ● Germination medium: Paper towels (white, unprinted) – 2–3 sheets per batch (folded into a damp "sandwich").
- ● Peat pellets or coco coir – 1–2 per seed (pre-moistened).
- ● Vermiculite or perlite – 1–2 cups (sterilized, for drainage).
- ● Spray bottle (with fine mist nozzle) – for gentle hydration.
- ● Plastic bag or clear container (e.g., ziplock, Tupperware) – to create a humidity dome.
- ○ Thermometer (optional but helpful) – to monitor ideal temps (65–85°F / 18–29°C).
- ● Scissors – for trimming paper towels or peat pellets.
- ● Measuring cup – to ensure consistent moisture (avoid sogginess!).
- ○ Heat mat (optional) – for fast germination (set to 70–85°F / 21–29°C).
- ○ Grow lights (optional) – LED or fluorescent (12–16 hrs/day) for post-germination light.
- ● Notebook/pencil – to track seed types, dates, and progress!
- ● Space: A clean, flat surface (e.g., countertop, seed tray) with indirect sunlight.
- ● Time: Commit to daily checks (5–10 mins/day) for moisture/temp.
- ● Patience: Germination times vary! Fastest: 3–7 days (e.g., radishes). Slowest: 2–4 weeks (e.g., orchids).
- ● Safety: Wash hands before/after handling seeds/tools to prevent contamination.
Understanding seed germination: the science behind fast sprouts
Here's how seeds break dormancy and grow—science made simple for speedy results.
🌱 Step 1: Understand the Four Key Requirements for Germination
Every seed needs four things to sprout: water, oxygen, proper temperature, and light—though light comes later. Water activates enzymes that break down stored nutrients inside the seed. Oxygen fuels cellular respiration, while temperature determines how fast these processes happen. Most seeds germinate fastest between 65-85°F, but some tropical varieties need warmth up to 90°F. I always check the seed packet for ideal ranges.
You'll notice seeds swell slightly within hours of water—this is your first sign they're waking up. If they stay dry, germination stalls completely. Too much heat or cold slows things down, while extremes can kill the embryo. Keep conditions steady, and you'll see faster, more uniform sprouts.
💧 Step 2: Break Dormancy with Proper Water and Preparation
Some seeds have tough outer coats that block water absorption. Soaking them in lukewarm water for 12-24 hours softens the shell and speeds germination. I use a shallow dish with enough water to cover the seeds by ¼ inch, then let them soak while I prepare containers. Never use hot water—it can damage delicate embryos.
After soaking, gently rub the seeds between your fingers to mimic natural wear from wind or animal digestion. This breaks dormancy for seeds like poppies or delphiniums. Watch for the seed coat to split slightly—that's your cue germination is about to begin.
☀️ Step 3: Provide the Right Conditions for Speed
Place your moistened seeds in a warm, dark environment for the first 3-7 days—light isn't needed yet. A seedling heat mat set to 75°F cuts germination time in half compared to room temperature. I cover my seed trays with plastic wrap to trap moisture, but leave a tiny gap for airflow to prevent mold.
Check daily for signs of sprouting: tiny white roots or a cracked seed coat. Once you see 50% of seeds germinating, move them to bright, indirect light. Direct sun now will scorch delicate sprouts. You'll know they're ready when first leaves appear—these are called cotyledons and look different from true leaves.
⏰ Step 4: Monitor and Troubleshoot Common Delays
If seeds take longer than expected, they might need scarification (scratching the coat) or stratification (cold treatment). Some woodland seeds need 60 days of cold to break dormancy—simulate this by refrigerating them in damp paper towels. Always follow the seed packet's instructions for special cases.
Overwatering is the #1 killer of new sprouts. The soil should feel damp but not soggy—like a wrung-out sponge. Yellowing leaves or mold mean too much moisture. Adjust your watering to keep conditions ideal, and you'll see strong, fast germination every time.
✂️ Step 5: Transplant at the Right Growth Stage
Once seedlings have 2-3 true leaves (not just cotyledons), they're ready for their own containers. Handle them gently by the leaves, never the stems. I use a small spoon to lift seedlings to avoid damaging roots. Transplant too early, and they'll struggle; wait too long, and roots get tangled.
After transplanting, place them in bright light but avoid direct sun for the first 24 hours. This helps them recover from the shock. You'll notice new growth within 3-5 days if conditions are right. That's your reward for getting the science just right!
Tips & tricks for faster seed germination
Mastering seed germination isn't rocket science—it's all about creating the perfect conditions. Here are the secrets to speeding up your sprouting game while avoiding common pitfalls.
Temperature Precision: The 65-85°F range is your sweet spot for most seeds, but don't guess—use a thermometer. I keep my seed trays on a seedling heat mat set to 75°F during the critical first 3-7 days. For tropical varieties needing up to 90°F, a simple DIY solution is placing trays on top of the fridge. The consistent warmth cuts germination time dramatically while preventing temperature swings that stall growth.
Soaking Science: That 12-24 hour lukewarm soak isn't just about hydration—it's about softening those tough seed coats. I've learned the hard way that hot water kills delicate embryos, so always use water that feels warm to your wrist (about 90°F). For extra stubborn seeds like poppies, I add a gentle sandpaper rub after soaking to mimic natural weathering. Watch for that first crack in the seed coat—that's your green light to move to the next stage!
Humidity Control: The plastic wrap trick works wonders, but balance is key. Seal your trays tightly to trap moisture, but leave a tiny gap (about ¼ inch) for airflow. I use a toothpick to prop up one corner—this prevents mold while maintaining that wrung-out sponge dampness. Too much moisture? Yellowing leaves appear within 24 hours. Too little? Seeds shrivel before sprouting. The Goldilocks zone is everything!
Light Timing: Patience is crucial here—don't rush to the light too soon. Keep seeds in darkness until you see 50% germination (those cracked coats and tiny white roots). Then, transition to bright, indirect light. I use a grow light 6 inches above my trays for the first 24 hours post-germination. Direct sun now would fry your delicate sprouts—think of it as their first sunburn warning!
Pro Tips for Define Seed Germination
- Mastering seed germination isn't rocket science—it's all about creating the perfect conditions.
- Temperature Precision: The 65-85°F range is your sweet spot for most seeds, but don't guess—use a thermometer.
- Soaking Science: That 12-24 hour lukewarm soak isn't just about hydration—it's about softening those tough seed coats.
Frequently asked questions
Got questions about seed germination?
You’re not alone! Here are answers to the most common queries to help you grow confidently.
How long does seed germination usually take?
Germination time varies by plant type—fast growers like radishes sprout in 3–5 days, while slow ones (e.g., beans or tomatoes) may take 1–3 weeks. Check the seed packet for specifics! Warmth, moisture, and light (or lack of it) also speed up or delay sprouting. Pro tip: Keep seeds in a warm, dark place until they crack open.
What if my seeds won’t germinate?
Don’t panic! Try these fixes:
- Check moisture: Soil should feel damp like a wrung-out sponge—neither soggy nor dry.
- Test viability: Soak seeds overnight; if they swell, they’re likely good. If not, try fresh seeds.
- Adjust temperature: Most seeds thrive at 65–75°F (18–24°C). Use a heating mat if needed.
- Scratch the seed coat: Some (like chives or parsley) need a light file to break dormancy.
Can I germinate seeds without soil?
Paper towel germination is a great soil-free method:
- Moisten a paper towel, sandwich seeds between two, and fold.
- Place in a sealed bag or container.
- Store in a warm spot (like on top of a fridge) until sprouts appear (usually 3–7 days).
- Transplant carefully into soil once roots are ½-inch long.
Pro tip: Avoid overwatering—the towel should stay damp, not drenched!
Does light affect seed germination?
Most seeds germinate best in darkness—light triggers sprouting only after the seedling stage. However, some light-dependent seeds (like lettuce or basil) need light to break dormancy. Always follow the plant’s natural cues: darkness for roots, light for leaves!
Is there a best time of year to start seeds?
Timing depends on your climate and plant type:
- Cool-season crops (e.g., spinach, peas): Start 6–8 weeks before last frost.
- Warm-season crops (e.g., tomatoes, peppers): Wait until 2–3 weeks after last frost or use indoor grow lights.
- Year-round growers (e.g., herbs, microgreens): Germinate anytime with controlled conditions.
Use a frost chart for your region to plan ahead!
Wrapping up and next steps
Understanding seed germination unlocks the magic of growing your own plants—whether you're a gardening newbie or a green-thumb pro! 🌱 From moisture and temperature to light and patience, each step plays a role in coaxing life from a tiny seed.
Now that you’re armed with the science, why not put it into action?
Start small: Try germinating a few easy seeds like beans or marigolds in a clear cup to observe the process firsthand. Soon, you’ll be harvesting homegrown veggies or blooming flowers—one sprouted seed at a time. Happy growing! 🌿