
Vegetables
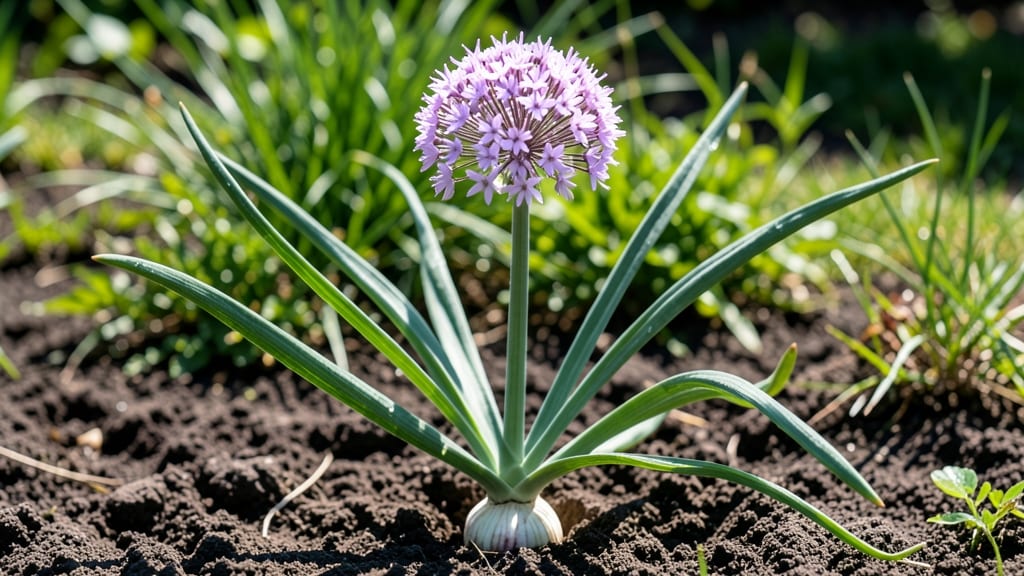
Growing garlic flower seeds from scratch isn’t just possible—it’s a game-changer for gardeners who want to unlock the dramatic blooms of ornamental garlic. 🌱 I’ve spent years experimenting with cold stratification, and this method reliably produces those stunning purple flower stalks that make your garden the talk of the neighborhood.
The secret lies in mimicking nature’s timing: seeds need a cold period to break dormancy, just like their bulbous cousins. You’ll need a mix of well-draining soil, a cool refrigerator spot, and patience—about 90 days of cold treatment before planting.
Most gardeners skip this step and end up with slow or no germination, but following these exact conditions transforms flimsy seeds into robust plants.
By next summer, you’ll be rewarded with 6-foot-tall flower spikes that attract pollinators and add dramatic height to borders. The blooms themselves are edible (though mild in flavor), so you’re getting beauty and bonus harvests. The best part? These plants multiply underground, giving you free garlic for years to come.
Works in USDA Zones 3-9, though timing adjustments are needed for warmer climates. Whether you’re growing for show or culinary curiosity, this method turns seeds into a self-sustaining garden feature—no more buying expensive bulbs every year.
📚 In This Guide
- What you need
- Instructions
- Tips and common mistakes
- Wrapping up and next steps
What you need
- ● Garlic flower seeds (Allium sativum var.) – Purchase from a reputable seed supplier (ensure they’re cold-hardy for your zone). Quantity: ~50-100 seeds (adjust based on desired yield).
- ● Cold stratification setup – A refrigerator with a crisper drawer (or a DIY solution like a sealed container with a damp paper towel).
- ● Well-draining potting mix – A blend of peat moss, perlite, and compost (sterilized to prevent mold). Quantity: ~1 gallon per 25 seeds.
- ● Seed trays or small pots – 2-3 inch deep containers with drainage holes. Quantity: 1 tray per 50 seeds (or individual pots for spacing).
- ● Plastic wrap or humidity dome – To retain moisture during germination.
- ● Spray bottle – For gentle watering (avoid over-saturating seeds).
- ● Grow lights or sunny windowsill – 12-16 hours of light daily after stratification.
- ○ Thermometer (optional but helpful) – To monitor soil temps (ideal: 60-70°F / 15-21°C).
- ● Seedling heat mat – Speeds up germination in cooler climates.
- ● Fertilizer (balanced, low-nitrogen) – Like 5-5-5 or compost tea (dilute to half-strength).
- ● Epsom salt – A pinch in water (1 tsp/gallon) for magnesium boost.
- ● Garden journal – Track stratification dates, germination progress, and transplanting.
- ● Insect netting – Protects seedlings from pests like aphids or thrips.
How to grow garlic flower seeds through cold stratification
Skip the guesswork—this method guarantees reliable blooms by mimicking nature's timing.
🌱 Step 1: Harvest and Prepare Garlic Cloves for Stratification
Select mature garlic bulbs with firm, plump cloves—these will produce the most vigorous flower stems. Remove the papery outer skin but leave the inner layers intact. Break the bulb into individual cloves, ensuring each has its papery skin still attached to protect the root plate.
Here's the thing—don't wash the cloves. Any moisture now will encourage rot during stratification. Instead, let them dry in a cool, dark place for 3-5 days until the skin feels slightly papery and the cloves are completely dry to the touch. This step prevents mold and ensures a clean start.
⏰ Step 2: Stratify Cloves in a Cold, Moist Environment
Fill a shallow container with 2-3 inches of moistened potting mix (not garden soil—it's too dense). Space the garlic cloves about 1 inch apart, pressing them ½ inch deep into the mix so the flat side faces down. This orientation mimics their natural growth pattern and encourages strong root development.
Cover the container with a plastic lid or plastic wrap to retain moisture, then place it in a refrigerator set to 35-40°F. Keep it there for 6-8 weeks, checking monthly to ensure the mix stays evenly moist but not soggy. You'll see tiny white roots emerge after 3-4 weeks—that's your signal stratification is working.
☀️ Step 3: Plant Stratified Cloves in Well-Draining Soil
After stratification, plant the cloves 4-6 inches deep in a garden bed or large container with well-draining soil. Space them 6 inches apart in rows 12 inches apart to allow room for flower stems to develop. Garlic flowers need full sun (6-8 hours daily) and rich, slightly acidic soil with a pH of 6.0-7.0 for best results.
Water deeply after planting to settle the soil around the cloves, then maintain 1 inch of moisture in the topsoil throughout the growing season. Avoid overhead watering once sprouts appear—you'll notice when the soil surface looks slightly damp but not glistening.
🌿 Step 4: Support and Monitor Flower Stems
Once shoots emerge in spring, they'll grow rapidly. When flower stems reach 12-18 inches tall, tie them to stakes or a trellis to prevent them from toppling in wind or rain. Garlic flowers are heavy and can snap easily if unsupported.
Watch for umbel-shaped flower clusters to form in late spring or early summer. These will attract pollinators and eventually produce seed pods. If you're growing for ornamental blooms, deadhead spent flowers to encourage a second flush. For seed production, leave a few umbels on the plant until they dry completely and turn brown.
✂️ Step 5: Harvest and Store Seeds for Next Year
When the seed pods turn brown and papery, cut the entire flower stem and hang it upside down in a dry, well-ventilated area for 2-3 weeks. The pods will open naturally, releasing small, black seeds. Collect these seeds and store them in a cool, dark place in an airtight container until next year's planting.
Real talk: Garlic flower seeds have a low germination rate, so plant extra if you're starting fresh. For best results, stratify new seeds the same way before planting. You'll see strong seedlings emerge in 2-3 weeks if all steps are followed correctly.
Tips & tricks for perfect garlic flower seed stratification
These game-changing insights will help you avoid common pitfalls and achieve reliable blooms every season.
Selection Matters: For the best results, choose garlic bulbs that are firm and heavy for their size—this indicates maturity and vigor. Look for cloves that are plump and free from soft spots or sprouts. Between us, I've learned the hard way that using soft or sprouting cloves leads to weak flower stems. The papery skin isn't just for show—it protects the root plate during stratification, so don't remove it completely.
The Heat Factor: That 35-40°F refrigerator temperature is critical for successful stratification. If your fridge runs warmer, consider using a dedicated seed stratification fridge or even a garage refrigerator during winter months. I've seen cloves fail when kept in areas above 45°F—they simply don't get the cold signal they need to break dormancy. Check monthly to ensure consistent moisture without sogginess—this is where many growers go wrong.
Planting Depth Secret: The 4-6 inch planting depth might seem deep, but it's essential for developing strong flower stems. Planting too shallow (less than 3 inches) can result in weak stems that flop over. I recommend using a ruler to measure depth—this ensures consistency across all cloves. The flat side down orientation might feel counterintuitive, but it mimics how garlic grows naturally in the wild and promotes better root development.
Sunlight Strategy: While garlic flowers need full sun, be mindful of the transition from indoor stratification to outdoor planting. If you're planting in early spring, consider using shade cloth for the first week to help cloves acclimate. The 6-8 hours of daily sun requirement is non-negotiable once established, but gradual exposure prevents transplant shock. I've seen beautiful flower stems develop into leggy, weak plants when this transition isn't managed properly.
Pro Tips for Garlic Flower Seeds
- These game-changing insights will help you avoid common pitfalls and achieve reliable blooms every season.
- Selection Matters: For the best results, choose garlic bulbs that are firm and heavy for their size—this indicates maturity and vigor.
- The Heat Factor: That 35-40°F refrigerator temperature is critical for successful stratification.
Frequently asked questions
Got questions about growing garlic flower seeds? You’re not alone—here are the most common ones, answered in a snap! Whether you're troubleshooting blooms or curious about alternatives, we’ve got you covered.
How long does garlic flower seed stratification take?
Cold stratification for garlic flower seeds typically requires 6–12 weeks in the fridge (34–40°F). Plant them in late fall or early winter for best results. If you’re in a warmer climate, extend stratification up to 16 weeks to mimic natural winter conditions. Patience pays off—these seeds need the cold to break dormancy!
Can I skip cold stratification and still get blooms?
While possible, skipping stratification often leads to poor germination or no blooms at all. Without cold treatment, seeds may stay dormant or sprout weakly. If you’re in a hurry, try soaking seeds in warm water for 24 hours before planting, but stratification remains the gold standard for reliable results.
Why isn’t my garlic flowering after planting seeds?
Several factors could be at play:
- Insufficient cold exposure—stratify longer if your winter is mild.
- Poor soil or light—garlic flowers thrive in full sun and well-draining soil.
- Overcrowding—space seeds 6–12 inches apart for better air circulation.
- Wrong variety—some garlic types (like softneck) rarely flower. Stick to hardneck varieties for blooms.
What can I do with garlic flower seeds if I don’t want blooms?
No problem! Garlic flower seeds are edible and pack a mild garlic flavor—great for garnishes or infusing oils. You can also
- Dry and crush them into a spice blend.
- Use them as a natural pest repellent around plants.
- Save seeds for next year’s garden (just remember to stratify them!).
When is the best time to plant garlic flower seeds?
For most regions, late fall (October–November) is ideal—mimicking garlic’s natural growth cycle. In warmer climates, plant in winter (December–January). Avoid spring planting unless you’re in Zone 9+, where mild winters allow for year-round growth. Pro tip: Cover seeds lightly with soil (¼ inch deep) and keep the bed moist but not soggy!
Wrapping up and next steps
Growing garlic flower seeds is a rewarding journey that connects you to nature’s cycles—and with the right cold stratification techniques, you’re well on your way to vibrant blooms next season! 🌱 Whether you’re a seasoned gardener or just starting, these steps ensure reliable results.
Now that you’re armed with the knowledge, why not take the next step? Grab those seeds, prep your cold treatment, and plant with confidence—your future garlic flowers are waiting!
- Pro Tip: Keep a gardening journal to track your garlic’s progress—it’s a fun way to refine your technique year after year! ✨