
Propagation
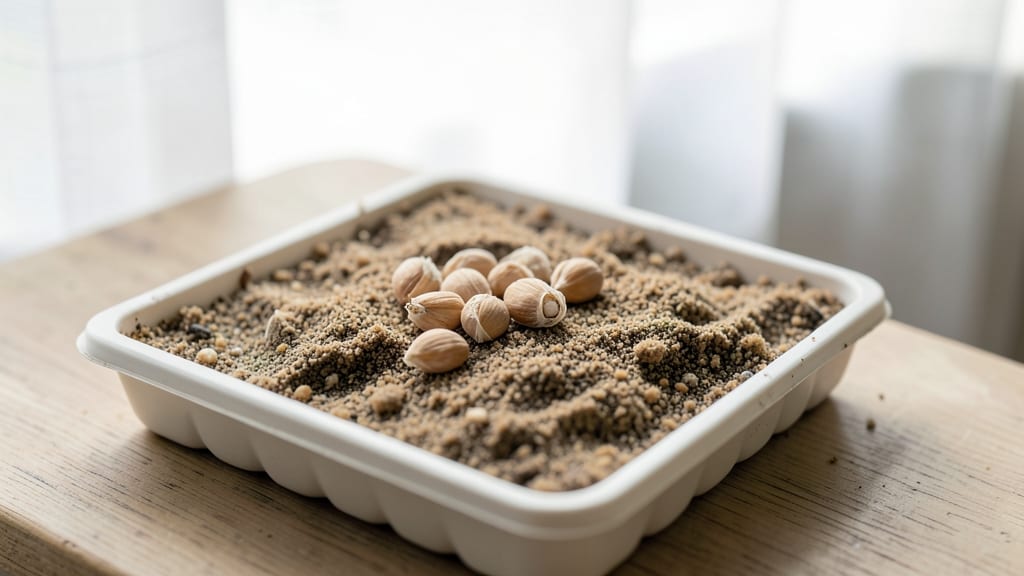
Germinating ginkgo seeds requires three months of cold patience—but the payoff is worth it. 🌱 I’ve cracked the code after years of watching seeds rot or sprout too late, and the secret lies in mimicking nature’s slow, steady rhythm.
These ancient seeds need a winter-like chill to break dormancy, and skipping this step means waiting years (or never) for germination.
The process starts with clean, firm seeds and a simple setup: damp sand or peat moss in a sealed container. Place it in your fridge’s crisper drawer for 12 weeks, checking monthly for mold.
Once you see tiny roots, it’s time to plant in well-draining soil—no rush, no fuss. This method works even for stubborn seeds that store-bought mixes can’t handle.
By spring, you’ll have 1-2 inch seedlings with glossy leaves that smell faintly of butterscotch—a sure sign they’re thriving. Keep them in bright, indirect light and water when the top inch of soil dries.
The first year is all about patience; ginkgos grow slow but live for centuries, and your seedlings will thank you with sturdy roots and vibrant growth.
Common pitfalls? Overwatering (rotted seeds are heartbreaking) or impatience (no shortcuts here). But once you’ve seen that first green shoot push through, you’ll understand why the wait was worth every chilly day. Let’s get those seeds stratified right.
📚 In This Guide
- What you need
- Instructions
- Tips and common mistakes
- Wrapping up and next steps
What you need
- ● Fresh ginkgo seeds (2–5 seeds per attempt; harvest only from ripe, yellow fruits in fall).
- ● Cold stratification setup: 1–2 paper towels (unbleached, seed-grade) or a peat moss/perlite mix (sterilized).
- ● 1 ziplock bag (quart-sized, reusable) or a seedling tray with drainage holes.
- ● Refrigerator (set to 34–40°F (1–4°C); avoid freezer sections!).
- ● Spray bottle (with room-temperature water; avoid tap water if heavily chlorinated).
- ● Patience (ginkgo seeds take 3–6 months to germinate—think of it as a slow-burning reward!).
- ● Humidity dome (to maintain moisture during stratification).
- ● pH test kit (ideal soil pH: 6.0–7.0 for transplanting).
- ● Heating mat (for post-stratification warmth, 70–75°F (21–24°C)).
- ● Journal/notebook (track seed placement, moisture, and temperature dates!).
- ● Gloves (ginkgo seed gel can stain—protect your hands! 🧤).
Step-by-Step instructions for germinating ginkgo seeds
Here's how to break the ginkgo seed's dormancy—it takes time, but the payoff is worth it.
🌱 Step 1: Harvest and Prepare the Seeds
Collect fresh ginkgo seeds when they're fully ripe and have turned yellowish-brown. You'll need 4 seeds for this process. Remove any remaining flesh and rinse them under cool water to clean off any remaining debris. The seeds should feel firm but not hard—squishy or soft seeds won't germinate.
Place the cleaned seeds in a small container and cover them with a damp paper towel. Fold the towel over the seeds so they're completely enclosed but not submerged. This keeps them moist without sitting in water, which can cause rot. Store the container in a sealed plastic bag to maintain humidity.
⏰ Step 2: Cold Stratify for 3 Months
Ginkgo seeds require 90 days of cold stratification to break dormancy. Place the sealed container in your refrigerator's crisper drawer, where temperatures stay consistently between 35-45°F. Check the seeds every 2 weeks to ensure the paper towel remains damp but not soggy.
Here's the thing—don't peek too often. Every time you open the bag, you risk exposing the seeds to warmer air, which can disrupt the stratification process. If the towel feels dry, mist it lightly with water and reseal the bag. After 3 months, the seeds should feel slightly softer to the touch—this is your signal they're ready for the next step.
🌿 Step 3: Sow in a Germination Medium
Fill a small pot or seed tray with a sterile seed-starting mix (not garden soil). Moisten the mix until it's damp but not dripping. Ginkgo seeds germinate best in a loose, airy medium that won't compact around the sprouting seedling. Plant each seed 1 inch deep, spacing them about 3 inches apart if using a tray.
Cover the pot or tray with plastic wrap or a humidity dome to create a mini greenhouse. Place it in a warm, dark location—like the back of a cabinet or under the sink—where temperatures stay around 70-75°F. Avoid direct light at this stage; ginkgo seedlings are sensitive to it before they've sprouted.
☀️ Step 4: Wait for Sprouts and Provide Light
Germination can take 2-6 weeks, so patience is key. You'll know it's happening when you see a tiny white root pushing through the soil, followed by a small sprout. Once the first true leaves appear—these will be soft and delicate—remove the plastic wrap and move the seedlings to a bright, indirect light source.
Gradually introduce them to morning sun over 1-2 weeks to avoid shocking the young plants. You'll see the leaves darken and thicken as they adjust. Keep the soil consistently moist but never waterlogged—ginkgo seedlings are prone to damping-off if overwatered.
🪴 Step 5: Transplant Young Seedlings
After 4-6 weeks, when seedlings have developed 2-3 sets of true leaves, it's time to transplant them into individual pots. Use a 4-inch diameter container filled with a well-draining potting mix. Gently remove the seedlings from the tray, being careful not to damage the roots, and plant them at the same depth they were growing before.
Water lightly after transplanting to settle the soil around the roots. Place the pots in a location with bright, indirect light for another 2 weeks to help them recover. This is where your patience pays off—ginkgo seedlings grow slowly but steadily, and with proper care, they'll reward you with lush, ancient-looking foliage for years to come.
Tips & tricks for perfect ginkgo seed germination
Ginkgo seeds are stubborn little things—they won't break dormancy without the right approach. Here's what I've learned from years of trial and error to make this process foolproof.
Seed Selection Matters: In Step 1, when harvesting your seeds, look for ones that are firm but not rock-hard. I've tried squishy seeds and they never germinated—they need that perfect balance of firmness. Also, make sure they're fully ripe (yellowish-brown) and fresh—older seeds lose viability quickly. If you're collecting from a tree, time your harvest for when the seeds are fully mature but still intact on the tree.
Cold Stratification Precision: The 90-day cold stratification in Step 2 is non-negotiable, but here's the secret: consistency is everything. I place my container in the refrigerator's crisper drawer where it stays between 35-45°F—this mimics natural winter conditions. The key is minimizing temperature fluctuations. If your fridge runs hotter in certain spots, move the container to the coldest area. And remember, those 2-week checks are crucial—just mist the towel if needed and reseal immediately to maintain humidity.
Germination Medium Insight: For Step 3, don't skimp on the sterile seed-starting mix. I've tried regular garden soil and the seedlings always struggled—it's too dense and can compact around delicate roots. The loose, airy mix allows proper airflow while holding moisture. When planting, that 1-inch depth is critical—too shallow and they'll dry out, too deep and they may rot before sprouting. Pro tip: tap the soil gently around each seed to ensure good contact without compacting.
Light Transition Strategy: The light introduction in Step 4 is where most people go wrong. When you first see those tiny sprouts, keep them in that dark, warm environment until true leaves appear. Then, move them to bright indirect light. I start with just 2 hours of morning sun per day and gradually increase over that 1-2 week period. This slow acclimation prevents sunburn on those delicate seedlings. Think of it like giving them sunglasses—they're sensitive to sudden UV exposure!
Pro Tips for Germinating Ginkgo Seeds
- Ginkgo seeds are stubborn little things—they won't break dormancy without the right approach.
- Seed Selection Matters: In Step 1, when harvesting your seeds, look for ones that are firm but not rock-hard.
- Cold Stratification Precision: The 90-day cold stratification in Step 2 is non-negotiable, but here's the secret: consistency is everything.
Frequently asked questions
Got questions about germinating ginkgo seeds?
You’re not alone! Here are answers to the most common concerns—because patience pays off with these ancient trees.
How long does cold stratification take for ginkgo seeds?
Cold stratification typically requires 60–90 days in the fridge (34–40°F). Some seeds may sprout sooner, while others need extra time—up to 120 days for stubborn varieties. Monitor moisture levels to avoid mold. Patience is key; these seeds are worth the wait!
Can I speed up germination without harming the seed?
While you can’t truly rush stratification, you can check for readiness by tapping the seed—if it feels soft, it’s likely primed. After stratification, soak seeds in warm water for 12–24 hours to kickstart germination. Avoid heat sources like ovens; they can damage the seed.
What if my ginkgo seed sprouts but then dies?
Don’t panic! Ginkgo seedlings are fragile—overwatering or temperature swings are common culprits. Ensure well-draining soil and keep humidity high (use a humidity dome). If the sprout wilts, mist it and place it in bright, indirect light. Most recover with gentle care.
Are there alternatives to cold stratification for ginkgo seeds?
Cold stratification is the gold standard, but you can try soaking seeds in warm water for 3–4 weeks (changing water daily) or using a peat moss mix to mimic moisture. However, these methods aren’t as reliable—stratification mimics natural winter conditions, which ginkgos evolved to rely on.
How do I know if my ginkgo seed is still viable?
Test viability by floating the seed in water: if it sinks, it’s likely good (ginkgo seeds are dense!). For a deeper check, cut open a seed—a white, firm interior means it’s alive. Discard seeds with black mold, cracks, or a hollow center. Fresh seeds (harvested <1 year ago) have the highest success rates!
Wrapping up and next steps
Germinating ginkgo seeds is a rewarding journey that blends patience with science—and your effort will soon bloom into a living piece of history! 🌱 By mastering cold stratification, you’ve unlocked the secret to breaking dormancy and nurturing these ancient seeds into thriving saplings.
Whether you’re a seasoned gardener or a curious beginner, the key is consistency and care.
Ready to watch your hard work sprout? Plant those stratified seeds in well-draining soil, keep them cozy indoors, and soon you’ll be tending to a ginkgo tree that could outlive you—and your great-grandchildren! 🌳