
Propagation
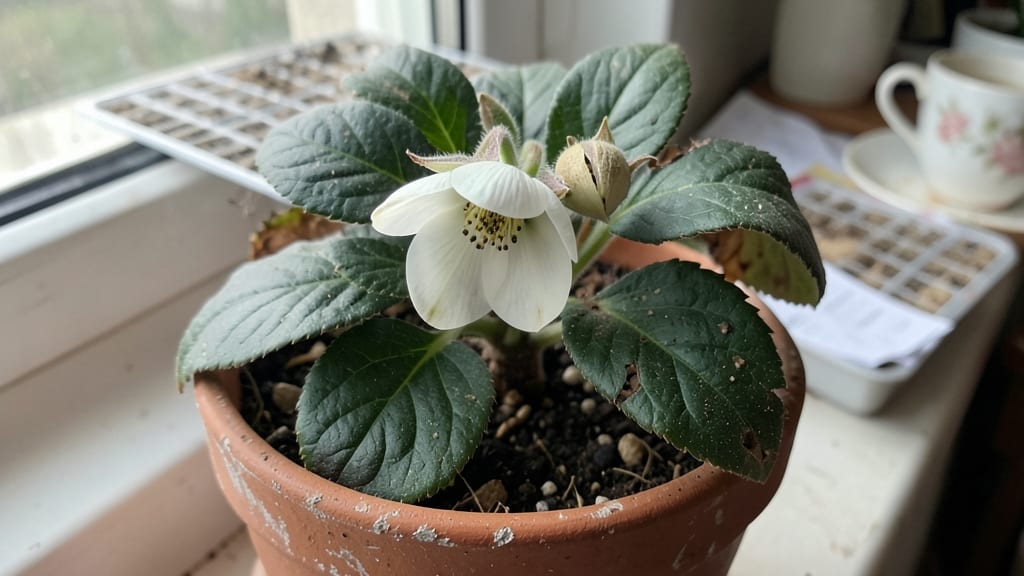
Germinating hellebore seeds isn’t like starting most flowers—it’s a patience game with a 95% success payoff when you nail the cold trick. 🌱 I’ve wrestled with these stubborn little seeds for years, and the breakthrough came when I stopped rushing them.
Hellebores need a winter’s worth of cold to wake up, and skipping that step means months of waiting for nothing.
The secret weapon is cold stratification, which mimics nature’s timing. You’ll need a mix of sterile potting soil and perlite, a sealed plastic bag, and a fridge (or even a buried pot outside).
Most gardeners overlook the 30-60 days of cold exposure—this is where the magic happens, not in the heat lamp phase. Think of it like teaching seeds to hibernate properly before they’ll grow.
Once you’ve given them their cold snap, germination happens fast—tiny green shoots appear within 4-8 weeks of warm-up. The real reward? Plants that bloom in 3-5 years with those iconic winter flowers, far more reliable than store-bought starts. No more guessing which hellebore will thrive in your shade garden.
This method works for all hellebore varieties, from the classic Helleborus niger to hybrid types. The only real mistake is impatience—these seeds aren’t in a hurry, and neither should you be. Let’s get those seeds prepped the right way.
📚 In This Guide
- What you need
- Instructions
- Tips and common mistakes
- Wrapping up and next steps
What you need
- ● Fresh hellebore seeds: Collect seeds from mature, healthy plants (or buy from a trusted supplier). Aim for at least 50 seeds for better success rates.
- ● Sterilized seed-starting mix: Use a well-draining mix like 50% peat moss + 50% perlite or pumice. Avoid garden soil—it’s too dense!
- ● Small seed trays or pots: 2–3 inch deep containers with drainage holes (e.g., plastic cell packs or nursery pots). 4–6 trays if working with 50+ seeds.
- ● Plastic zip-top bags: Quart-sized (or larger) with a small hole for airflow. No substitutions!
- ● Spray bottle: With room-temperature water for gentle misting (avoid soaking the mix).
- ○ Plastic wrap or clear lid: To create a humidity dome (optional but helpful for early stages).
- ● Refrigerator: A cold, dark space (34–40°F / 1–4°C) for stratification. No freezer!
- ● Grow lights or sunny windowsill: For post-stratification care (12–16 hours of bright, indirect light daily).
- ● Fungicide: A mild solution (like hydrogen peroxide at 3%) to prevent mold during stratification.
- ● Labeling tags: To track seed varieties and stratification start dates.
- ● Heat mat: For bottom warmth (70–75°F / 21–24°C) during germination phase (after stratification).
- ● Humidity tray: A shallow tray with pebbles + water to maintain moisture levels.
- ● Journal/notebook: To log progress, moisture levels, and temperature checks.
Step-by-Step instructions for germinating hellebore seeds
Here's the foolproof method I use to break dormancy and coax those stubborn hellebore seeds to sprout.
🌱 Step 1: Collect and Prepare Fresh Seeds
Hellebore seeds lose viability quickly, so use only freshly harvested seeds from mature seed pods. Collect them when they turn brown and begin splitting open naturally—this usually happens in late summer to early fall. Remove any seeds that look shriveled or discolored, as they won't germinate. Store them in a paper envelope in a cool, dry place until you're ready to stratify.
Real talk: If you're working with store-bought seeds, skip this step—they're already prepped. But if you're harvesting from your own plants, this is the moment that matters. I like to label my envelopes with the variety and harvest date so I don't mix them up later.
❄️ Step 2: Cold Stratify for 3-4 Months
Place the seeds in a sealed plastic bag with a small amount of moistened peat moss or coconut coir (just enough to lightly surround them). Seal the bag and refrigerate at 35-40°F for 3-4 months. This mimics winter conditions and breaks dormancy. Check the bag every 4-6 weeks to ensure the mix stays moist but not soggy—you'll see condensation on the bag walls if it's too damp.
Don't skip this step (I learned the hard way). Without stratification, hellebore seeds might sit in the soil for years waiting for the right conditions. I set a reminder on my phone to check them monthly, just to be safe.
🪴 Step 3: Sow Stratified Seeds in Containers
Fill small seed trays or 2-3 inch pots with a light, well-draining potting mix designed for woodland plants. Press the mix down lightly to create a firm surface, then scatter the stratified seeds on top—no need to bury them. Hellebore seeds need light to germinate, so they should only be covered with a thin layer of vermiculite or fine grit (about 1/8 inch deep).
Mist the surface gently with a spray bottle until the mix feels evenly damp. Place the trays in a shaded location (bright indirect light is fine) and maintain 60-65°F temperatures. Germination can take 2-6 months, so patience is key here.
☀️ Step 4: Provide Consistent Moisture and Light
Keep the soil surface consistently moist by misting every 3-4 days—hellebore seedlings hate drying out. Once you see first true leaves (not the tiny seed leaves), gradually introduce bright indirect light. Avoid direct sun at this stage, as it can scorch delicate seedlings. You'll notice the leaves develop a deeper green color as they acclimate to more light.
This is where most growers give up, but don't. Hellebore seedlings grow slowly, and it's easy to think they're dead when they're just taking their time. I keep mine under a sheer curtain for the first few months to filter the light gently.
⏰ Step 5: Transplant After First True Leaves Form
Once seedlings have developed 3-4 true leaves and are about 2 inches tall, they're ready for their first transplant. Gently lift them from the seed tray and separate them, being careful not to damage the delicate roots. Plant them in 3-4 inch pots filled with the same light potting mix, burying them to the same depth they were growing before.
Water lightly after transplanting and place them back in bright indirect light. After another 4-6 weeks, when they've doubled in size, you can gradually introduce them to morning sun for a few hours daily. This slow transition prevents shock and ensures they grow strong.
Tips & tricks for perfect hellebore seed germination
Here's what I've learned after years of trial and error with these finicky seeds.
Stratification is Non-Negotiable: The 3-4 month cold stratification at 35-40°F in Step 2 is absolutely critical—this mimics winter conditions that trigger germination. I've tried skipping it, and seeds just sat dormant for years. If your fridge runs warmer than 40°F, consider using a refrigerator with a crisper drawer or even a seed stratification chamber for precise control. The moisture level is key too—just enough to keep the peat moss damp like a wrung-out sponge.
Light Requirements Matter: In Step 3, when sowing your seeds, remember they need light to germinate. That thin 1/8-inch covering of vermiculite is crucial—it protects them while still allowing light penetration. I've used a simple kitchen scale to measure this depth precisely, as too much coverage can prevent germination entirely. Place your seed trays near an east-facing window for the gentlest natural light.
Patience is Everything: Those 2-6 months of germination time in Step 3 can be tough, but don't give up! I've seen seeds take up to 8 months in cooler conditions. The first true leaves (not the tiny seed leaves) are your signal that germination has finally succeeded. Keep a journal to track your progress—you'll be amazed at how slowly these seeds develop compared to other plants.
Transplanting Timing: When you reach Step 5 and see those 3-4 true leaves, wait until the seedlings are about 2 inches tall before transplanting. I've made the mistake of rushing this step, and the delicate roots get damaged easily. Use a small fork to gently loosen the soil around the seedlings before lifting them—this helps preserve those fragile root systems. The 4-6 week acclimation period to morning sun is crucial for hardening them off.
Pro Tips for Germinating Hellebore Seeds
- Here's what I've learned after years of trial and error with these finicky seeds.
- Stratification is Non-Negotiable: The 3-4 month cold stratification at 35-40°F in Step 2 is absolutely critical—this mimics winter conditions that trigger germination.
- Light Requirements Matter: In Step 3, when sowing your seeds, remember they need light to germinate.
Frequently asked questions
Got questions about germinating hellebore seeds?
You’re not alone—this process can feel tricky! Below, we’ve tackled the most common concerns to help you avoid pitfalls and boost your success rate.
How long does cold stratification take for hellebore seeds?
Cold stratification typically requires 4–8 weeks in moist, refrigerated conditions (34–40°F). Some varieties, like Helleborus niger, may need up to 12 weeks. Monitor moisture levels—damp (not soggy) is key. Patience pays off!
Can I stratify hellebore seeds outside in the garden?
Yes! Sow seeds in fall directly into well-drained soil, lightly covering them with compost. Nature handles the cold stratification for you. Just ensure your climate has consistent winter chills (below 40°F). Spring germination is a rewarding surprise!
What if my hellebore seeds won’t germinate after stratification?
Try these fixes:
- Check moisture: Seeds need constant dampness (not waterlogged). Mist lightly weekly.
- Test viability: Old seeds (<2 years) may fail. Source fresh seeds or try a freshness test (nick the seed—white inside = viable).
- Light exposure: Some hellebores need indirect light to germinate. Move trays to a bright, shaded spot.
Do I need to use a special soil mix for germinating hellebore seeds?
A simple mix of 50% peat moss and 50% perlite works wonders. Avoid heavy garden soil—it compacts and suffocates tiny roots. For extra insurance, add a fungicide (like mycorrhizal powder) to prevent damping-off. Sterilize your mix by baking it at 200°F for 30 minutes if repurposing potting soil.
How do I know when hellebore seedlings are ready for transplanting?
Seedlings are ready when they’ve developed 2–3 true leaves (not just the initial cotyledons) and a sturdy root system (gently tug—resistance = good!). Harden them off for 1–2 weeks before moving to the garden. Choose a part-shade spot with moist, well-draining soil to mimic their woodland roots.
Wrapping up and next steps
Germinating hellebore seeds may seem daunting, but with the right cold stratification technique, you’re well on your way to a thriving garden! 🌱 The key is patience, precision, and a little winter magic—your efforts will soon reward you with delicate blooms.
Now that you’re armed with the blueprint, take the next step: gather your supplies, follow the steps, and watch those seeds transform into stunning hellebores.
Pro tip: Keep a seed journal to track progress—it’s a rewarding way to celebrate each milestone! 📝✨