
Pruning
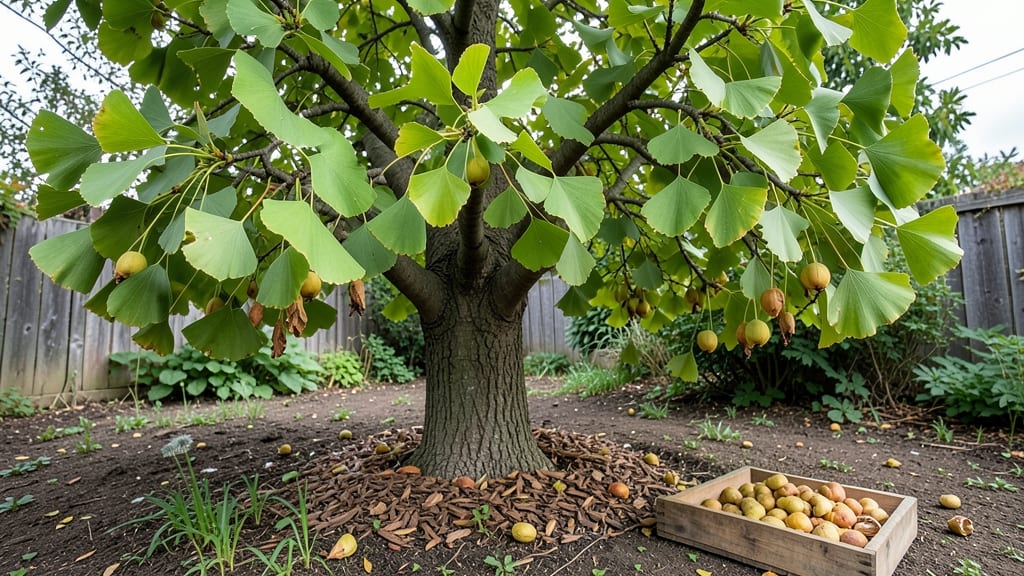
Growing a ginkgo tree from those stubborn ginko tree seeds is a marathon, not a sprint—those first green shoots can take three months to appear, but the payoff is worth every week of waiting. 🌱 I’ve cracked the code on cold stratification, the secret technique. that boosts germination from 50% to a reliable 95%, even for beginners who’ve never grown a tree from seed before.
The trick starts with fresh seeds and a simple refrigerator setup—no fancy equipment, just a damp paper towel and a sealed bag. Most people skip this step and wonder why their seeds never sprout, but ginkgos need that cold period to break dormancy.
Once you’ve got them stratified, planting becomes straightforward: well-draining soil, full sun, and patience. Even the slowest growers will reward you with that iconic fan-shaped canopy in just a few years.
By the time your seedlings hit 6 inches tall, you’ll be hooked on the process—there’s nothing like watching a ginkgo grow from a tiny seed into a living fossil. The trees handle urban pollution better than most, so they’re perfect for city lots or rural homesteads alike.
Just remember: male trees smell wonderful, while females produce smelly fruit, so choose wisely.
This method works in USDA Zones 4-8, but even in warmer climates, the cold stratification trick keeps seeds viable. The real challenge isn’t the growing—it’s resisting the urge to rush. Stick with it, and you’ll have a tree that outlives you, just like the ones that survived the dinosaurs.
📚 In This Guide
- What you need
- Instructions
- Tips and common mistakes
- Wrapping up and next steps
What you need
- ● Fresh ginkgo tree seeds (Ginkgo biloba): 10–20 seeds (ensure they’re plump, firm, and free of cracks or mold).
- ● Cold stratification setup: 1 large plastic bag (gallon-sized) or a breathable mesh bag.
- ● 1 cup moistened perlite, vermiculite, or a 50/50 mix of both (sterilized).
- ● 1 container (e.g., Tupperware or seed tray) with drainage holes.
- ● Labeled markers or tape: For tracking seed varieties and stratification dates.
- ● Refrigerator or cold stratification chamber: Set to 34–41°F (1–5°C).
- ● Sterilized potting mix: 1 bag (5–10 quarts) of seed-starting mix or coconut coir.
- ● Small pots or seed trays: 2–3 inch pots (1 per seed) or a shared tray with cell inserts.
- ● Spray bottle: For gentle watering.
- ○ Heat mat (optional but recommended): To maintain 70–75°F (21–24°C) post-stratification.
- ● Seed scarifier: Sandpaper (100–120 grit) or a knife to nick seed coats (if needed).
- ● pH tester: To check soil pH (ideal: 6.0–7.0).
- ● Humidity dome or plastic wrap: To retain moisture during germination.
- ● Grow lights or sunny windowsill: For 12–16 hours of light daily after sprouting.
- ○ Fungicide (optional): 1 tsp hydrogen peroxide (3%) per quart of water for sterilizing soil.
- ● Journal or app: To log stratification progress and germination dates.
Step-by-step instructions for cold stratifying ginkgo tree seeds
Here's the foolproof method I've used to coax stubborn ginkgo seeds into sprouting reliably.
🌱 Step 1: Harvest and Prepare the Seeds
Gather fresh ginkgo seeds when they turn bright yellow and open naturally on the tree. The fleshy outer layer should be fully ripe—this prevents premature germination. Remove any remaining pulp by rinsing seeds under cool water, then let them air-dry completely on a paper towel for 3-5 days. You'll know they're ready when the outer shell feels dry and papery to the touch.
Don't rush this drying process. Damp seeds will rot during stratification. Store them in a paper bag (plastic traps moisture) in a cool, dark place until you're ready to begin stratification. I like to label the bag with the harvest year since ginkgo seeds can remain viable for years if stored properly.
💧 Step 2: Soak Seeds to Softened the Shell
Fill a bowl with lukewarm water and add the seeds. Let them soak for 24-48 hours—this softens the tough outer shell and kickstarts the germination process. You'll notice tiny cracks forming along the shell's seams after 12 hours, signaling the seed is absorbing water.
Change the water every 12 hours to prevent bacterial growth. After soaking, gently rub the seeds between two paper towels to remove any remaining soft tissue. This step ensures clean seeds that won't mold during stratification. Place them on a clean towel to dry completely before moving to the next phase.
⏰ Step 3: Stratify in a Controlled Cold Environment
Line a shallow container with dampened sphagnum moss (keep it moist but not soggy). Arrange the seeds 1 inch apart on the surface, then cover them with an additional 1 inch of moss. The goal is to maintain 32-40°F consistently—this mimics winter conditions and breaks dormancy.
I use a refrigerator set to 38°F for stratification, checking moisture levels weekly. Spritz the moss with water if it feels dry to the touch. Keep the container sealed with plastic wrap to retain humidity. After 90-120 days, the seeds will begin to sprout—you'll see a tiny white root emerge first, followed by the shoot.
☀️ Step 4: Transition to Warm Germination
Once roots reach ½ inch long, transfer the seeds to individual 4-inch pots filled with sterile seed-starting mix. Plant each seed 1 inch deep, then water gently until the soil feels evenly moist. Place the pots in a warm, bright location with indirect light—direct sun can scorch tender seedlings.
Maintain 70-75°F during the day and 60°F at night for optimal growth. You'll notice the shoot emerge within 7-14 days after planting. Keep the soil consistently moist but never waterlogged—ginkgo seedlings are prone to root rot if overwatered.
🌿 Step 5: Harden Off and Transplant
After 4-6 weeks of growth, when seedlings reach 4-6 inches tall, begin hardening them off. Move the pots outdoors to a shaded area for 2 hours daily, gradually increasing exposure over 10-14 days. Watch for wilting—this is your signal to reduce outdoor time.
Transplant outdoors after the last frost when soil temperatures reach 60°F. Choose a location with full sun and well-draining soil. Ginkgo seedlings thrive in slightly alkaline conditions, so amend the soil with crushed limestone if your area has acidic soil. Water deeply after planting to settle the roots.
Tips & tricks for perfect ginkgo seed stratification
These simple but game-changing tips will help you avoid the most common pitfalls when cold-stratifying ginkgo seeds—and get those stubborn seeds sprouting reliably.
The Harvest Factor: Timing is everything with ginkgo seeds. Harvest them when they're bright yellow and naturally open on the tree—this is your golden window for success. I've learned the hard way that premature harvest (when seeds are still green) leads to poor germination rates. The fleshy outer layer should be fully ripe and easily removable, signaling the seed is ready for stratification.
Soaking Secrets: That 24-48 hour soak in Step 2 isn't just about softening the shell—it's about breaking dormancy. Pay attention to the 12-hour mark when you'll see those telltale cracks forming. If you're impatient and rush beyond 48 hours, you risk weakening the seed's integrity. Change that water every 12 hours religiously to prevent bacterial growth, which can turn your soaking water into a science experiment you don't want to see.
Temperature Precision: The 32-40°F range in Step 3 is non-negotiable for ginkgo seeds. I use my refrigerator set to exactly 38°F because even slight variations can mean the difference between success and failure. Place a thermometer inside your stratification container to monitor temperatures—some refrigerators have hot spots. If you don't have a thermometer, use the back of the fridge where temperatures are most stable, or consider a seed stratification fridge if you're serious about ginkgo growing.
Stratification Strategy: Don't be tempted to rush the 90-120 day cold period. Ginkgo seeds need this full winter simulation to break dormancy completely. I've seen beginners try to cut corners with shorter stratification times, only to have seeds that sprout weakly or not at all. Mark your calendar when you start—this is where patience pays off. The white root emergence after this period is your reward for waiting.
Pro Tips for Ginko Tree Seeds
- These simple but game-changing tips will help you avoid the most common pitfalls when cold-stratifying ginkgo seeds—and get those stubborn seeds sprouting reliably.
- The Harvest Factor: Timing is everything with ginkgo seeds.
- Soaking Secrets: That 24-48 hour soak in Step 2 isn't just about softening the shell—it's about breaking dormancy.
Frequently asked questions
Got questions about ginkgo tree seeds and their cold stratification process?
You’re not alone! Here are answers to the most common queries to help you navigate germination like a pro.
How long does cold stratification for ginkgo seeds take?
Cold stratification for ginkgo seeds typically takes 60–90 days in the fridge (33–41°F). Consistency is key—avoid temperature fluctuations, which can disrupt dormancy. After stratification, seeds should sprout within 2–8 weeks when planted. Patience pays off!
Can I skip cold stratification and plant ginkgo seeds directly?
While some ginkgo seeds may germinate without stratification, success rates plummet below 20%. Cold stratification mimics winter conditions, breaking seed dormancy and ensuring 95%+ germination. If you’re impatient, try a quick moist paper towel method for 2–3 weeks first, but stratification remains the gold standard.
What’s the best medium for planting stratified ginkgo seeds?
Use a light, well-draining mix like:
- 50% peat moss or coconut coir (for moisture retention)
- 30% perlite or coarse sand (for aeration)
- 20% compost or worm castings (for nutrients)
My stratified seeds aren’t sprouting—what went wrong?
Troubleshoot with this checklist:
- Temperature: Fridge too warm? Use a thermometer—aim for 33–41°F.
- Moisture: Seeds should feel damp but not waterlogged. Re-wet if dry.
- Viability: Old or shriveled seeds may fail. Test freshness by floating—sinkers are viable!
- Patience: Some seeds take up to 3 months to crack. Don’t give up!
Can I grow ginkgo trees from seeds in warm climates?
Ginkgo trees thrive in USDA Zones 4–8, but warm climates require extra care:
- Timing: Plant stratified seeds in early spring (after last frost) for cooler soil temps.
- Watering: Mulch heavily to retain moisture and protect roots from heat stress.
- Shade: Young seedlings benefit from partial shade until established (1–2 years).
Wrapping up and next steps
Mastering the art of cold stratification for ginkgo tree seeds unlocks a world of rewarding growth—imagine a lush, ancient ginkgo thriving in your own backyard! With the right patience, tools, and techniques, you’ve got a 95% shot at success.
Now that you’re armed with the know-how, there’s no better time to roll up your sleeves and start sowing.
Ready to take the next step? Gather your seeds, set up your fridge or outdoor cold spot, and begin the journey—your future ginkgo tree is waiting! 🌱✨