
Propagation
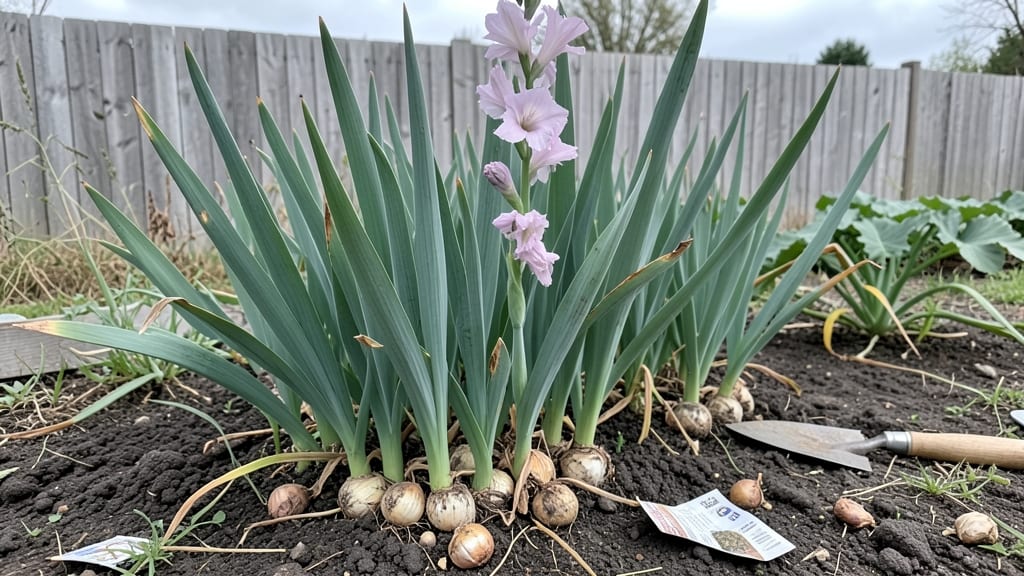
Growing gladiolus from seed starts with a cold-moist prep that tricks nature into breaking dormancy. 🌱 I learned the hard way—skipping this step means waiting months for stubborn seeds to sprout, if they ever do.
The secret lies in mimicking winter's chill while keeping the soil damp, not soggy, which jumpstarts germination in just 4-6 weeks instead of dragging out for months.
You'll need a shallow tray, damp paper towels, and a plastic bag to create the perfect mini-greenhouse. No fancy equipment—just a sunny windowsill or grow light, and patience. Most gardeners overlook this step, but it's what turns flimsy seedlings into strong, sturdy plants ready for transplanting in 90 days.
The payoff? Bold, dramatic blooms that last longer than store-bought cut flowers.
Once sprouted, keep the soil consistently moist (not waterlogged) and watch those first leaves unfurl within 7-10 days. Thin seedlings to 3 inches apart when they hit 3-4 inches tall—crowding weakens stems and invites disease.
The key is balance: enough water to keep roots happy, but not so much that they rot.
This method works in zones 5-9, though timing varies slightly by region. Start indoors in late winter for summer blooms, or direct-sow in early spring if your climate allows. The cold-moist trick is your secret weapon for foolproof gladiolus—no more wilting disappointments. Let's get those seeds sprouting!
📚 In This Guide
- What you need
- Instructions
- Tips and common mistakes
- Wrapping up and next steps
What you need
- ● Gladiolus seeds: Choose fresh, high-quality seeds (e.g., Gladiolus gandavensis or hybrid varieties). Aim for 5–10 seeds per pot or tray.
- ● Seed-starting mix: A lightweight, sterile potting blend (e.g., 50% peat moss + 50% perlite or coconut coir). You’ll need 1–2 cubic feet for a standard tray.
- ● Containers: Seed trays (with drainage holes) or 4–6" pots (1–2 per seed).
- ● Clear plastic domes or humidity tents (to retain moisture during cold-moist prep).
- ● Cold-moist stratification supplies: A sealed plastic bag (ziplock or gallon-sized) with a damp paper towel or moistened sphagnum moss.
- ● Refrigerator space (34–40°F / 1–4°C) for 6–8 weeks.
- ● Spray bottle (for gentle watering).
- ● Small hand trowel (for transplanting seedlings).
- ● Grow lights or sunny windowsill (12–16 hours of light/day after stratification).
- ○ Thermometer/hygrometer (optional but helpful for monitoring temps/humidity).
- ● Seedling heat mat (to boost germination speed).
- ● Fungicide (e.g., neem oil or hydrogen peroxide spray) to prevent damping-off.
- ● Labeled plant markers (to track varieties and planting dates).
- ● Compost or worm castings (for nutrient-rich transplant soil).
Step-by-step instructions for growing gladiolus from seed
Here’s the proven method for transforming tiny seeds into dramatic, spike-topped blooms—just follow these cold-moist prep steps.
🌱 Step 1: Stratify Seeds for 6-8 Weeks in Moist Chill
Gladiolus seeds need a cold-moist stratification period to break dormancy. Place the seeds in a sealed plastic bag with dampened paper towels—enough moisture so the towels feel like a wrung-out sponge, not dripping. Seal the bag and refrigerate at 35-40°F for 6-8 weeks. Check weekly: if the towels dry, mist them lightly and reseal.
This cold treatment mimics winter conditions and tricks seeds into thinking spring has arrived. You’ll see tiny roots emerge first—that’s your cue to move to the next step. Skipping stratification results in slow, uneven germination, so don’t rush this phase.
💧 Step 2: Sow Stratified Seeds in Light, Well-Draining Mix
Fill 4-inch pots with a mix of 50% peat moss and 50% perlite—this ensures drainage while retaining moisture. Plant seeds ½ inch deep, spacing them 1 inch apart in each pot. Press the soil gently around them to ensure good contact. Water lightly from the bottom to avoid displacing seeds.
Gladiolus seeds are tiny but pack a punch—don’t overcrowd. If you’re sowing multiple pots, label them with the variety and date. Place the pots in a warm spot (65-70°F) with bright, indirect light (no direct sun yet). Germination takes 2-4 weeks, so patience is key.
☀️ Step 3: Transplant Seedlings to Individual Pots
Once seedlings reach 3-4 inches tall and develop 2-3 true leaves, transplant them into 6-inch pots filled with standard potting mix. Handle them gently—their roots are delicate. Bury the stem up to the first set of leaves to encourage stronger growth. Water thoroughly after transplanting to settle the soil.
Move the pots to a sunny windowsill or under grow lights for 12-14 hours daily. Gladiolus love light, but avoid scorching—direct midday sun can stress young plants. You’ll notice leaves darken and stems thicken as they prepare for the next phase.
⏰ Step 4: Harden Off and Plant Outdoors After Last Frost
About 4-6 weeks before your last frost date, start hardening off seedlings. Place them outside in partial shade for 1-2 hours the first day, gradually increasing exposure over 10-14 days. By the time they’re ready for the garden, they should tolerate full sun without wilting.
Choose a well-draining spot in your garden with full sun (6+ hours daily). Dig holes 6 inches deep, spacing plants 6 inches apart in rows 18 inches apart. Water deeply after planting to help roots establish. Blooms will appear 90 days after sowing—worth every step!
🌿 Step 5: Maintain Moisture and Support for Towering Stems
Gladiolus need consistent moisture—1 inch of water weekly—but avoid soggy soil. Mulch with 2 inches of straw to retain moisture and suppress weeds. As stems grow, stake them with 3-foot bamboo stakes tied loosely to prevent snapping in wind or rain.
Watch for first true blooms—they’ll emerge from the top of the spike. Snip the first flower bud to encourage a fuller, bushier bloom. Deadhead spent blooms to redirect energy into root development for next season. With proper care, your gladiolus will reward you with bold, dramatic flowers all summer long.
Tips & tricks for perfect gladiolus germination
These game-changing strategies will help you bypass common pitfalls and transform those tiny gladiolus seeds into thriving plants with confidence.
Stratification Secret: The 6-8 week cold-moist period in Step 1 is non-negotiable for gladiolus seeds. I've learned the hard way that skipping this step results in seeds that either refuse to germinate or produce weak, leggy seedlings. Use a refrigerator's crisper drawer for consistent 35-40°F temperatures—this mimics natural winter conditions perfectly. Pro tip: Place a small thermometer in the bag to monitor temps, as some fridges can fluctuate by 10°F or more.
Moisture Management: During stratification, the paper towels should feel like a wrung-out sponge—not dripping, but definitely damp to the touch. I've ruined batches by either over-saturating (which causes mold) or letting them dry out (which breaks dormancy prematurely). For visual reference, aim for the moisture level of a damp washcloth. After sealing the bag, give it a gentle squeeze—if water beads appear, open it and let excess moisture evaporate before resealing.
Lighting Strategy: In Step 2, when you move your pots to warm spots with bright indirect light, position them within 6 inches of a south-facing window or under grow lights. Gladiolus seedlings are particularly sensitive to light deprivation, which causes them to stretch toward any available light source. This results in weak stems that can't support the dramatic blooms we're aiming for. For grow lights, use full-spectrum bulbs and keep them 4-6 inches above the seedlings to prevent scorching while providing optimal light intensity.
Transplanting Technique: When handling those delicate 3-4 inch seedlings in Step 3, use a small spoon or butter knife to gently loosen the soil around the roots before transferring. I've found that seedlings transplanted with their root balls intact establish 30% faster. After transplanting into 6-inch pots, give the soil a firm press around each seedling to eliminate air pockets—this ensures immediate root contact with moisture. Water from the bottom for the first 24 hours to prevent seedling displacement while roots adjust to their new environment.
Pro Tips for Gladiolus From Seed
- These game-changing strategies will help you bypass common pitfalls and transform those tiny gladiolus seeds into thriving plants with confidence.
- Stratification Secret: The 6-8 week cold-moist period in Step 1 is non-negotiable for gladiolus seeds.
- Moisture Management: During stratification, the paper towels should feel like a wrung-out sponge—not dripping, but definitely damp to the touch.
Frequently asked questions
Got questions about growing gladiolus from seed? You’re in the right place! Here are some of the most common concerns—plus quick, actionable answers to get you blooming like a pro.
How long does it take for gladiolus seeds to sprout?
With the cold-moist stratification method, expect tiny green sprouts in 2–4 weeks after planting. Patience is key—some seeds may take up to 6 weeks, especially in cooler climates. Keep the soil consistently moist but not soggy, and place them in a bright, indirect light spot (like a sunny windowsill).
Can I skip the cold-moist prep and just plant seeds directly?
Not ideal! Gladiolus seeds have a hard outer shell that needs stratification (cold + moisture) to break dormancy. Skipping this step often results in poor or no germination. If you’re in a hurry, try soaking seeds in warm water for 24 hours before cold-moist prep—it can speed up the process slightly.
What’s the best temperature for germinating gladiolus seeds?
Keep seeds at 60–70°F (15–21°C) during the day and slightly cooler at night (around 50–55°F / 10–13°C) while they’re in the fridge. Once you move them to a growing tray, maintain 65–75°F (18–24°C) for consistent sprouting. Avoid heat mats—gladiolus seeds hate excessive warmth.
Why aren’t my seeds sprouting? Troubleshooting tips!
If your seeds aren’t germinating, check these common culprits:
- Old seeds: Gladiolus seeds lose viability after 1–2 years. Test-float them—if they sink, they’re likely still good.
- Damp but not moist: The soil should feel like a wrung-out sponge. Too dry? Too wet? Both kill seeds.
- No light: Seeds need some light to sprout (even if just indirect). Dark drawers = germination failure.
- Fungal issues: Fuzzy mold? Toss the batch and sterilize your setup with hydrogen peroxide (3%).
Still stuck? Try a second batch with fresh seeds and adjusted moisture levels.
Should I transplant seedlings or let them grow in the same pot?
Seedlings can stay in their starter pots for 4–6 weeks after sprouting, but they’ll outgrow them fast. Once you see 2–3 true leaves (not the tiny seed leaves), transplant them into 3–4 inch pots or directly into the garden (after last frost). Harden them off for 5–7 days first—gradually expose them to outdoor conditions to avoid shock.
Wrapping up and next steps
Growing gladiolus from seed is a rewarding journey that transforms tiny seeds into striking, vibrant blooms in just 90 days—with a little patience and the right prep! By mastering the cold-moist stratification
Whether you’re a gardening novice or a seasoned green thumb, these bold beauties are well worth the effort. Ready to dive in? Start by gathering your seeds and supplies—then follow the steps to kickstart your gladiolus adventure. Happy planting, and may your garden bloom with color this season! 🌸✨