
Propagation
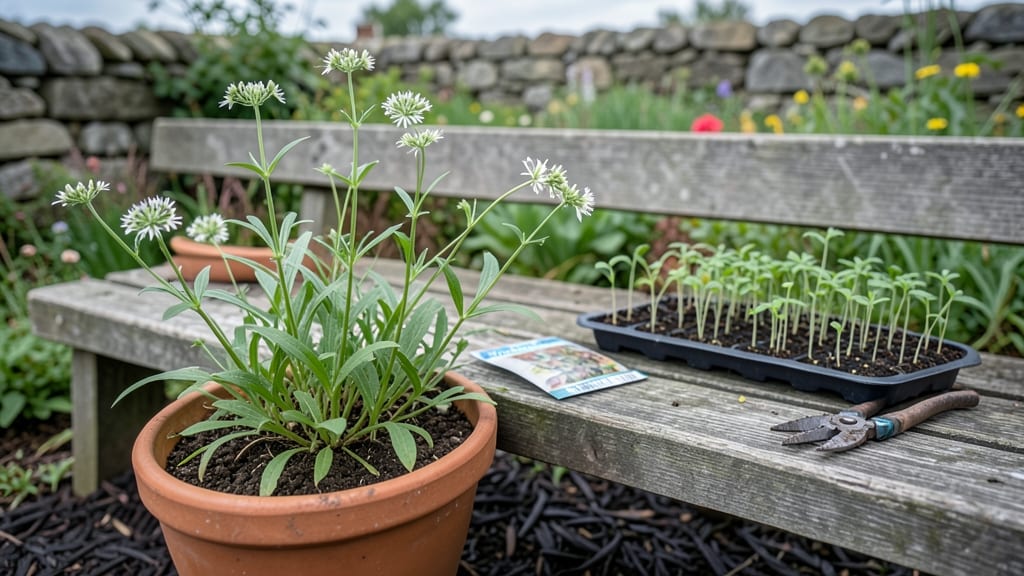
Gooseneck loosestrife seeds need a cold snap to wake up—something I learned after my first batch of seeds sat stubbornly dormant for months. 🌱 The trick is mimicking winter's chill, which breaks their dormancy and sets the stage for those iconic arching blooms next spring.
Without this step, even fresh seeds might never sprout, leaving you staring at empty pots when your neighbors' gardens burst into color.
You'll need just three things: a sealed plastic bag, a fridge, and patience. Toss your seeds into a damp paper towel inside the bag, then store them in your fridge for 6-8 weeks.
This cold treatment tricks the seeds into thinking winter's passed, so they'll be ready to germinate when you plant them in early spring. The process is simple, but timing matters—too short, and seeds stay asleep; too long, and they might lose viability.
Once chilled, plant them in well-draining soil under bright, indirect light. Keep the soil lightly moist (not soggy) and expect germination in 2-4 weeks. The first leaves will be tiny and round, but don't rush—these plants grow slowly at first.
By midsummer, you'll see those signature arching stems forming, each one a promise of delicate white or pink flowers that hummingbirds adore.
This method works for gardeners in zones 3-9, though southern growers can skip the fridge step if they plant seeds outdoors in fall. The key is consistency: whether you're starting indoors or direct-sowing, the cold treatment is non-negotiable for reliable blooms.
Ready to grow these tough, elegant perennials that thrive with almost no fuss?
📚 In This Guide
- What you need
- Instructions
- Tips and common mistakes
- Wrapping up and next steps
What you need
- ● Gooseneck loosestrife seeds: Fresh or stored seeds (ensure they’re viable—see pro tips below for testing). Aim for 50–100 seeds to account for germination variability.
- ● Seed-starting mix: A lightweight, well-draining peat-based or coco coir blend (avoid garden soil—it’s too dense!). A 10–12 inch tray or small pots (2–3 inches deep) will suffice.
- ● Containers: Plastic seed trays with clear domes (for humidity) or Small plastic pots (3–4 inches wide) with drainage holes.
- ● Spray bottle: A fine-mist sprayer (16 oz or larger) to keep seeds moist without overwatering.
- ○ Plastic wrap or humidity dome: To create a mini greenhouse effect (optional but highly recommended for cold stratification).
- ● Refrigerator or cold frame: A consistent 34–40°F (1–4°C) space for 6–8 weeks of cold stratification.
- ● Grow lights or sunny windowsill: A south-facing window or LED grow lights (12–16 hours/day) for post-stratification growth.
- ● Seed heat mat: (70–75°F / 21–24°C) to speed up germination after stratification.
- ● pH test kit: To ensure your soil mix is slightly acidic (6.0–6.5)—ideal for loosestrife.
- ● Fertilizer: A balanced liquid fertilizer (5-5-5 or 10-10-10) diluted to half-strength for young seedlings.
- ● Labeling tags: To track seed varieties and planting dates (trust us, it’s a lifesaver!).
- ● Humidity tray: A shallow tray with pebbles and water to boost moisture levels during germination.
- ● 🔥 Test seed viability: Soak seeds in warm water for 24 hours—sinkers are viable! Floaters may need fresher sources.
- ● 🌡️ Cold stratification hack: Place seeds in a sealed bag with moist paper towels in the fridge for easier monitoring.
- ● ✨ Light exposure: Loosestrife seeds need light to germinate—don’t bury them! Sprinkle on top of the soil mix.
Step-by-step guide to germinating gooseneck loosestrife seeds
Here's how to break dormancy and coax strong seedlings from these finicky seeds.
🌱 Step 1: Collect and Prep Seeds for Stratification
Harvest mature seed pods when they turn brown and begin cracking open—this usually happens in late fall after blooms fade. Let the pods dry completely on paper towels for 3-5 days before gently crushing them to release the tiny, dark seeds. I store them in a paper envelope (not plastic) in a cool, dry place until stratification.
Gooseneck loosestrife seeds require cold stratification to mimic winter conditions. Place the seeds in a ziplock bag with a damp paper towel (not soaking wet—just enough to feel slightly damp when squeezed). Seal the bag and refrigerate for 8-12 weeks at 35-40°F. Check weekly to ensure the towel stays moist; if it dries, mist lightly with water.
⏰ Step 2: Sow Stratified Seeds in Containers
After stratification, fill 4-inch pots with sterile seed-starting mix (never garden soil—it’s too dense). Moisten the mix until it holds together when squeezed but doesn’t drip. Press the soil down lightly to remove air pockets, then create shallow furrows about ¼ inch deep using a pencil or small stick.
Sow seeds sparingly—they’re tiny and germinate slowly. Space them ½ inch apart in the furrows, then cover lightly with a thin layer of mix. Mist the surface with water until evenly damp (not soggy). Place the pots in a clear plastic bag or under a humidity dome to retain moisture and warmth. Keep them in a bright, indirect light spot (like a north-facing window) until germination.
☀️ Step 3: Provide Warmth and Light for Germination
Germination can take 4-8 weeks, so patience is key. Place the pots on a seedling heat mat set to 70-75°F to speed up the process. Without heat, germination may take 2-3 months. Keep the soil consistently moist—never let it dry out, but avoid waterlogging, which causes rot.
Once seedlings emerge, remove the plastic bag and move them to a south-facing window or under grow lights for 14-16 hours of light daily. You’ll know they’re getting enough light when the leaves are deep green and compact (not leggy or pale). If stems stretch toward the light, raise the grow light or rotate the pots daily.
🌿 Step 4: Thin and Harden Off Seedlings
When seedlings reach 2-3 inches tall and have 2-3 sets of true leaves, thin them to one per pot using clean scissors. Snip at soil level to avoid disturbing roots. Transplant the remaining seedlings into 6-inch pots with fresh seed-starting mix to give them room to grow.
Two weeks before your last frost date, begin hardening off the seedlings. Start by placing them outside in a shaded, sheltered spot for 1-2 hours the first day. Gradually increase outdoor time by 1 hour daily over 10-14 days, exposing them to morning sun first and bringing them indoors before evening. This prepares them for the garden’s full sun and temperature swings.
Tips & tricks for germinating gooseneck loosestrife seeds
These little-known tricks will help you break through the dormancy barrier and get those stubborn gooseneck loosestrife seeds sprouting reliably.
Stratification Precision: The 8-12 week cold treatment is non-negotiable for these seeds, but here's the secret: place a small container of water near your refrigerator seeds to maintain consistent humidity. I've found that seeds kept at 38-40°F (the upper end of the range) germinate faster once warmed up. Mark your calendar—set a reminder for exactly 8 weeks so you don't accidentally extend the cold treatment too long, which can reduce germination rates.
Container Selection Tip: For Step 2, I recommend using 4-inch plastic nursery pots with drainage holes instead of ceramic. The plastic retains more consistent moisture levels, and you can easily label each pot with the sowing date. If you're sowing multiple batches, use a shallow tray with cell inserts to keep everything organized—this prevents mix-ups when checking germination progress.
Lighting Strategy: During the 4-8 week germination period, position your grow lights 6-8 inches above the seedlings to prevent overheating. I've seen seedlings "burn" when lights are too close—they develop brown patches on leaves. For the critical 14-16 hours of light daily, use a timer to automate the lighting cycle. This consistency is more important than the exact duration—some days you might get 15 hours naturally, other days only 13, but the timer keeps it steady.
Harden Off Gradually: When you start the 1-2 hour outdoor acclimation in Step 4, I've found that placing a small fan nearby helps strengthen stems. The gentle airflow mimics natural wind conditions and prevents leggy growth. Also, if your morning temperatures drop below 50°F, bring seedlings back inside until they've built more resilience—those first few harden-off days are about temperature adaptation, not sun exposure.
Pro Tips for Gooseneck Loosestrife Seeds
- These little-known tricks will help you break through the dormancy barrier and get those stubborn gooseneck loosestrife seeds sprouting reliably.
- Stratification Precision: The 8-12 week cold treatment is non-negotiable for these seeds, but here's the secret: place a small container of water near your refrigerator seeds to maintain consistent humidity.
- Container Selection Tip: For Step 2, I recommend using 4-inch plastic nursery pots with drainage holes instead of ceramic.
Frequently asked questions
about gooseneck loosestrife seeds—because every gardener deserves clarity!When should I sow gooseneck loosestrife seeds for winter chilling?
Sow seeds outdoors in late fall (October–November) or indoors 8–10 weeks before your last frost date. Winter chilling (40–50°F for 6–8 weeks) mimics natural conditions, ensuring strong germination next spring. Pro tip: Cover seeds lightly with soil or sand to protect them from harsh winter elements.
How long does it take for gooseneck loosestrife seeds to germinate after winter chilling?
Germination typically occurs 2–4 weeks after warming in spring, once soil temps reach 55–65°F. Patience is key—some seeds may take up to 6 weeks, especially in cooler climates. Keep soil consistently moist but not soggy to avoid damping-off.
Can I skip winter chilling and still get blooms?
Yes, but with less reliability! Store-bought seeds often undergo pre-chilling, but home-saved seeds require stratification. For faster results, place seeds in a sealed bag with damp sand in the fridge for 6–8 weeks before sowing. Bonus: This method also boosts seed viability for future seasons.
Why aren’t my gooseneck loosestrife seeds sprouting?
Common culprits: inadequate chilling, dry soil, or old seeds (viability drops after 2 years). Troubleshoot by:
- Verifying chilling time (6+ weeks).
- Testing soil moisture (use a spray bottle if topsoil is dry).
- Checking seed freshness (try a new packet).
Are gooseneck loosestrife seeds invasive? Should I worry?
Native to wetlands, gooseneck loosestrife (Lysimachia clethroides) is not invasive in most U.S. climates (unlike its cousin, purple loosestrife). However, it self-seeds freely, so deadhead spent blooms if you want to control spread. Tip: Plant in containers if your garden prefers low-maintenance natives!
Wrapping up and next steps
Mastering the art of winter-chilling gooseneck loosestrife seeds unlocks the secret to vibrant, early blooms next spring—no green thumb required! 🌱 With the right materials, patience, and a few simple steps, you’re well on your way to transforming tiny seeds into stunning garden stars.
The key? Consistency—whether it’s moisture levels, temperature control, or gentle care during germination.
Ready to take the next step? Start small—try a few seeds in pots this fall, and watch your confidence (and blooms!) grow. Before you know it, you’ll be sharing tips with fellow plant enthusiasts. Your future garden awaits! ⏳🌸