
Size
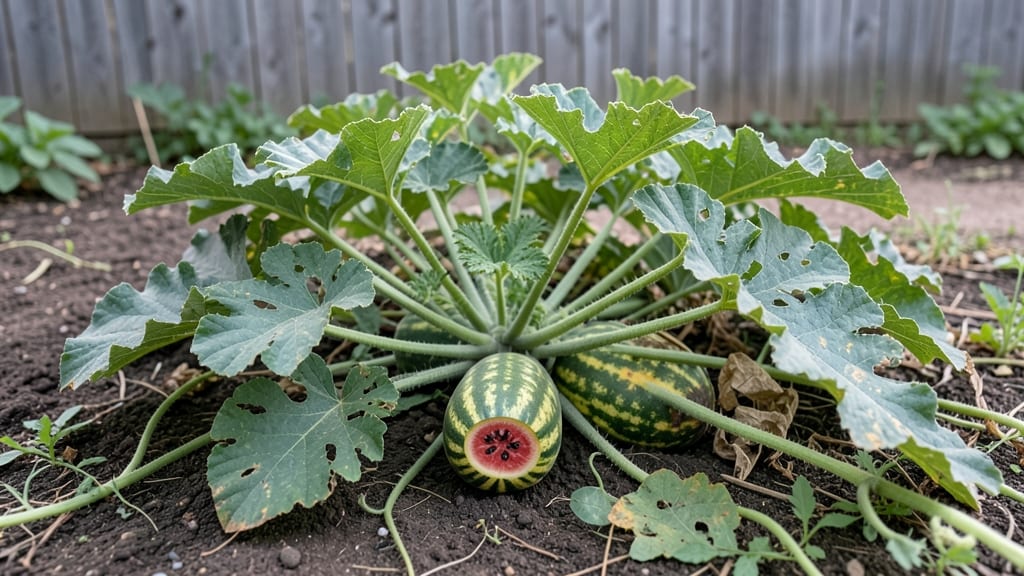
Growing a garden watermelon from seed starts with the right timing—those tiny seeds can sprout in just 3-5 days when soil temps hit 70°F or warmer. 🌱 I learned the hard way that cool soil means waiting weeks for germination, but once those first leaves crack through, you’ll be hooked on the speed of it all.
The secret to fast starts lies in prepping soil that’s loose, warm, and rich in compost—think of it as creating a cozy nest for those seeds.
Plant them only 1 inch deep and space them 6 feet apart (they’ll sprawl like lazy sunbathers), then keep the soil damp but never soggy. Watermelons are thirsty plants, but drowning them kills roots faster than drought ever will.
By midsummer, you’ll be watching vines stretch like green rivers across your garden, with 3-4 inch tendrils signaling healthy growth. The first small melons appear after 70-85 days, and with proper care, you’ll end up with 10-15 pound fruits that split open to reveal that perfect pink flesh.
The best part? You’ll outpace store-bought melons in both size and sweetness.
For cooler climates, extend the season by starting seeds indoors 4-6 weeks before the last frost, then transplant after soil warms. And if you’re worried about pests, focus on row covers early on—they’ll keep bugs from feasting on your seedlings before they even get a chance to grow.
📚 In This Guide
- What you need
- Instructions
- Tips and common mistakes
- Wrapping up and next steps
What you need
- ● Watermelon seeds: 3–5 seeds per hill (or 1–2 per pot if container-growing). Opt for fast-germinating varieties like Sugar Baby, Crimson Sweet, or Seedless for quicker results.
- ● Garden soil: Well-draining, fertile soil with a pH of 6.0–6.8. Mix in compost (1–2 cups per planting hole) for nutrients.
- ○ Planting containers (optional): 5–10 gallon pots with drainage holes if growing in containers.
- ● Watering can or hose: With a gentle spray nozzle for consistent moisture without disturbing seeds.
- ● Mulch: Straw or black plastic mulch to retain moisture and suppress weeds.
- ● Fertilizer: Balanced 10-10-10 or 5-10-10 fertilizer (follow package rates) for vining plants.
- ○ Trellis or stakes (optional): For varieties like ‘Sugar Baby’ to support climbing vines (if desired).
- ● Pruning shears: For trimming excess vines later in the season.
- ● Seed-starting kit: For indoor germination (if starting seeds early).
- ● Soil thermometer: To monitor ideal germination temps (70–90°F).
- ● Row covers: Lightweight fabric to protect seedlings from pests.
- ● Organic pest control: Neem oil or insecticidal soap for aphids/spider mites.
- ● Garden gloves: To keep hands clean while handling soil and seeds.
Step-by-Step instructions for growing watermelon from seed
Here's how to get those first sprouts popping in just days—not weeks—so you can enjoy homegrown watermelons faster than store-bought.
🌱 Step 1: Soak Seeds Overnight for Faster Germination
Watermelon seeds have tough outer shells that slow down sprouting. Place 4 seeds in a small bowl and cover them with warm water (around 80°F). Let them soak for 12-24 hours—this softens the seed coat and speeds up germination by 3-5 days.
After soaking, drain the water and let the seeds rest on a paper towel for 30 minutes. This prevents them from sticking together when you plant. You'll see the seeds plump up slightly—this means they're ready to push through the soil.
🪴 Step 2: Fill Containers with Warm, Moist Soil
Use the seed-starting mix and fill 4-inch pots (or a single tray with 4 cells) to ¾ full. Press the soil down lightly with your fingers until it's firm but not compacted. The goal is a surface that holds shape when touched but still lets roots penetrate easily.
Moisten the soil with warm water until it's damp 1 inch deep—like a wrung-out sponge. Too much water causes seeds to rot; too little and they won't sprout. Stick your finger in: if it comes out clean, you're good.
💧 Step 3: Plant Seeds Shallow and Keep Warm
Plant the soaked seeds ½ inch deep—any deeper and they’ll struggle to break through. Drop 1 seed per pot (or 2 per cell if using a tray) and cover lightly with soil. Press gently to ensure contact with the mix.
Place the pots in a warm spot (75-85°F), like on top of a refrigerator or near a sunny window. Use a seedling heat mat if available—this keeps the soil consistently warm and speeds germination. Expect sprouts in 3-7 days.
☀️ Step 4: Move to Bright Light Immediately After Sprouting
As soon as the first true leaves appear (not the initial seed leaves), move the seedlings to a sunny spot with 6-8 hours of direct light daily. A south-facing window works, but if growth looks leggy (stretched and pale), supplement with a grow light.
Leggy seedlings mean the light isn’t strong enough. Keep the light 2-3 inches above the plants and raise it as they grow. You’ll see sturdy, dark green leaves within 10-14 days—that’s your sign they’re thriving.
⏰ Step 5: Transplant After True Leaves Form
Once seedlings have 2-3 sets of true leaves (about 3-4 weeks), harden them off by placing them outside in partial shade for 1 hour daily. Gradually increase time over 5-7 days until they’re outdoors full-time.
Transplant into the garden after the last frost when soil is at least 70°F. Space plants 2-3 feet apart in rows 6 feet apart—watermelons need room to sprawl. Water deeply at the base to encourage strong root growth.
Tips & tricks for fast-germinating garden watermelon seeds
Watermelon seeds need the right conditions to break dormancy quickly—here's how to give them the perfect start for a harvest that beats store-bought speed.
Soaking Secret: The 12-24 hour soak at 80°F isn't just about hydration—it's about breaking the seed coat's natural resistance. I like to add a few drops of hydrogen peroxide (3%) to the warm water during soaking to prevent fungal growth while the seeds soften. After draining, pat them dry thoroughly on paper towels for those 30 minutes—this prevents mold while keeping them plump and ready to push through soil.
Soil Temperature Matters: The instructions mention warm soil, but here's the real trick: maintain that 75-85°F range consistently after planting. I use a seedling heat mat under my pots and cover them with plastic wrap (removed during watering) to trap warmth. This creates a mini greenhouse effect that can cut germination time by nearly half compared to room-temperature soil.
Light Timing Strategy: Those 6-8 hours of direct light in Step 4 should begin immediately after the first true leaves appear—not before. I place my seedlings under a grow light on a timer set to 14 hours of light/day during this phase. This mimics summer daylight and prevents leggy growth while keeping the plants stocky and ready for transplanting.
Transplanting Hack: When hardening off your seedlings (Step 5), I recommend doing it gradually over 5-7 days but with a twist: place them in partial shade for the first 2 hours instead of just 1 hour. This extra time helps toughen the seedlings without shocking them. Also, water the garden bed thoroughly before transplanting—dry soil makes the transition harder for young roots.
Pro Tips for Grow A Garden Watermelon Seed
- Watermelon seeds need the right conditions to break dormancy quickly—here's how to give them the perfect start for a harvest that beats store-bought speed.
- Soaking Secret: The 12-24 hour soak at 80°F isn't just about hydration—it's about breaking the seed coat's natural resistance.
- Soil Temperature Matters: The instructions mention warm soil, but here's the real trick: maintain that 75-85°F range consistently after planting.
Frequently asked questions
Got questions about growing watermelons from seed? You’re not alone!
Here are answers to the most common queries—so you can skip the guesswork and get straight to juicy success.
How long does it take for watermelon seeds to germinate?
Watermelon seeds typically sprout in 5–10 days after planting, depending on soil warmth (ideal: 75–90°F). For faster results, pre-soak seeds overnight or use a heat mat. Patience pays off—just keep the soil moist and avoid overwatering!
When is the best time to plant watermelon seeds outdoors?
Wait until after the last frost and soil temps are consistently above 70°F (use a soil thermometer to check!). In warm climates, plant in early spring; cooler regions may need to start seeds indoors 3–4 weeks before transplanting (around mid-April).
Can I grow watermelons in containers? What size pot do I need?
Choose a 5-gallon container or larger (bigger = more fruit). Use well-draining soil, a trellis for climbing varieties, and place in full sun (6+ hours/day). Dwarf varieties like ‘Sugar Baby’ thrive in pots—just expect smaller melons (1–3 lbs).
Why aren’t my watermelon seeds sprouting? Troubleshooting tips.
Check these fixes:
- Cold soil: Seeds need warmth—cover with plastic or use black plastic mulch.
- Too wet/dry: Keep soil consistently moist (not soggy).
- Old seeds: Test viability by soaking in water (floaters = bad; sinkers = good).
- Poor soil: Amend with compost or use seed-starting mix.
How do I know when watermelons are ripe for harvest?
Look for these signs:
- Color: Solid ground spot (creamy/yellow) or deep rind color.
- Sound: Tap the melon—it should sound hollow.
- Stem: Dry, brown, and detached easily.
- Weight: Heavy for its size = juicy goodness!
Wrapping up and next steps
Growing watermelons from seed is a rewarding journey that combines patience, care, and a little sunshine! 🌱 With the right soil, spacing, and techniques—like proper germination tricks and consistent watering—you’ll soon be feasting on juicy, homegrown fruit. Start small, stay consistent, and don’t forget to celebrate those first sprouts!
Ready to take the next step? Plant your seeds today and watch your garden transform into a sweet, vine-filled paradise! 🍉💦 Bonus tip: Share your progress with fellow gardeners—inspiration spreads faster than weeds!