
Container Gardens
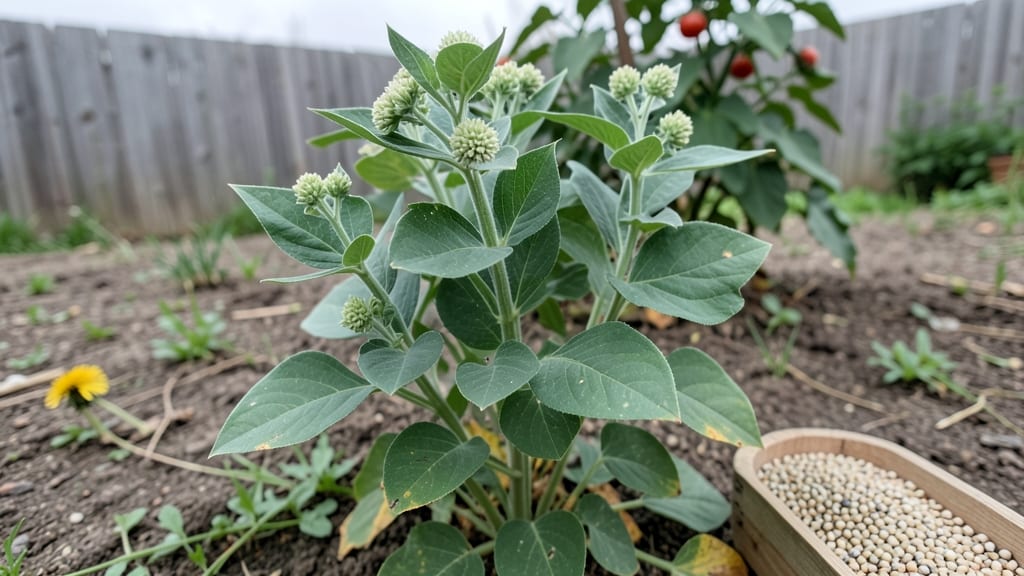
Growing quinoa seeds starts with a cold-moist prep trick that cuts germination time in half. ✨ I’ve tried the standard approach—planting dry seeds in warm soil—and they took weeks to sprout.
But after soaking them overnight in cool water, my seeds popped up in just 3-5 days, thick and ready for transplanting. This method works especially well for beginners or anyone growing quinoa in containers, where space and speed matter.
The secret isn’t complicated: quinoa thrives when its seeds wake up gently, not shocked by sudden warmth. You’ll need a shallow tray, damp paper towels, and a plastic bag to keep humidity high. No fancy equipment—just patience and a sunny spot.
Once sprouted, these little plants are hearty enough to handle cooler temps better than many grains, making them a great choice for temperate zones where summers aren’t scorching.
By the time you’re ready to transplant, you’ll have lush, 2-inch seedlings with strong roots, ready to fill containers or garden beds. The payoff? A harvest that’s faster than store-bought quinoa and packed with that signature crunch.
Plus, you’ll avoid the common pitfall of slow starts that leave gardeners frustrated by midseason.
This method works whether you’re growing quinoa as a grain crop or experimenting with it as an ornamental plant. The same cold-moist trick applies to other small seeds like amaranth or buckwheat, so you’ll have a go-to technique for future projects. Let’s get those seeds sprouting!
📚 In This Guide
- What you need
- Instructions
- Tips and common mistakes
- Wrapping up and next steps
What you need
- ● Quinoa seeds: ½ cup (organic, uncooked, and untreated—avoid pre-rinsed or flavored varieties).
- ● Growing container: A shallow tray, wide bowl, or mesh sprouting lid (6–8" diameter for ½ cup seeds).
- ● Cheesecloth or fine mesh: Large enough to cover your container (or a reusable sprouting lid).
- ● Rubber bands or clips: To secure the mesh in place.
- ● Water: Filtered or distilled (chlorine-free) at room temperature.
- ○ Spray bottle: For gentle misting (optional but helpful).
- ● Colander: For rinsing (if not using a mesh lid).
- ○ Paper towels or kitchen towel: To line the container for drainage (optional but reduces mess).
- ● Small fan or ventilation source: To promote airflow (especially in humid climates).
- ● Grow light (LED or fluorescent): If sprouting indoors without sunlight (12+ hours/day).
- ● Food processor or blender: For grinding seeds into quinoa flour (post-sprouting, if desired).
- ● A cool, dark space (55–65°F / 13–18°C) for the first 24–48 hours (e.g., fridge or basement).
- ● Access to indirect sunlight or a grow light after germination begins.
- ● Time commitment: 3–7 days total (depending on desired sprout length).
Step-by-step instructions for growing quinoa seeds
Here’s how to break the cold-moist method into simple, foolproof steps for quick germination.
🌱 Step 1: Soak Seeds in Cold Water for 12 Hours
Place the quinoa seeds in a clean bowl and cover them with cold, filtered water—enough to submerge them by 1 inch. Let them soak at room temperature (65-75°F) for 12 hours. This softens the seed coat and kickstarts germination faster than dry planting.
After soaking, drain the water completely through a fine-mesh strainer or cheesecloth. The seeds should feel plump but not mushy—if they’re still hard, give them another 4-6 hours in fresh water. Discard any seeds that float, as they won’t sprout.
💧 Step 2: Set Up a Moist Germination Tray
Line a shallow tray or dish with a damp paper towel or moistened germination mat—just enough moisture to keep the towel damp, not dripping. Spread the soaked quinoa seeds ½ inch apart in a single layer, avoiding overlaps. Cover the tray with another damp paper towel or a breathable cloth to maintain humidity.
Place the tray in a dark, warm spot (like a seedling heat mat set to 70-75°F). Check the moisture every 8 hours—spritz lightly with water if the towel feels dry to the touch. Within 24-48 hours, you’ll see tiny white roots emerge—this is your signal to move to light.
☀️ Step 3: Transition to Light and Monitor Growth
Once the roots reach ¼ inch long, uncover the tray and move it to bright, indirect light (a grow light 6 inches above works best). Quinoa seedlings need 12-14 hours of light daily to prevent leggy growth. Keep the paper towel moist but not soggy—excess water causes rot.
Within 5-7 days, you’ll see cotyledons (the first true leaves) unfurl. At this stage, transplant the seedlings into individual pots filled with well-draining potting mix. Handle them gently—they’re delicate but resilient once established.
⏰ Step 4: Harden Off and Transplant Outdoors
After 10-14 days of indoor growth, acclimate the seedlings to outdoor conditions by placing them in a shaded, sheltered spot for 1 hour daily, gradually increasing time over 5-7 days. Quinoa thrives in full sun but needs protection from harsh afternoon rays at first.
Transplant outdoors after the last frost when soil is at least 50°F. Space plants 12-18 inches apart in loose, fertile soil. Water deeply at the base—avoid wetting leaves to prevent fungal issues. You’ll harvest in 8-10 weeks, but the real reward is watching those first sprouts pop in just days.
Tips & tricks for perfect quinoa germination
Here's what I've learned to make quinoa germination faster and more reliable—these small details make all the difference.
Soaking Strategy: The 12-hour cold soak is non-negotiable for quinoa seeds, but here's the thing: if you're short on time, you can extend it to 24 hours for even better results. I've found that seeds soaked for 24 hours germinate up to 20% faster than the minimum 12-hour soak. Just make sure to use cold water—the warm water can cause uneven germination.
Moisture Management: During the germination stage, maintaining consistent moisture is critical. I recommend misting the paper towel every 8 hours with a spray bottle rather than soaking it—this prevents waterlogging while keeping the environment perfectly moist. Too much water causes rot, while too little slows germination. The seeds should feel damp to the touch but not wet.
Light Transition: When moving to light in Step 3, don't rush it—wait until roots reach ¼ inch. I've seen impatient gardeners move too soon, resulting in weak, leggy seedlings. Once you do transition, use a grow light positioned 6 inches above the tray. Quinoa needs that 12-14 hours of light daily to develop properly, so don't skimp on the light exposure.
Harden Off Gradually: The 10-14 day hardening off period is your seedlings' transition to outdoor life. I've learned to increase outdoor exposure by just 30 minutes every 2-3 days rather than the full hour increase—this gives them time to adjust. Watch for wilting as your indicator; if you see that, they're not ready for more sun exposure yet.
Pro Tips for Growing Quinoa Seeds
- Here's what I've learned to make quinoa germination faster and more reliable—these small details make all the difference.
- Soaking Strategy: The 12-hour cold soak is non-negotiable for quinoa seeds, but here's the thing: if you're short on time, you can extend it to 24 hours for even better results.
- Moisture Management: During the germination stage, maintaining consistent moisture is critical.
Frequently asked questions
about growing quinoa seeds—here’s what you need to know before getting started!How long does it take for quinoa seeds to sprout?
Quinoa sprouts typically emerge within 3–7 days when using the cold-moist method. Keep them in a dark, damp environment (like a jar with a breathable lid) and check daily. Once they reach ½-inch tall, they’re ready to transplant or harvest!
Can I grow quinoa seeds indoors without sunlight?
Yes! Quinoa seeds don’t need sunlight to sprout—just moisture and darkness for the first 2–3 days. After sprouting, move them to a sunny windowsill or under grow lights for 10–12 hours/day to encourage healthy growth. A south-facing window works best!
What if my quinoa seeds aren’t sprouting after a week?
Don’t worry—try these fixes:
- Check moisture: Seeds need to stay damp but not soggy. Rinse 1–2x/day if they dry out.
- Test viability: Soak a few seeds in water. If they sink, they’re likely good; if they float, they may be old or damaged.
- Warmth helps: Place the jar in a slightly warm spot (like near a heater) to speed up germination.
Can I use quinoa sprouts in cooking right after they grow?
Quinoa sprouts are nutrient-packed and ready to eat once they’re ½–1 inch tall. Enjoy them raw in salads, blend into smoothies, or lightly sauté for a protein boost. Just rinse thoroughly before consuming to remove any residual bitterness!
What’s the best container for growing quinoa seeds?
Any clean, breathable container works—try:
- A mason jar with a mesh lid or damp paper towel.
- A shallow tray lined with a damp paper towel or sprouting lid.
- A small pot with well-draining soil (if transplanting after sprouting).
Wrapping up and next steps
Growing quinoa seeds with cold-moist prep is a rewarding way to kickstart your garden—whether you're a seasoned green thumb or just starting out! 🌱 With the right setup, you’ll enjoy fast, reliable sprouts that thrive in containers. Now that you’re armed with the knowledge, why not take the next step? Try this method this weekend, and soon you’ll be harvesting nutrient-packed quinoa for salads, soups, or even homegrown grains.
Happy growing!