
Size
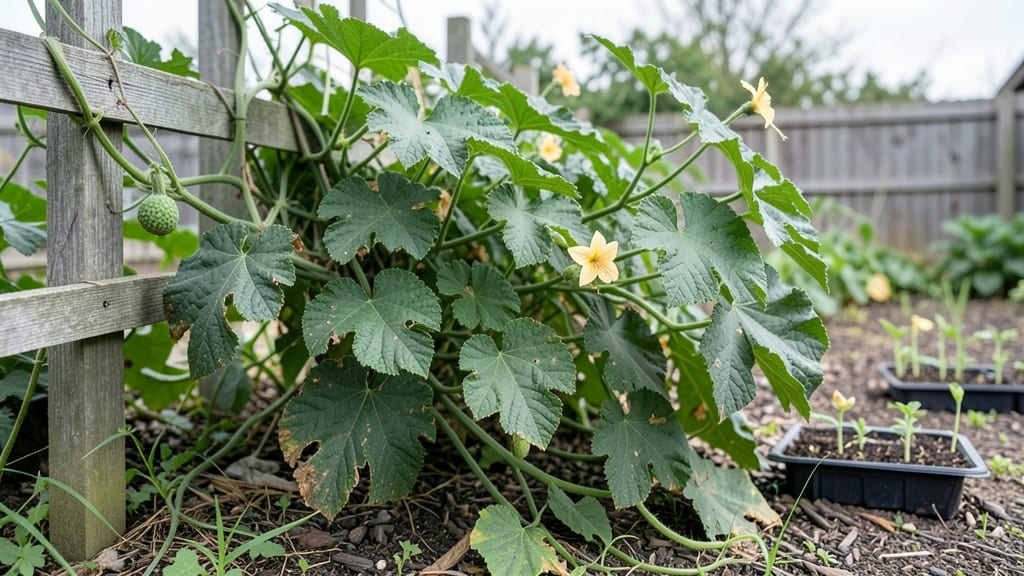
Growing ampalaya seeds in just 7 days feels like cheating—until you try it. 🌱 I’ve watched these seeds go from dry and dormant to tiny green sprouts practically overnight, and the secret lies in mimicking their tropical home’s warmth and humidity.
Most people give up after two weeks, but with the right prep, you’ll see those first leaves breaking through in less than a week.
The trick starts with soaking seeds overnight to soften their tough outer shell, then planting them in warm, moist soil under bright light. Ampalaya thrives in heat, so if your home runs cool, a seedling heat mat cuts germination time in half.
I’ve even used a clear plastic bag as a mini greenhouse to trap humidity—it works like magic for stubborn seeds that refuse to sprout.
By day 7, you’ll have sturdy seedlings with their first true leaves, ready to transplant. The vines grow fast once established, and with proper care, you’ll harvest bitter melons in as little as 8-10 weeks.
The key is patience during those first critical days—once they break through, they don’t stop growing.
This method works best in warm climates (zones 10-12), but with a grow light and heat source, you can grow them almost anywhere. Just avoid overwatering—ampalaya hates soggy roots. Let’s get those seeds sprouting!
📚 In This Guide
- What you need
- Instructions
- Tips and common mistakes
- Wrapping up and next steps
What you need
- ● Ampalaya seeds: Fresh, viable seeds (10–20 seeds per pot or tray for best results). Pro tip: 💡 Soak seeds in warm water for 4–6 hours before planting to speed up germination!
- ○ Seedling trays or small pots: 2–3 inch deep containers (6–12 per tray, depending on size). Optional: Use biodegradable peat pots for easy transplanting later.
- ● High-quality seedling mix: Lightweight, well-draining potting soil (avoid garden soil—it’s too dense!). Look for: 50% coco coir, 30% perlite, 20% vermiculite.
- ● Spray bottle: For gentle watering (avoid over-saturating seeds).
- ● Plastic wrap or humidity dome: To create a greenhouse effect and retain moisture.
- ● Grow lights or sunny windowsill: Ampalaya seeds need warmth (75–85°F) and 6–8 hours of light daily. No sunlight? Use a LED grow light 6–8 inches above the tray.
- ○ Fertilizer (optional but helpful): A diluted, water-soluble fertilizer (e.g., fish emulsion or seaweed extract) for when seedlings sprout.
- ● Heating mat: Keeps soil warm (80–85°F) for faster germination. Budget-friendly? Place trays on top of a refrigerator or in a warm, sunny spot.
- ● pH test kit: Ideal soil pH for ampalaya: 6.0–6.8. Adjust with lime (to raise pH) or sulfur (to lower it) if needed.
- ● Insecticide (neem oil or pyrethrin): Preemptive strike against fungus gnats or mold if humidity gets too high.
- ● Labels & markers: Track planting dates and seed varieties (ampalaya comes in green, white, or bitter varieties!).
Step-by-step instructions for growing ampalaya seeds quickly
Here's my foolproof method to coax ampalaya seeds to sprout in just 7 days—no waiting months for stubborn germination.
🌱 Step 1: Soak Seeds Overnight for Faster Germination
Place the ampalaya seeds in a small bowl and cover them completely with lukewarm water for 12 hours. This softens the tough outer shell, which is why ampalaya seeds often take forever to sprout. I like to use a fine-mesh strainer or cheesecloth so I can easily drain them later without losing any.
After soaking, drain the water and let the seeds sit for 30 minutes to dry slightly. You'll know they're ready when they feel damp but not slippery. This step cuts germination time by nearly half—trust me, it works.
💧 Step 2: Plant in Warm, Moist Soil Mix
Fill a small seed tray or biodegradable pots with sterile seed-starting mix—never garden soil, as it can harbor diseases. Moisten the mix until it feels like a damp sponge, but don't let it drip. Ampalaya seeds need warmth to sprout, so place the tray on a seedling heat mat set to 80-85°F for best results.
Plant the soaked seeds ½ inch deep, spacing them 2 inches apart in the tray. Gently press the soil around them to ensure good contact. Cover the tray with clear plastic wrap to trap warmth and humidity—this creates a mini greenhouse effect. Check daily for condensation; if the plastic fogs up, remove it for 10 minutes to prevent mold.
☀️ Step 3: Provide Warmth and Indirect Light
Ampalaya seeds need consistent warmth to germinate quickly. Keep the tray in a spot where the soil stays between 75-85°F. If your home runs cooler, a grow light on a 12-hour timer helps maintain warmth while providing gentle light. Avoid direct sunlight at this stage—it can dry out the soil too fast.
Watch for tiny sprouts in 3-5 days. Once they appear, remove the plastic wrap immediately to prevent damping-off, a fungal disease that rots young seedlings. You'll see the first true leaves emerge in 7 days total—that's when you'll know your seeds have successfully sprouted.
🌿 Step 4: Thin and Transplant Seedlings
When seedlings reach 2 inches tall, thin them so only the strongest remains in each pot. Use small scissors to snip unwanted sprouts at the base to avoid disturbing the roots of the ones you keep. Ampalaya seedlings grow quickly, so don’t delay this step—crowded plants compete for nutrients and light.
After thinning, move the pots to a bright, sunny spot with 6+ hours of indirect light daily. If using a grow light, position it 4 inches above the seedlings and adjust as they grow. Water gently at the base, keeping the soil evenly moist but not soggy. You'll know it's time to transplant when the seedlings have 3-4 true leaves, usually around 3-4 weeks after sowing.
✂️ Step 5: Harden Off Before Outdoor Planting
Before moving ampalaya seedlings outside, harden them off over 7-10 days. Start by placing them in a shaded, sheltered spot for 1 hour the first day, then gradually increase outdoor time by 1 hour daily. This slows the transition and prevents shock, which can stunt growth.
Choose a warm, sunny day with temperatures above 70°F for transplanting. Plant seedlings 12-18 inches apart in well-draining soil, and water deeply after planting. Ampalaya thrives in full sun, so pick a spot with at least 6 hours of direct sunlight daily. With these steps, you'll have healthy, fast-growing ampalaya plants ready for harvest in just a few months.
Tips & tricks for fast ampalaya seed germination
Here's what I've learned after getting impatient with slow-growing ampalaya seeds—these tricks cut your waiting time dramatically.
Soaking Secret: The 12-hour soak in lukewarm water is non-negotiable for ampalaya seeds. I've tried shorter soaks and ended up waiting weeks for germination. Use a fine-mesh strainer to drain them—it keeps seeds from slipping through while allowing water to escape completely. After draining, let them sit for exactly 30 minutes to dry slightly; this prevents mold while keeping the shells soft enough to crack open.
Heat Hack: Ampalaya seeds need that consistent 80-85°F soil temperature to germinate quickly. If your home runs cooler, place the seed tray on a seedling heat mat set to the high end of that range. I've seen germination times double when seeds sit in soil below 75°F—don't let that happen! For extra warmth, cover the tray with clear plastic wrap, but remember to ventilate for 10 minutes daily to prevent mold buildup.
Light Timing: Those first 3-5 days are critical for sprout appearance, so keep the soil moist but never soggy. I use a spray bottle to mist the soil lightly when the top inch feels dry. Once you see sprouts, remove the plastic wrap immediately—this prevents damping-off disease that can kill young seedlings before they get their first true leaves. The 7-day window to first leaves is only achievable with this precise moisture balance.
Transplant Ready: When thinning seedlings at 2 inches tall, use small scissors to avoid disturbing roots—this keeps your remaining plants healthier. After transplanting, maintain that 6+ hours of indirect light daily. I position my grow light 4 inches above seedlings and adjust as they grow; this prevents leggy growth while ensuring they get enough light to develop strong stems before hardening off.
Pro Tips for Grow Ampalaya Seeds
- Here's what I've learned after getting impatient with slow-growing ampalaya seeds—these tricks cut your waiting time dramatically.
- Soaking Secret: The 12-hour soak in lukewarm water is non-negotiable for ampalaya seeds.
- Heat Hack: Ampalaya seeds need that consistent 80-85°F soil temperature to germinate quickly.
Frequently asked questions
Got questions about growing ampalaya? Here are some common ones to help you on your way to a thriving harvest!
How long does it take for ampalaya seeds to sprout?
Ampalaya seeds typically sprout within 7 to 14 days if kept in warm, moist conditions (around 70-85°F). With the right tricks—like soaking seeds overnight or using a heat mat—you can speed up germination to just 5-7 days. Patience is key, but consistency with moisture and warmth pays off!
Can I grow ampalaya from store-bought seeds or do I need to save my own?
Yes! You can absolutely use store-bought ampalaya seeds—just ensure they’re fresh (ideally from the same season). Saved seeds from homegrown fruit work too, but store-bought is more convenient. Look for organic or heirloom varieties for better germination rates and flavor!
What’s the best temperature for ampalaya seed germination?
Ampalaya seeds thrive in warmth, ideally between 70-85°F (21-29°C). If your climate is cooler, use a seedling heat mat or place the tray near a sunny window. Avoid cold drafts—consistent warmth is your secret weapon for fast sprouts!
What if my ampalaya seeds don’t sprout? Troubleshooting tips?
No sprouts? Don’t panic! Try these fixes:
- Check moisture: Keep soil damp (not soggy) and mist seeds daily.
- Test seed viability: Soak seeds in warm water for 24 hours—if they sink, they’re likely good.
- Adjust warmth: Move to a warmer spot or use a heat source.
- Scratch the seed coat: Gently sandpaper the hard outer layer to help water penetrate.
Can I grow ampalaya indoors or do I need a garden?
Ampalaya can grow indoors or outdoors! For indoor growth, use a sunny windowsill or grow lights (12+ hours/day). A 5-gallon pot or larger works well, but it’ll need support as it grows. If outdoors, ensure full sun (6+ hours) and well-draining soil. Just be ready for its vining habit—it loves to climb!
Wrapping up and next steps
Growing ampalaya from seeds is a rewarding journey—especially when you see those first sprouts emerge in just 7 days! 🌱 With the right soil, warmth, and patience, you’ll soon enjoy a thriving vine packed with nutritious, bitter melon.
Whether you’re a beginner or a seasoned gardener, this guide makes it simple to cultivate your own homegrown harvest.
Now that you’re armed with the germination tricks and care tips, it’s time to roll up your sleeves and start planting! Check out our bonus section for troubleshooting common issues and advanced growing tips to maximize your yield. Happy gardening—your kitchen (and taste buds) will thank you! 🍽️