
Picking
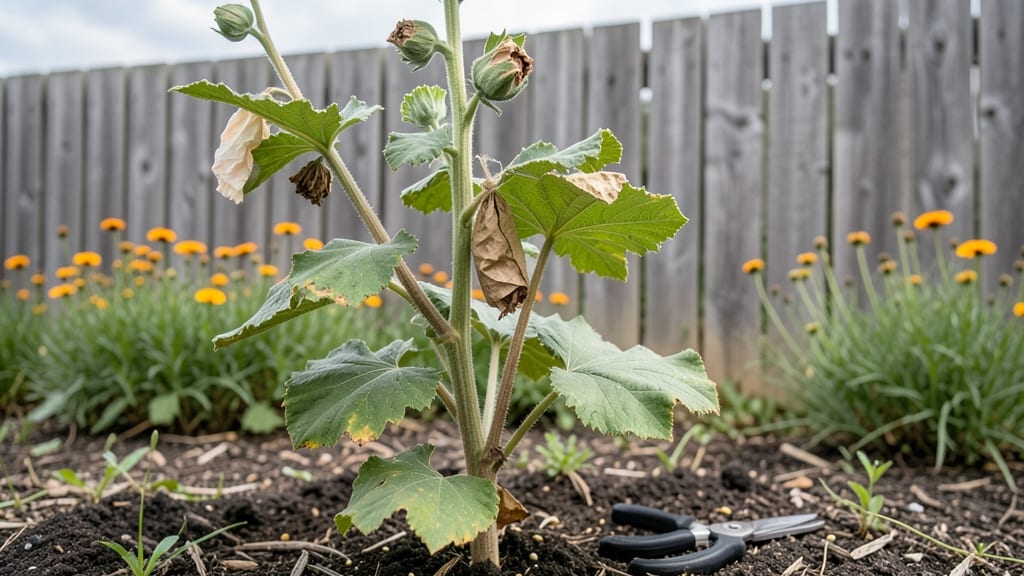
Harvesting hollyhock seeds at the perfect moment means next year’s garden will burst with those towering, velvety blooms again. 🌿 I’ve learned the hard way that waiting too long or picking too soon ruins everything—so let’s get this right.
The key is watching for those seed pods to turn completely brown and papery, which usually happens in late summer or early fall, depending on your climate.
You’ll need just a few simple things: a pair of clean pruning shears, a paper bag or envelope for storage, and a sunny day to work. Once the pods are dry, gently twist or snip them open—don’t crush them, or the seeds inside scatter like confetti.
If you’re dealing with stubborn pods, let them dry indoors for another day or two before trying again.
The payoff? A stash of seeds that’ll sprout into hollyhocks just as stunning as the ones you grew this season. Store them in a cool, dry place, and they’ll stay viable for up to three years.
Just imagine: next summer, you’ll be pinching back those same heirloom varieties, knowing you saved them yourself.
Fair warning: some pods might crack open before you’re ready, spilling seeds everywhere. If that happens, just scoop them up and store them separately—they’ll still grow! Now, let’s make sure your hollyhocks keep coming back year after year.
📚 In This Guide
- What you need
- Instructions
- Tips and common mistakes
- Wrapping up and next steps
What you need
- ● Mature hollyhock plants (with fully ripened seed pods—look for brown, dried pods that easily split open)
- ● Sharp pruning shears or garden scissors (for clean cuts without damaging stems)
- ● Paper grocery bags or breathable seed-saving envelopes (1–2 bags per plant, depending on pod size)
- ● Labeling tags or masking tape + marker (to jot down plant varieties and harvest dates)
- ● A flat tray or clean workspace (for drying and sorting seeds)
- ● Fine-mesh sieve or colander (to separate seeds from chaff and debris)
- ○ Drying rack or mesh screen (optional but helpful for airflow)
- ● Small paper towels or newspaper (for cleanup and seed drying)
- ● Desiccant packets (to absorb excess moisture in seed storage containers)
- ● Glass jars with airtight lids (for long-term seed storage—label clearly!)
- ● Handheld fan or dehumidifier (if your climate is very humid)
- ● Magnifying glass (to inspect seed viability before planting)
- ● Digital scale (to track seed weight for germination tests)
Step-by-Step instructions for harvesting hollyhock seeds
Here’s how to collect seeds from your hollyhocks so you can grow next year’s vibrant blooms.
🌱 Step 1: Identify and Select Mature Seed Pods
Wait until the flower petals have fallen completely and the seed pods turn from green to a dry, papery brown. These pods should feel slightly crisp when touched—if they’re still soft, they’re not ready. Hollyhocks produce long, slender pods that resemble dried beans. Harvest them on a dry day, ideally in the morning when dew has evaporated.
Gently twist the pod from the stem or use clean pruning shears to snip it off. Avoid pulling too hard, as this can damage the plant. I like to harvest a few pods at a time, leaving some on the plant to ensure a good seed yield. If left too long, the pods may split open and scatter seeds before you’re ready.
⏰ Step 2: Dry the Seed Pods Properly
Spread the harvested pods on a clean, dry surface in a well-ventilated area, away from direct sunlight. A mesh screen or an old window screen works perfectly. Let them dry for about 1-2 weeks until they’re completely brittle. You’ll know they’re ready when they rattle loudly when shaken—this means the seeds inside are fully mature.
If you’re in a humid climate, drying may take longer. A fan on low speed can help speed up the process without damaging the pods. Avoid using a dehydrator or oven, as the heat can scorch the seeds and reduce their viability. Once dry, the pods will split open easily, releasing the seeds inside.
✂️ Step 3: Extract and Clean the Seeds
Once the pods are fully dry, place them in a paper bag and gently crush them with your hands or a rolling pin. This will release the small, dark seeds inside. Shake the bag to separate the seeds from the chaff. Hollyhock seeds are tiny and flat, often with a slightly rough texture. I find it easiest to sift them through a fine-mesh strainer to remove any remaining debris.
Store the cleaned seeds in an airtight container, such as a small glass jar or envelope, and keep them in a cool, dry place. Properly stored, hollyhock seeds remain viable for 2-3 years, though they’re best used within the first year for the highest germination rate. Label the container with the variety and harvest date to keep track.
💧 Step 4: Prepare Seeds for Planting (Optional)
Hollyhock seeds benefit from a brief cold stratification process to mimic winter conditions, which can improve germination. Place the seeds in a sealed plastic bag with a damp paper towel, then refrigerate for 4-6 weeks. After stratification, plant the seeds ¼ inch deep in well-draining soil during early spring or late summer.
Keep the soil consistently moist but not soggy until germination, which typically occurs in 2-4 weeks. Thin seedlings to 12-18 inches apart once they’re a few inches tall to give them room to grow. This step ensures stronger, healthier plants next season.
Tips & tricks for perfect hollyhock seed harvesting
Here's what I've learned after harvesting hollyhock seeds for years—these little tricks make all the difference for healthy germination.
Timing is Everything: In Step 1, when checking for mature pods, look for that papery brown color and crisp texture. I've learned to harvest on a dry morning because dew can make pods feel damp, tricking you into thinking they're not ready. If you're unsure, wait one more day—underripe pods won't yield viable seeds.
Drying Secrets: During the 1-2 week drying period in Step 2, I've found that placing pods near a window with indirect sunlight speeds up the process without risking heat damage. The rattling test is foolproof—if they don't rattle, they're not ready. In humid climates, I add a small fan on low to circulate air without disturbing the pods.
Seed Extraction Hack: For Step 3, I've discovered that freezing the dried pods for 24 hours before crushing makes them even more brittle, releasing seeds more easily. After crushing, I use a clean white paper plate to shake out the seeds—they stand out clearly against the chaff. This method saves time and reduces waste.
Storage Wisdom: When storing seeds for up to 3 years, I add a small packet of silica gel with the seeds in their container. This extra step keeps moisture at bay, especially important if your storage area gets damp. Always label with the harvest date—varieties like 'Black Knight' and 'Lady Jane' have different germination rates.
Pro Tips for Harvest Hollyhock Seeds
- Here's what I've learned after harvesting hollyhock seeds for years—these little tricks make all the difference for healthy germination.
- Timing is Everything: In Step 1, when checking for mature pods, look for that papery brown color and crisp texture.
- Drying Secrets: During the 1-2 week drying period in Step 2, I've found that placing pods near a window with indirect sunlight speeds up the process without risking heat damage.
Frequently asked questions
Got questions about harvesting hollyhock seeds? You’re not alone! Here are some of the most common queries—and their straightforward answers—to help you master the process like a pro.
When is the best time to harvest hollyhock seeds?
The ideal time is when the seed pods turn brown and dry but before they split open—usually late summer to early fall. If you wait too long, seeds scatter, and you lose your harvest! Check pods daily in the last weeks of bloom for readiness.
How long does it take for hollyhock seeds to mature?
Seed pods typically take 6–8 weeks to mature after flowering. However, this varies by variety and climate—cooler regions may need extra time. Watch for pods that crunchle when squeezed lightly; that’s your cue!
What if my hollyhock pods won’t open naturally?
If pods stay stubbornly closed, don’t force them—they’ll release seeds on their own when fully dry. For a head start, place pods in a paper bag and store them in a warm, dry spot for 1–2 weeks. Shake gently to encourage seed release.
Can I harvest seeds from hybrid hollyhocks?
Hybrid hollyhocks (like ‘Black Night’ or ‘Peach Blow’) won’t grow true to type from seeds—they’re often sterile or produce unpredictable offspring. Stick to heirloom varieties (e.g., ‘Chater’s Double’) for reliable seed harvests and consistent blooms next season.
How should I store harvested hollyhock seeds?
Once dry, store seeds in a cool (35–40°F), dark, and dry place (like a seed envelope or jar with silica packets). Label them with the variety and date—hollyhock seeds stay viable for 2–4 years if stored properly!
Wrapping up and next steps
Harvesting hollyhock seeds is a rewarding way to preserve your favorite varieties and share their beauty with others!
By following these simple steps—waiting for the pods to mature, using the right tools, and storing seeds properly—you’ll ensure strong germination for next season’s blooms. Now that you’re equipped with the know-how, why not plant a few seeds and watch your garden grow even more vibrant? 🌱
Ready to take it further? Experiment with seed-saving techniques or explore companion planting to enhance your hollyhock’s growth—happy gardening!