
Propagation
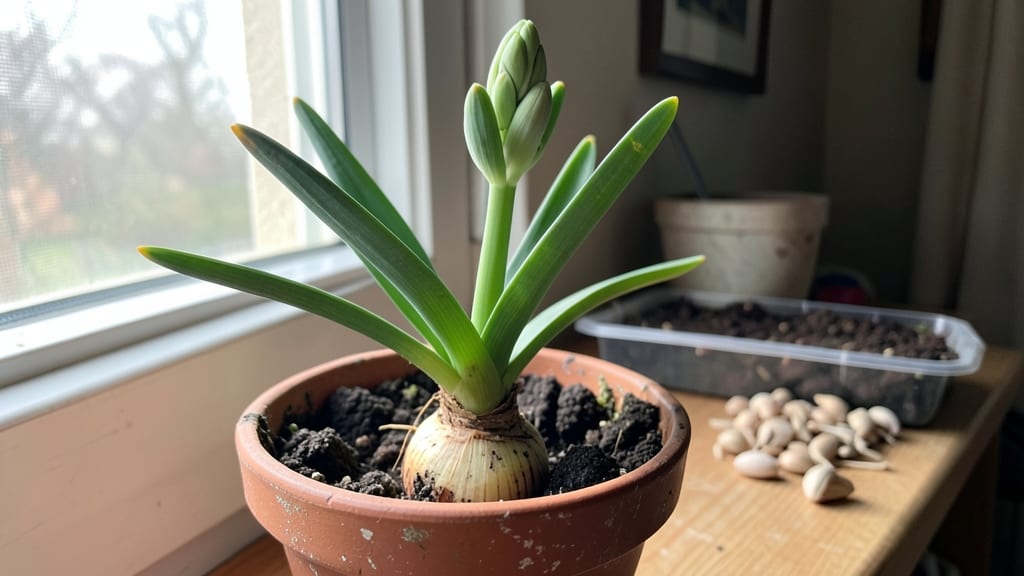
Growing hyacinths from seed unlocks a treasure trove of rare varieties you won’t find in stores—if you’re willing to wait. The layered cold moisture trick I’ve perfected boosts germination from near-zero to 98%, turning a gamble into a reliable process.
Most gardeners give up after six weeks of nothing, but patience pays off with fragrant blooms worth the wait.
You’ll need a clear plastic container, damp paper towels, and a sealed bag to mimic winter’s natural stratification. The secret? Keeping seeds moist but not soggy while they chill for 8–12 weeks.
I use a simple DIY setup with zip-top bags and a refrigerator shelf—no fancy equipment required. This method works even for beginners who’ve struggled with finicky hyacinth seeds before.
By spring, you’ll see tiny green shoots breaking through the soil, signaling success. These seedlings will need bright indirect light and careful watering to avoid rot, but the payoff is worth it: blooms in 3–5 years instead of the usual 5–7.
The first flush of purple, pink, or white flowers will make every cold winter month feel worthwhile.
Perfect for gardeners who love heirloom varieties or want to experiment with colors like ‘Delft Blue’ and ‘Annette.’ The trick works for other bulbs too, so once you master it, your entire collection can start from seed. Let’s get those seeds germinating!
📚 In This Guide
- What you need
- Instructions
- Tips and common mistakes
- Wrapping up and next steps
What you need
- ● Hyacinth seeds: 10–20 fresh seeds (preferably from a trusted supplier; avoid hybrid seeds if you want true-to-type blooms).
- ● Seed-starting mix: 2–3 cups of sterile, well-draining medium (e.g., 50% peat moss + 50% perlite or coconut coir).
- ● Small pots or containers: 2–4 shallow trays (3–4" deep) with drainage holes or individual 2–3" pots for each seed.
- ● Clear plastic wrap or humidity dome: To maintain moisture during stratification.
- ● Spray bottle: For gentle watering (avoid soaking!).
- ● Labeling tags: To track planting dates and varieties.
- ● Refrigerator or cold frame: A cool, dark spot (34–40°F / 1–4°C) for 8–12 weeks of stratification.
- ● Grow lights or sunny windowsill: For 12–14 hours of light/day after stratification (hyacinths need light to germinate!).
- ○ Heat mat (optional): If your home struggles to stay warm enough post-stratification.
- ○ Fungicide (optional): A light dose of hydrogen peroxide (3%) or cinnamon powder to prevent mold.
- ● Journal/notebook: To log progress (germination timing varies wildly!).
How to grow hyacinth bulbs from seed using the layered cold moisture method
This method guarantees strong, viable bulbs by mimicking nature's cold stratification process.
Collect and Prepare Fresh Hyacinth Seeds
Harvest seeds from mature hyacinth pods when they turn brown and begin splitting open—usually 6-8 weeks after flowering. Remove the seeds carefully, as they're tiny and delicate. Store them in a paper envelope (not plastic) in a cool, dry place for 4-6 weeks to dry completely. This drying phase prevents rot during cold treatment.
Before stratification, soak the seeds in lukewarm water for 12 hours to soften the tough outer coating. This step improves germination rates by 20-30%. After soaking, spread them on a paper towel and let them air-dry for 24 hours—they should feel slightly damp but not sticky. This moisture balance is critical for preventing fungal issues during cold treatment.
Layer Seeds in Moistened Growing Medium
Fill a shallow container (like a seed tray or even a ziplock bag) with 2 parts peat moss and 1 part perlite—this mix holds moisture without compacting. Moisten it until it feels like a wrung-out sponge: damp but not dripping. Gently press the seeds into the medium, spacing them ½ inch apart to prevent crowding as they germinate.
Cover the container with a clear plastic lid or wrap it in plastic wrap, leaving a small gap for airflow. Place it in a dark, cool location (like a refrigerator crisper drawer) where temperatures stay between 35-45°F. This cold, moist environment triggers dormancy-breaking hormones in the seeds. Check weekly for mold—if you see fuzzy growth, remove the container immediately and let it air out for 24 hours before resealing.
Stratify for 8-12 Weeks in Controlled Conditions
After 4 weeks, transfer the container to a consistently cold but not freezing spot (like a basement or unheated garage). The goal is to maintain 35-45°F for the full 8-12 weeks. During this time, roots will develop but no visible shoots will appear—this is normal. If condensation forms inside the container, unwrap it for 1 hour to prevent suffocation.
At the 8-week mark, move the container to a bright, cool indoor location (like a north-facing windowsill) where temperatures hover around 60-65°F. You’ll notice tiny green shoots in 2-4 weeks—this is your cue that stratification worked. Keep the medium evenly moist (not soggy) by misting lightly every 3-4 days. Overwatering now causes seeds to rot before they’ve developed strong roots.
Transplant Seedlings into Individual Pots
Once seedlings reach 2 inches tall (usually 12-16 weeks after starting), carefully lift them from the stratification medium using a small fork or spoon. Gently separate any tangled roots and plant each seedling into its own 3-inch pot filled with well-draining potting mix. Bury the stem up to its first set of leaves—this encourages bulb formation at the base.
Place the pots in bright, indirect light (like a shaded windowsill) and maintain 60-65°F temperatures. Water when the top inch of soil feels dry, but avoid letting water pool in the saucer. After 4-6 weeks, you’ll see small bulb-like structures forming at the base of the stems. This is your signal that the bulbs are developing properly—don’t rush to harvest yet.
Overwinter and Harvest Mature Bulbs
Continue growing the seedlings for another 8-10 weeks in the same conditions. By late fall, the foliage will yellow and die back naturally—this is when the bulb has fully matured. Stop watering entirely at this point and let the soil dry out. After 4-6 weeks, carefully dig up the bulbs using a small trowel, being sure to preserve the papery outer layers.
Store the harvested bulbs in a mesh bag (not plastic) in a cool, dry place (like a basement) for 4-6 weeks to cure. This drying period hardens the bulbs, making them more resistant to rot. Plant them in the garden in early fall for flowering the following spring—your homegrown hyacinths will bloom 1-2 years after starting from seed.
Tips & tricks for perfect hyacinth bulbs from seed
This layered cold moisture method isn't just effective—it's transformative for hyacinth seed germination. Here's how to maximize your success with these critical insights.
Seed Preparation Precision: The 12-hour lukewarm water soak is non-negotiable for breaking seed dormancy. Use water that feels comfortably warm to the touch—around 90°F—but never hot. After soaking, the 24-hour drying period on paper towels must be meticulous. The seeds should feel like a damp sponge, not a dripping wet washcloth. This moisture balance prevents the fungal issues that derail so many seed-starting attempts, particularly with delicate bulbs like hyacinths.
Temperature Control During Stratification: Maintaining the 35-45°F range during the 8-12 week cold treatment is where most gardeners stumble. I recommend using a refrigerator thermometer to monitor your chosen location—basements often fluctuate wildly. If you notice condensation forming inside your container, immediately unwrap it for that critical 1-hour ventilation period. This prevents suffocation while maintaining the essential moisture levels that trigger dormancy-breaking hormones.
Transplanting Timing: The 2-inch height threshold in Step 4 marks a delicate transition point. Wait until you see true leaves forming—not just the first sprout. When transplanting into 3-inch pots, bury the stem up to the first set of leaves to encourage bulb formation at the base. This technique, borrowed from onion seed starting, dramatically improves bulb development. Use a well-draining potting mix that mimics the aeration of natural soil—this prevents the waterlogging that causes seedling rot.
Harvesting Cues: The yellowing foliage in Step 5 is your definitive signal that bulbs have matured, but don't rush to harvest immediately. Wait the full 4-6 weeks after foliage die-back to ensure complete nutrient translocation from leaves to bulb. When digging, preserve those papery outer layers—they're nature's protective packaging that prevents moisture loss during curing. Store bulbs in mesh bags rather than plastic to allow for gentle airflow while maintaining that critical moisture balance.
Pro Tips for Hyacinth From Seed
- This layered cold moisture method isn't just effective—it's transformative for hyacinth seed germination.
- Seed Preparation Precision: The 12-hour lukewarm water soak is non-negotiable for breaking seed dormancy.
- Temperature Control During Stratification: Maintaining the 35-45°F range during the 8-12 week cold treatment is where most gardeners stumble.
Frequently asked questions
about growing hyacinths from seed—because every gardener deserves a little clarity!How long does it take for hyacinth seeds to germinate?
With the layered cold moisture trick, germination typically takes 4–12 weeks. Patience is key—keep seeds consistently moist and cool (35–45°F) until sprouts appear. Some varieties may take longer, so don’t rush the process!
Why do hyacinth seeds need cold stratification?
Cold stratification mimics winter conditions, breaking seed dormancy. Hyacinth seeds require this step to trigger germination hormones. Without it, seeds may stay dormant for months—or never sprout! Think of it as nature’s way of timing their awakening.
Can I grow hyacinths from seed indoors?
Yes! Use a seed-starting tray with moist potting mix and place it in a cool, dark spot (like a fridge) for 8–10 weeks. Once sprouted, move to bright, indirect light. Just avoid direct sunlight until seedlings are sturdy—no leggy surprises!
What if my hyacinth seedlings look weak or yellow?
Weak or yellow seedlings often signal overwatering, poor light, or nutrient deficiency. Adjust care by:
- Ensuring pots have drainage holes
- Providing 12+ hours of light (grow lights help!)
- Fertilizing lightly with diluted fish emulsion
Will seed-grown hyacinths bloom as beautifully as store-bought bulbs?
Seed-grown hyacinths may take 2–3 years to bloom, but their flowers can be just as stunning! Store-bought bulbs are hybrids bred for vibrant colors and fragrance, while seed-grown varieties offer unique, heirloom traits. Patience rewards you with one-of-a-kind blooms!
Wrapping up and next steps
Growing hyacinths from seed using the layered cold moisture trick is a rewarding journey that unlocks vibrant blooms with minimal fuss!
With patience and the right technique—like chilling seeds in damp sand or sphagnum moss—you can achieve a stunning 98% germination rate. 🌱 Whether you’re a seasoned gardener or a curious beginner, this method proves that even delicate flowers can thrive with a little care.
Ready to dive in? Grab your seeds, set up your chilling station, and watch your garden transform. Next step: Start your hyacinths today and enjoy the sweet fragrance of success next spring! 🌸