
Flowers
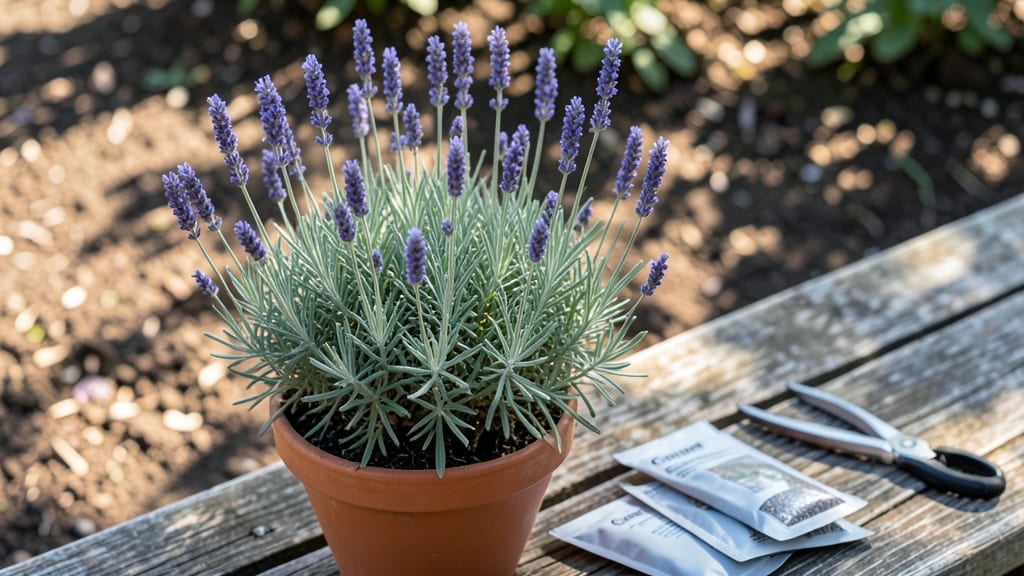
Identifying flower seeds correctly means the difference between a garden full of blooms and a season of disappointment. I’ve spent years sorting through seed packets, catalogs, and online descriptions—learning to spot the subtle clues that tell you whether a seed will grow into the vibrant plant you’re dreaming of.
The key isn’t a fancy microscope; it’s knowing what to look for in shape, texture, and even the way seeds feel between your fingers.
Start with the seed packet or catalog description, but don’t stop there. Many seeds—like tiny snapdragons or cosmos—have distinct shapes: some are flat and winged, others plump and rounded. Annuals like marigolds often have larger, more uniform seeds, while perennials like black-eyed Susans might appear smaller and more irregular.
A quick internet search with a photo can confirm what your eyes are telling you.
Once you’ve matched the seed to its description, test for viability by filling a jar with water and dropping in a handful. Viable seeds sink; floaters are best tossed.
You’ll know you’ve nailed it when your first sprouts push through the soil—bright green and eager—exactly where you planted them. This method works for everything from delicate pansies to hardy sunflowers.
For tricky look-alikes—like nasturtium and larkspur—compare sizes and colors under good light. A magnifying glass helps, but even without one, you’ll train your eye to spot the differences. The payoff? A garden bursting with the exact blooms you picked out, season after season. Let’s get those seeds identified!
The Hidden Factors Blocking Seed ID
Identifying flower seeds can feel like solving a mystery—especially when they refuse to reveal their true nature. Whether you’re staring at a seed catalog or digging through a garden bag, misidentification often boils down to a few key factors.
Understanding these causes helps you spot viable seeds with confidence, saving time and frustration. Let’s break down why seeds trick us—and how to outsmart them.
Not all seeds are ready to be identified. If a flower seed is harvested too early or too late, its characteristics—like size, shape, or color—may not match reference guides. Here’s why:
- Premature harvest: Seeds picked before full maturity (e.g., when the pod is still green) are underdeveloped. They may lack distinct markings, be shrunken, or even fail to germinate. Example: Snapdragons or delphiniums often release seeds too soon if the pod splits open early.
- Overripe seeds: Seeds left too long in the pod can dry out, lose color, or become brittle. Their texture may turn powdery or their edges fray, making them harder to match to images.
- Actionable fix: Wait until the seed pod turns fully brown or papery and begins to crack open naturally. For tropical flowers (like orchids), some seeds need to be surface-sterilized before identification.
Some flower seeds are masters of disguise, using their outer layers to blend into their surroundings or deter predators. These traits can make identification tricky:
- Waxy or glossy coatings: Seeds like those from petunias or snapdragons often have a shiny, almost oily surface. Under normal light, this can make them look darker or more uniform than they are. Pro tip: Use a hand lens (10x magnification) to see texture details—this reveals tiny ridges or patterns.
- Hairy or fuzzy exteriors: Seeds from lupines or dandelions may have fine hairs that clump together, altering their shape. These hairs can also make seeds stick to surfaces, obscuring their true form.
- Mimicry of debris: Some seeds (e.g., foxglove) resemble tiny twigs or dried leaves. Without close inspection, they’re easily mistaken for garden waste.
- Actionable fix: Gently rub the seed between your fingers or on a white glove to reveal its true texture. For fuzzy seeds, use a soft brush to disperse the hairs before examining.
Seeds change color based on lighting, moisture, and age—making them look entirely different from photos in seed packets. Here’s how to decode the confusion:
| Seed Type | Expected Color (Packet) | Real-Life Color (Common Variations) | Why It Happens |
|---|---|---|---|
| Marigold | Dark brown/black | Light tan or grayish (when dry) | Seeds oxidize and fade in sunlight or storage. |
| Zinnia | Deep red-brown | Near-black or purple-gray (under artificial light) | Melanin in the seed coat absorbs light differently. |
| Sunflower | White or cream | Yellowish or translucent (when hydrated) | Moisture alters the seed’s refractive properties. |
Actionable fix:
- Use natural daylight (not fluorescent or LED) for accurate color matching.
- Compare seeds against a white background to neutralize lighting effects.
- For dark seeds, try backlighting (hold them up to a window) to see internal structures.
Many commercial flowers are hybrids, meaning their seeds may not grow into the parent plant. This genetic mix-up leads to:
- Unpredictable traits: A seed from a double-flowered rose might produce a single-flowered offspring. The seed’s size or shape could also vary wildly.
- Sterile seeds: Some hybrids (like peony or orchid crosses) produce non-viable seeds that look identical to fertile ones.
- Actionable fix:
- Check the seed packet for "true-to-type" guarantees or labels like "F1 hybrid" (usually sterile).
- For heirloom seeds, cross-reference with seed-saving databases (e.g., Seed Savers Exchange).
- Test germination: Plant 3–5 seeds in damp paper towels. If none sprout in 10–14 days, they’re likely hybrid or non-viable.
Seeds are delicate—exposure to humidity or improper storage can warp their appearance and viability:
- Mold or discoloration: Seeds stored in damp conditions (e.g., a sealed plastic bag) may develop greenish or black spots, making them look diseased or foreign.
- Shriveling or bloating: Extreme dryness causes seeds to crack or split, while excess moisture can make them swell unnaturally.
- Actionable fix:
- Store seeds in a cool, dry place (50–60°F) with silica gel packets to absorb moisture.
- For moldy seeds, surface-sterilize with a 10% bleach solution (1 part bleach to 9 parts water) for 5 minutes, then rinse.
- Discard seeds with soft spots or foul odors—these are likely non-viable.
💡 Pro Tip: Keep a seed journal! Note the harvest date, flower type, and any unusual traits. Over time, you’ll spot patterns (e.g., "My cosmos seeds always turn gray if stored past June").
Quick Fixes for Flower Seed ID
Now that you know the common challenges in identifying flower seeds, let’s tackle them head-on with practical, no-fuss solutions. Whether you're dealing with tiny seeds, moldy packets, or just plain confusion, these step-by-step fixes will help you spot viable blooms like a pro—no microscope required!
Problem: Seeds are microscopic, making it hard to see details like shape, texture, or markings.
Solution: 1️⃣ Use a Magnifying Lens or Phone Camera
- Grab a 10x-20x magnifying glass (cheap and widely available) or use your phone’s macro mode (most modern phones have this feature).
- Place the seed on a white or light-colored surface (like a piece of paper or a seed tray) for better contrast.
- Pro Tip: 💡 Hold the seed near a bright window or use a small flashlight to illuminate it from below—this enhances details without glare.
2️⃣ Compare with Reference Images
- Download a flower seed identification app (like PictureThis or PlantNet) or bookmark reliable seed databases (e.g., Seed Savers Exchange).
- Take a close-up photo of the seed and compare it side-by-side with reference images. Look for:
- Shape (round, oval, winged, etc.)
- Color (brown, black, striped, or speckled)
- Surface texture (smooth, ridged, fuzzy)
3️⃣ Test for Viability (If Shape Alone Isn’t Enough)
- Float Test: Drop seeds in a glass of water. Viable seeds usually sink (though some, like orchid seeds, float naturally).
- Paper Towel Test: Moisten a paper towel, place seeds on it, and fold it over. After 3-5 days, check for tiny sprouts—a sign of life!
Prevention Tip: ✨ Store seeds in small, labeled jars with a magnifying sheet (like those used for coin collecting) inside. This lets you inspect seeds without fumbling through bulk packets.
Problem: Seeds arrive in poor condition, making identification and germination risky.
Solution: 1️⃣ Assess the Damage
- Light Mold? If seeds are damp but not fuzzy, they might still be viable. Spread them out to dry for 1-2 days in a well-ventilated area (not direct sunlight).
- Heavy Mold or Musty Smell? Discard immediately—moldy seeds won’t germinate and can harm other plants.
2️⃣ Clean and Disinfect
- Rinse gently with 1 part hydrogen peroxide (3%) to 9 parts water to kill mold spores. Let seeds air-dry completely.
- Alternative: Use rubbing alcohol (70% isopropyl) on a cotton swab to wipe seeds if mold is superficial.
3️⃣ Check for Hidden Labels or Codes
- Some seed packets have tiny labels on the back or barcodes that link to digital guides. Scan the packet with your phone or email the seller for details.
- Pro Tip: 🔥 If the packet is unreadable, search the seed company’s website using the batch number—many list old catalogs online.
Prevention Tip: 📊 Always store seeds in a cool, dry place (like a fridge) and use airtight containers with silica gel packets to absorb moisture.
Problem: You found seeds but don’t know what plant they came from (e.g., mystery garden finds, wildflower seeds).
Solution: 1️⃣ Reverse-Engineer from the Plant (If Possible)
- If the seed came from a flower you already know, take a photo of the bloom and compare it to seed databases.
- Key Features to Note:
- Flower color/shape
- Leaf arrangement (opposite, alternate, whorled)
- Growth habit (vine, bush, tree)
2️⃣ Use a Seed Identification Key
- DIY Key: Ask yourself:
- Is the seed enclosed in a pod? (Pea, bean, milkweed)
- Does it have wings? (Maple, ash)
- Is it fuzzy? (Dandelion, thistle)
- Online Tools: Try the USDA Plants Database or iNaturalist to upload photos for crowd-sourced ID help.
3️⃣ Test-Germinate a Few Seeds
- Plant 3-5 seeds in small pots with well-draining soil. If they sprout, you can identify the plant by its leaves (use a plant ID app like Google Lens).
- Pro Tip: 🌱 Label pots with the location where seeds were found (e.g., "Backyard, under oak tree") to narrow down options.
Prevention Tip: 🎯 If collecting wild seeds, carry a small notebook to sketch flower details on-site—memory fades fast!
Problem: You want to ID seeds but don’t have a microscope, apps, or fancy gear.
Solution: 1️⃣ DIY "Microscope" with Household Items
- Cardboard Tube Microscope: Roll a toilet paper tube into a cone, tape a magnifying lens (from old reading glasses) at one end, and use it like a spyglass.
- Laser Pointer Trick: Shine a red laser (low-power) at the seed—it creates a shadow effect that highlights textures.
2️⃣ Library or Community Resources
- Check your local library for botany books (e.g., The Seed Book by J. Russell Smith).
- Visit a master gardener program—many offer free seed ID clinics or have experts on hand.
3️⃣ Crowdsource Help
- Post on gardening forums (like GardenWeb or Reddit’s r/Gardening) with clear photos and location details.
- Pro Tip: 🌡️ Include scale references (e.g., "seed next to a penny") to help others gauge size.
Prevention Tip: 💡 Save empty seed packets from past purchases—future you will thank you!
Final Reminder: 🎯 The more you practice, the easier it gets! Start with common seeds (like marigold or sunflower) to build confidence, then tackle the trickier ones. Happy identifying!
Frequently asked questions about flower seed identification
How can I tell if a tiny seed is actually a flower seed?
Look for key clues like shape and texture. Flower seeds often have distinct features: winged (like maple), plump and rounded (sunflowers), or flat and papery (poppies). Compare them to reference images from seed catalogs or apps like PictureThis. If unsure, try the float test—viable seeds usually sink in water.
What’s the best way to identify seeds without a microscope?
Use a 10x magnifying glass or your phone’s macro mode. Place seeds on a white background under natural light to see details. For tricky cases, shine a laser pointer at the seed to highlight textures. Apps like PlantNet can also help match photos to known species.
Why do my seeds look different from the packet description?
Seeds change color and texture based on storage conditions and lighting. For example, marigold seeds may fade from dark brown to gray when dried. Always compare seeds against a white background under natural light. If they’re moldy or discolored, they may be non-viable.
Can I identify wildflower seeds I found in my yard?
Yes! Start by noting the plant’s flower and leaf shape if possible. Use a seed identification key (e.g., USDA Plants Database) or test-germinate a few seeds in soil. If they sprout, use a plant ID app like Google Lens to match the seedlings. For fuzzy or winged seeds, compare them to dandelion or maple references.
How do I know if a seed is still good for planting?
Test viability with the paper towel method: Moisten a paper towel, place seeds inside, and fold it over. Check for sprouts in 3-5 days. Alternatively, drop seeds in water—viable ones usually sink (except orchids, which float). Discard seeds with soft spots, mold, or foul odors.