
Propagation
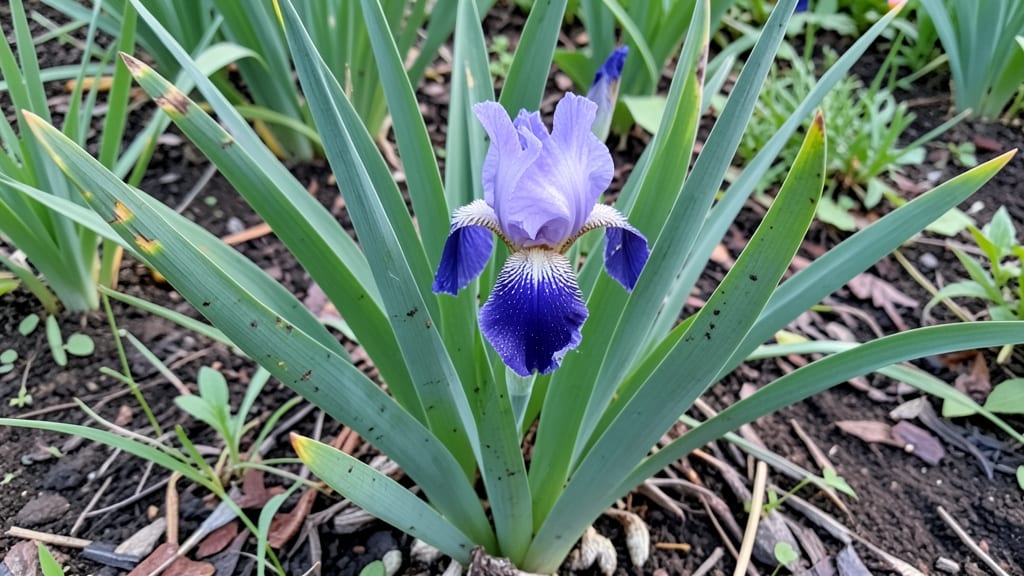
Growing irises from seeds is a patience test that pays off with showstopping blooms in just a few years. 🌱 I’ve tried forcing germination the easy way—just planting seeds in spring—and ended up with nothing but disappointment.
The secret lies in mimicking nature’s timing with cold stratification, a process that tricks seeds into breaking dormancy the way they would in the wild.
You’ll need fresh seeds (not dried), a sealed plastic bag with damp paper towels, and a refrigerator for about 8-12 weeks. No fancy equipment—just a cool, dark spot and a little time. The key is keeping those seeds consistently moist but not soggy, checking them weekly to avoid mold.
Most gardeners skip this step and wonder why their seeds never sprout, but this is where the magic happens.
Once stratified, you’ll plant them in well-draining soil and wait—sometimes up to a year—before seeing those first tiny leaves. The payoff? Irises grown from seed develop deeper roots, stronger stems, and blooms that outshine store-bought divisions.
Imagine a rainbow of purple, yellow, or blue irises popping up where you planted them last fall.
This method works best for bearded and Siberian irises, though it’s trickier with Louisiana varieties. The slow start is worth it—your first blooms might take 3-5 years, but each season after that, they’ll multiply and reward you with bold, healthy growth. Ready to start your long-term project?
📚 In This Guide
- What you need
- Instructions
- Tips and common mistakes
- Wrapping up and next steps
What you need
- ● Iris seeds: Fresh, high-quality seeds (preferably from a trusted supplier). Aim for at least 10–20 seeds to increase your chances of germination.
- ● Cold stratification setup: A ziplock bag or small container with a breathable lid (e.g., a plastic bag with holes poked in it).
- ● Moistened paper towels or peat moss (enough to lightly cover the seeds).
- ● Refrigerator space (or a cool, dark place like a basement) to maintain 34–40°F (1–4°C) for 4–8 weeks.
- ● Germination medium: Seed-starting mix (lightweight and well-draining, like a 50/50 blend of peat moss and perlite).
- ● Small pots or trays (3–4 inches deep) with drainage holes. 1–2 seeds per pot is ideal.
- ● Grow lights or sunny windowsill: A grow light (12–16 hours of light daily) or a south-facing window to provide 10+ hours of sunlight after stratification.
- ● Misting bottle or spray nozzle: For gentle watering to keep the medium moist but not soggy.
- ● Plant labels and markers: To track varieties and germination dates.
- ● Humidity dome or plastic wrap: To create a mini greenhouse effect during early germination.
- ● Heating mat: (For indoor growers) to maintain 65–70°F (18–21°C) after stratification.
- ● Fertilizer (diluted): A balanced, water-soluble fertilizer (5-5-5 or 10-10-10) at half-strength once seedlings sprout.
- ● Transplanting tools: Small trowel or spoon for delicate seedling transfers.
- ● Journal or app: To log seed sources, stratification dates, and growth milestones.
Step-by-Step instructions for growing irises from seeds
Here’s how to break the cold stratification process into simple, foolproof steps.
🌱 Step 1: Harvest and Prepare Iris Seeds
Collect seeds from mature iris pods when they turn brown and papery—this usually happens in late summer or early fall. Open the pods carefully with a small knife, then remove the seeds and let them dry on a paper towel for 24 hours. This prevents mold and ensures they’re ready for stratification.
I like to store them in a small envelope labeled with the iris variety and harvest date. Keep them in a cool, dry place until you’re ready to start the cold treatment. The goal is to mimic the natural winter period irises need to break dormancy.
❄️ Step 2: Cold Stratify the Seeds
Place the dried seeds in a sealed plastic bag with a small amount of moistened peat moss—just enough to keep it damp but not soggy. This mimics the moisture they’d encounter in soil during winter. Store the bag in your refrigerator’s vegetable crisper for 60-90 days.
Check the bag monthly to ensure the peat moss stays lightly moist. If it dries out, add a few drops of water. This cold treatment tricks the seeds into thinking winter has passed, signaling them to germinate in spring. Real talk: Skipping this step means you’ll wait years for blooms—or never see them at all.
🌿 Step 3: Sow Stratified Seeds in Containers
Fill small pots or seed trays with a light, well-draining potting mix. Press the mix down gently to remove air pockets, then scatter the seeds on the surface—no need to bury them. Lightly cover them with a thin layer of fine vermiculite (about ¼ inch deep) to hold moisture while allowing light to reach the seeds.
Place the trays in a shady spot indoors or outdoors where temperatures stay between 60-70°F. Keep the soil consistently moist but never waterlogged. You’ll see tiny green shoots emerge in 4-8 weeks, depending on the iris variety. Here’s the thing—patience is key. These seeds take longer to sprout than most flowers, but it’s worth the wait.
☀️ Step 4: Transition Seedlings to Outdoor Light
Once seedlings have 2-3 true leaves (not just the initial seed leaves), it’s time to move them outdoors. Start by placing them in a sheltered, partially shaded spot for 1-2 hours daily, gradually increasing their time outside over 2-3 weeks. This process, called hardening off, prepares them for full sun.
After they’ve adjusted, transplant the seedlings into individual pots or directly into the garden in a spot with full sun. Space them 6-12 inches apart, depending on the iris variety. Water deeply after planting to help roots establish. You’ll know they’re thriving when they develop strong, upright growth and the first true iris leaves appear.
⏰ Step 5: Overwinter and Plan for Blooms
For the first year, focus on establishing strong roots. Irises grown from seed won’t bloom until their second or third year, so resist the urge to fertilize heavily. Instead, mulch lightly around the base in fall to protect the young plants from freezing temperatures.
Come spring, you’ll see the real magic: slender, sword-like foliage emerging from the ground. This is your signal that the plants are settling in. By the following year, with patience and care, you’ll finally see those vibrant blooms you’ve been waiting for. Trust the process—irises reward persistence.
Tips & tricks for perfect iris seed stratification
Here's what nobody tells you about growing irises from seeds—these tricks make all the difference between waiting years for blooms and seeing vibrant flowers next spring.
Timing Secret: The 24-hour drying time in Step 1 isn't just about preventing mold—it's about breaking the seed's natural dormancy barrier. I learned this the hard way after ruining three batches with seeds that sprouted too early. Place them on a paper towel in a single layer, never overlapping, and keep them in a warm, dry spot like on top of your fridge. This ensures they're perfectly primed for the cold stratification that follows.
Stratification Strategy: During the 60-90 day cold treatment in Step 2, consistency is everything. I use a small spray bottle to mist the peat moss every 2 weeks instead of adding water directly—this prevents clumping and keeps the seeds evenly moist. Place a small piece of paper towel inside the bag with the seeds to absorb any excess moisture that might develop from condensation. This simple trick prevents mold while maintaining the perfect dampness level.
Sowing Success: When sowing in Step 3, don't be tempted to press the seeds into the soil—irises need light to germinate. Instead, place them on the surface and cover with just ¼ inch of vermiculite. I like to use a fine mesh sieve to create an even layer. This light covering holds moisture while allowing sunlight to penetrate, which is crucial for breaking through that tough outer seed coat. The difference between good germination and poor germination often comes down to this single step.
Hardening Off Hack: For the 1-2 hour outdoor acclimation in Step 4, I start with just 30 minutes on day one, then add 15 minutes each subsequent day. This gradual approach prevents shock to the delicate seedlings. Place them in a spot where they'll receive morning sun and afternoon shade—this mimics natural light conditions and helps them develop stronger cell walls before full sun exposure. Watch for wilting as your signal to bring them back inside for the day.
Pro Tips for Iris From Seeds
- Here's what nobody tells you about growing irises from seeds—these tricks make all the difference between waiting years for blooms and seeing vibrant flowers next spring.
- Timing Secret: The 24-hour drying time in Step 1 isn't just about preventing mold—it's about breaking the seed's natural dormancy barrier.
- Stratification Strategy: During the 60-90 day cold treatment in Step 2, consistency is everything.
Frequently asked questions
Got questions about growing irises from seeds?
You’re not alone! Here are answers to the most common queries to help you navigate this rewarding (but patient) process with confidence.
How long does cold stratification take for iris seeds?
Cold stratification typically requires 6–12 weeks in the fridge (or outdoors in winter). For most iris species, 8–10 weeks is ideal—just place seeds in a moist paper towel or potting mix in a sealed bag. Patience pays off: this mimics natural winter conditions and breaks dormancy for stronger germination!
When will iris seeds actually sprout after stratification?
After stratification, germination can take 2–6 weeks (sometimes longer!). Keep soil consistently moist (not soggy) and maintain temps between 60–70°F (15–21°C). If nothing sprouts in 8 weeks, check for mold or rot—seeds may need fresh stratification or extra warmth.
Can I grow iris seeds indoors without a fridge?
Yes! If you lack fridge space, try outdoor winter sowing (plant seeds in pots in Dec/Jan) or a seedling heat mat (70°F/21°C) for 2–3 weeks before chilling. Alternatively, some gardeners use a DIY cold frame outside during winter months—just protect from pests and freezing temps.
What if my iris seeds never sprout? Troubleshooting tips
Don’t panic! Common culprits:
- Old seeds: Iris seeds lose viability after 1–2 years—source fresh ones.
- Improper moisture: Too dry = dormancy; too wet = rot. Aim for damp, not drenched.
- Wrong temps: Seeds need cold (34–40°F/1–4°C) first, then warmth.
- Patience: Some species (like Iris lactea) germinate extremely slowly—wait up to a year!
How do I know if my seedling is a true iris (not a weed)?
Young iris seedlings resemble grasses or weeds at first! Look for:
- Long, sword-like leaves (narrower than grass).
- Vertical growth (irises grow straight up; weeds sprawl).
- No flowers—they won’t bloom until 3–5 years old!
Wrapping up and next steps
Growing irises from seeds is a rewarding journey that unlocks a world of vibrant blooms—if you embrace patience and precision. 🌱 With the right tools, cold stratification, and a little care, you’ll soon be nurturing seedlings that’ll flourish into stunning flowers next season. Now’s your chance to take action: gather your seeds, set up your stratification station, and watch your garden transform!
🚀 Your Next Step:
- Start with high-quality seeds and follow the stratification steps outlined above.
- Keep a garden journal to track progress and adjust care as needed.
- Share your iris-growing wins with fellow plant enthusiasts—inspiration spreads!