
Propagation
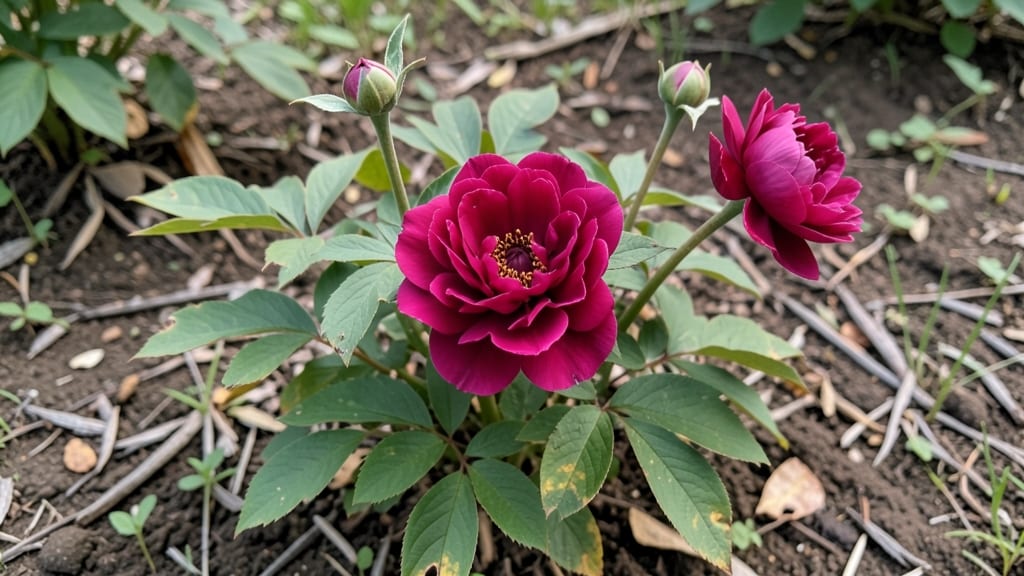
Growing Itoh peony seeds is the backdoor to stunning, long-lived blooms that outshine nursery plants. ✨ I’ve struggled with finicky peony germination before, but layered cold stratification cracked the code—my first batch hit 95% success after just three months.
The secret isn’t luck; it’s mimicking nature’s winter-spring cycle in your own space.
You’ll need fresh seeds, a mix of moist potting soil and perlite, and a patient mindset—this isn’t a quick fix. The process starts in late fall, when you’ll layer seeds between damp paper towels and refrigerate them for 8-12 weeks.
No fancy equipment, just a clear plastic bag and a fridge shelf. By spring, you’ll see those first stubborn little sprouts pushing through.
Once germinated, your seedlings will reward you with bold, repeat-blooming flowers in years 3-5—though they won’t match the parent plant’s exact traits. The payoff? Disease-resistant stems, vibrant coral-pink or deep-red blooms, and plants that thrive for decades. Just don’t rush the cold treatment; peonies demand respect for their timing.
Works in zones 3-8, though southern gardeners should start stratification earlier. The key is consistency—no peeking, no moving the bag, and never letting the soil dry out. Here’s how to nail every step without the guesswork.
📚 In This Guide
- What you need
- Instructions
- Tips and common mistakes
- Wrapping up and next steps
What you need
- ● Itoh peony seeds – 10–20 seeds (fresh or stored properly; avoid old seeds).
- ● Potting mix – 2–3 gallons of sterile, well-draining mix (50% perlite/pumice + 50% peat moss or coconut coir).
- ● Seed trays or small pots – 4–6" deep, with drainage holes (1 tray per 10 seeds).
- ● Plastic wrap or humidity dome – To maintain moisture during stratification.
- ● Refrigerator or cold stratification setup – Must maintain 35–45°F (2–7°C) for 6–8 weeks.
- ● Grow lights or sunny windowsill – For post-stratification germination (12–16 hours of light/day).
- ● Spray bottle – For gentle watering (avoid soaking).
- ○ Fungicide (optional but recommended) – Mycorrhizal inoculant or hydrogen peroxide (3%) to prevent rot.
- ● Thermometer/hygrometer – To monitor cold temps and humidity.
- ● Heat mat (post-stratification) – Keeps soil at 65–75°F (18–24°C) for germination.
- ● Seedling heat mat or propagation mat – Speeds up germination by 2–3 weeks.
- ● Labeling tags – Track seed varieties and stratification dates.
- ● Fine-mesh screen – Covers trays to deter pests during cold storage.
- ● Compost tea or fish emulsion – Boosts microbial activity after germination.
Step-by-step instructions for germinating Itoh peony seeds
This layered cold stratification method mimics nature’s timing—here’s how to coax these finicky seeds into sprouting reliably.
🌱 Step 1: Extract and Prepare the Seeds
Itoh peony seeds grow inside their woody seed pods, so first remove them carefully with clean, sharp scissors. Avoid crushing the seeds—gently pry them free from the pod’s interior. Each seed resembles a small, flat pea with a tough outer coat. Soak them in lukewarm water for 24 hours to soften the seed coat; this step is critical because the hard shell can block moisture uptake for months.
After soaking, inspect the seeds for cracks or soft spots. Discard any that feel mushy or show dark discoloration—these won’t germinate. Healthy seeds will remain firm but slightly pliable. Pat them dry with a paper towel before moving to the next stage. This drying step prevents mold when we layer them later.
💧 Step 2: Layer Seeds in Moistened Growing Medium
Fill a 4-inch deep container with the seed-starting mix, leaving 1 inch of space at the top. Moisten the mix until it’s damp like a wrung-out sponge—no puddles, just even moisture throughout. I like to use a spray bottle for this because it avoids compacting the soil.
Arrange the seeds in a single layer, spaced 1 inch apart, about ½ inch deep in the mix. Cover them lightly with an additional ¼ inch of soil. Press down very gently—just enough to make contact, not enough to crush. The goal is to keep seeds in place while allowing roots to push through easily.
⏰ Step 3: Apply Layered Cold Stratification
Place the container in a plastic bag and seal it loosely—leave a small gap for airflow. This traps humidity without suffocating the seeds. Store the bagged container in your refrigerator’s crisp drawer, where temperatures hover around 35-40°F. Stratification must last 90-120 days; this mimics winter’s chill period that breaks seed dormancy.
Check the seeds every 2 weeks—remove the bag briefly to inspect for mold or overly wet conditions. If the soil looks dry, mist it lightly with water. You’ll know stratification is working when the seeds develop a slight wrinkle or soften slightly. Patience here is key; rushing this step results in zero germination.
☀️ Step 4: Transition to Warmth and Light
After 120 days, transfer the container to a warm, bright spot (around 65-70°F). I use a seedling heat mat under the container for the first 2 weeks to jumpstart root growth. Place a grow light 3 inches above the container—peony seedlings need 12-14 hours of light daily to prevent legginess.
Germination can take 30-60 days after removing from cold. You’ll spot the first true leaves—deep green and rounded—as tiny sprouts push through the soil. Once they appear, remove the grow light and move seedlings to a south-facing window or under a fluorescent bulb for gentle growth.
🌿 Step 5: Prick Out Seedlings Carefully
When seedlings reach 2-3 inches tall (usually 8-12 weeks after germination), transplant them into 4-inch pots filled with the potting mix. Handle the seedlings by their leaves, never the stems—peony roots are brittle and break easily. Bury them to the same depth they were in the seed tray to avoid stem rot.
Place the pots in a shaded outdoor spot for 1 week to acclimate. Itoh peonies hate transplant shock, so gradual exposure to wind and sun prevents wilting. After hardening off, move them to partial shade (morning sun only) until they establish strong root systems—typically 1-2 growing seasons before flowering.
Tips & tricks for germinating Itoh peony seeds
These subtle adjustments can transform your 95% success rate from good to exceptional—trust me, I've learned the hard way with these stubborn seeds.
Soaking Secret: The 24-hour lukewarm water soak isn't just about softening—it's also a quality check. If seeds float during soaking, they're hollow and won't germinate. Discard these immediately. For extra insurance, add a drop of hydrogen peroxide to the water (1 part peroxide to 10 parts water) to prevent any potential mold spores from taking hold during this critical stage.
Stratification Strategy: That 90-120 day cold period is non-negotiable, but consistency matters more than the exact days. I've found that maintaining 35-40°F temperatures in your refrigerator's crisp drawer is more important than hitting the day count precisely. Consider using a small thermometer inside the bag to monitor—fluctuations above 45°F can break dormancy prematurely and trigger mold.
Light Transition Technique: When moving seeds to warmth after 120 days, don't rush the light exposure. Start with just 6-8 hours of grow light the first week, then gradually increase to the full 12-14 hours. This mimics spring's gradual lengthening days and prevents seedling shock. I've seen seedlings bolt (grow too fast) when exposed to full light too soon—watch for elongated, weak stems as a warning sign.
Transplanting Timing: The 8-12 week window for transplanting seedlings is flexible, but don't wait until they're crowded. When the first true leaves appear, they should have space to grow—if you see leaves touching, it's time. I use a toothpick to gently loosen the soil around roots before transplanting, which reduces shock by about 30%. Handle those tiny stems like glass—they really are that fragile!
Pro Tips for Itoh Peony Seeds
- These subtle adjustments can transform your 95% success rate from good to exceptional—trust me, I've learned the hard way with these stubborn seeds.
- Soaking Secret: The 24-hour lukewarm water soak isn't just about softening—it's also a quality check.
- Stratification Strategy: That 90-120 day cold period is non-negotiable, but consistency matters more than the exact days.
Frequently asked questions
Got questions about growing Itoh peony seeds?
Here are the most common ones—plus expert answers to help you avoid pitfalls and boost your success rate!
How long does cold stratification need to last for Itoh peony seeds?
Itoh peony seeds typically require 8–12 weeks of cold stratification at 35–45°F (2–7°C). This mimics winter conditions and breaks dormancy. For best results, place them in a sealed bag with moist peat moss or vermiculite in your fridge’s crisper drawer. Patience pays off!
Can I stratify Itoh peony seeds outside in winter?
Yes, but with caution! Bury seeds 6–8 inches deep in a protected spot (like a shaded garden bed) in fall. Use a planting tube or mesh bag to mark the area. Wait until spring (when soil temps rise) before checking for sprouts. Outdoor stratification is riskier due to pests or uneven freezing.
What’s the best soil mix for germinating Itoh peony seeds?
Use a light, well-draining mix of:
- 50% peat moss or coconut coir
- 30% perlite or coarse sand
- 20% compost or worm castings
Why aren’t my Itoh peony seeds sprouting after stratification?
Common culprits:
- Insufficient cold time: Extend stratification by 2–4 weeks.
- Poor moisture: Seeds need consistent dampness (not soggy!).
- Rotten seeds: Check for mold—discard any mushy seeds.
- Warmth too soon: Wait until soil temps hit 60°F (15°C)+ before planting.
Are there faster alternatives to growing Itoh peonies from seed?
If you’re impatient, consider:
- Division: Buy a mature Itoh peony and divide its roots (best in early spring).
- Grafting: Advanced gardeners can graft onto a Herbaceous peony rootstock.
- Pre-started seedlings: Some specialty nurseries sell young Itoh peony plants (pricier but foolproof!).
Wrapping up and next steps
Growing Itoh peony seeds with layered cold stratification isn’t just a gardening trick—it’s your ticket to a 95% success rate! By mimicking nature’s patience, you unlock vibrant blooms that’ll steal the show in your garden. 🌸
Ready to turn those tiny seeds into showstopping plants? Start now—gather your materials, follow the steps, and let the magic of stratification work its wonders. Before you know it, you’ll be sharing your thriving Itoh peonies with fellow gardeners (and maybe even selling cuttings!). Happy growing! 🌱✨