
Pruning
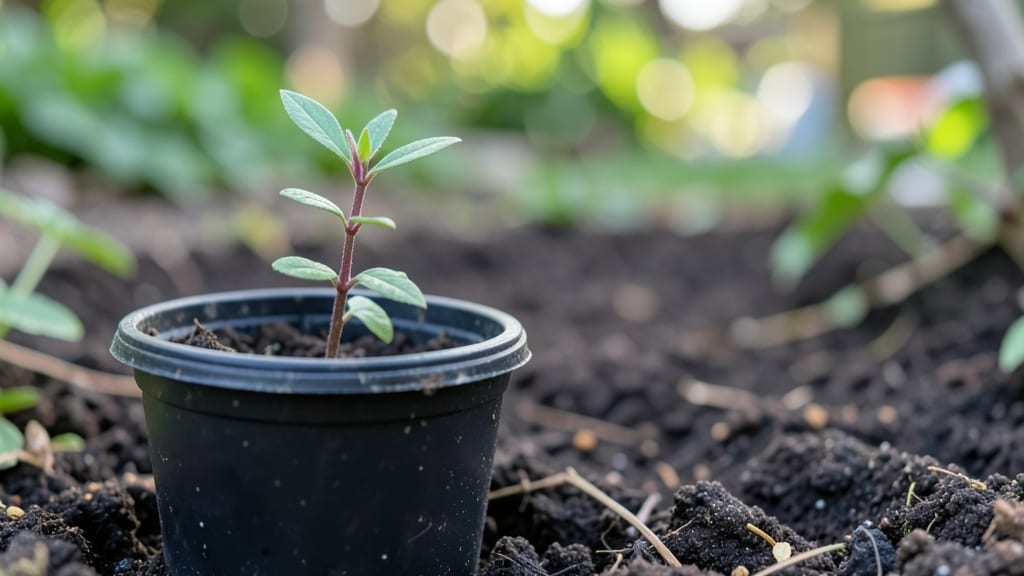
Spotting a single Japanese knotweed seedling means trouble—its roots spread like a silent takeover, cracking foundations and choking gardens before you know it. 🌱 I’ve wrestled with this invasive menace in my own yard, and what I learned changed everything about how I approach stubborn plants.
The moment you see those distinctive zigzag stems, time is your enemy: one overlooked sprout can turn into a full-blown infestation within a season.
You’ll need heavy-duty tools—no ordinary garden fork will cut it—and a strategy that combines digging, smothering, and chemical treatment for stubborn patches. Legal restrictions vary by state, so check local rules before applying herbicides, but the key is persistence: knotweed’s roots can lie dormant for years, waiting to regrow.
My first attempt failed because I didn’t dig deep enough—lesson learned the hard way.
By following the right steps, you’ll starve out those roots and prevent regrowth, restoring your garden to usable space. The satisfaction of watching the last stubborn shoot wither is worth every hour spent, and the peace of mind knowing your property’s value stays protected makes it all worthwhile.
Here’s exactly how to do it without letting it win.
This method works for backyard patches, construction sites, or even roadside invasions—just scale the effort to the size of the problem. The goal isn’t just removal; it’s making sure it never comes back. Let’s get started on your eradication plan.
📚 In This Guide
- What you need
- Instructions
- Tips and common mistakes
- Wrapping up and next steps
What you need
- ● Heavy-duty gloves (waterproof, long-sleeved, rated for thorny plants) – 2 pairs (one for digging, one for handling cuttings)
- ● Face shield or goggles (to protect against sap and debris)
- ● Long-sleeved shirt and pants (thick fabric, tucked into gloves)
- ● Pruning shears or loppers (bypass pruners, sharp and sturdy – 1 pair)
- ● Shovel or mattock (for deep root excavation – 1)
- ● Heavy-duty trash bags (55-gallon or larger, 3–5 bags)
- ● Disposable work boots or rubber boots (waterproof, ankle-high)
- ● Garden tarp or plastic sheeting (6’ x 8’ or larger – 1–2 sheets)
- ● Rake or hoe (for clearing surface debris – 1)
- ● Hose with spray nozzle (for rinsing tools and washing sap off skin)
- ● Root saw or handsaw (for thick, stubborn roots)
- ● Garden kneeler or pad (for comfort during long sessions)
- ● Hairnet or cap (to keep sap out of hair)
- ● Disinfectant spray (for cleaning tools between cuts)
- ● Labeling tags and marker (if bagging cuttings for disposal tracking)
- ● Sunscreen and bug spray (for outdoor work)
- ● Check local regulations – Japanese knotweed is often illegal to transport; confirm disposal rules in your area.
- ● Schedule for early spring or late fall – Roots are most vulnerable when dormant.
- ● Notify neighbors – Seedlings can spread easily via water or wind.
- ○ Wear a respirator mask (optional but recommended if you’re sensitive to plant fibers).
Step-by-Step instructions for Japanese knotweed eradication
Here’s how to tackle this invasive plant—systematically and without leaving stubborn roots behind.
🌱 Step 1: Identify and Prepare the Infestation
First, confirm you’re dealing with Japanese knotweed by looking for its distinctive hollow, bamboo-like stems and zigzag growth pattern. This plant spreads aggressively through underground rhizomes, so dig carefully. Mark the perimeter of the infestation with stakes or spray paint to track progress.
Wear long sleeves, gloves, and eye protection—knotweed sap can irritate skin. If the area is large, divide it into 4-foot sections to manage systematically. Avoid disturbing the soil outside the marked zone to prevent spreading fragments.
✂️ Step 2: Cut Back Above-Ground Growth
Use pruning shears or a weed trimmer to cut stems at the base, 1-2 inches below ground level. Bag the clippings immediately—never compost them, as even small fragments can regrow. For thick stems, make two cuts: the first ½ inch above the ground, then another ½ inch below to sever the rhizome connection.
Repeat this process every 2-3 weeks during the growing season. The goal is to exhaust the plant’s energy reserves stored in the roots. If you miss any stems, they’ll quickly resprout and dominate the area again.
💧 Step 3: Apply Herbicide to Severed Stems
Within 24 hours of cutting, apply a glyphosate-based herbicide directly to the fresh cuts. Use a brush or sprayer for precision. Avoid spraying leaves or soil—focus only on the exposed stem ends. Reapply after 7-10 days if new growth appears.
Herbicide works by traveling down the stem into the rhizomes, weakening the root system. For best results, time applications in late summer or early fall, when the plant is actively storing energy. Never apply herbicide to dry or frozen stems—it won’t absorb properly.
🪴 Step 4: Monitor and Repeat for Full Eradication
After treatment, watch for new shoots. If they appear, cut them back immediately and reapply herbicide. This cycle may take 2-5 years depending on the infestation size. Patience is critical—skipping steps leads to regrowth.
Once no new growth appears for two full growing seasons, dig up the soil in the treated area. Sift through it carefully, removing any rhizome fragments. Dispose of all plant material in sealed bags—never in compost or landfills.
⏰ Step 5: Prevent Reinfestation Long-Term
Japanese knotweed can lie dormant for years, so treat the area as contaminated for at least 5 years. Avoid planting anything in the space until you’re certain the soil is clear. If you must use the area, install a 2-foot deep barrier of compacted clay or plastic sheeting to block rhizome spread.
Regularly inspect neighboring properties—knotweed spreads easily via water runoff and construction equipment. If you spot it elsewhere, report it to local invasive species authorities immediately.
Tips & tricks for Japanese knotweed eradication
Dealing with Japanese knotweed requires precision and patience—here's how to maximize your chances of success while avoiding common pitfalls.
Precision Cuts in Step 2: When cutting stems in Step 2, aim for that 1-2 inch cut below ground level—any shallower, and you risk leaving viable rhizome fragments. For thick stems, the two-cut method (first ½ inch above, then ½ inch below) is non-negotiable. I've seen regrowth happen when people skip this detail, so take your time. Use a sharp pruner to make clean cuts that minimize tissue damage, which helps the herbicide work better later.
Herbicide Timing in Step 3: That 24-hour window after cutting is critical—the fresh cuts absorb herbicide most effectively. I've learned this the hard way after seeing treatments fail when applied too late. If you can't treat immediately, cover the cut stems with plastic wrap to keep them fresh until application. Also, always apply herbicide when the plant is actively growing—late summer to early fall is ideal, as the instructions state, because that's when energy is flowing into the rhizomes.
Monitoring Strategy in Step 4: The 2-3 week cutting cycle might seem tedious, but consistency is key. I recommend setting calendar reminders for your cutting dates to avoid gaps. Watch for new shoots carefully—even a single missed stem can lead to a full regrowth cycle. Consider photographing the area weekly to track progress visually. When no new growth appears for two full growing seasons, that's your true test—be patient, as knotweed can hide dormant.
Long-Term Barrier Design in Step 5: For that 2-foot deep barrier, compacted clay works best but can be expensive. A more budget-friendly alternative is heavy-duty plastic sheeting installed below the root zone. Make sure it extends at least 12 inches beyond the infestation perimeter to prevent lateral spread. I've seen cases where barriers failed because they weren't deep enough—don't cut corners here.
Pro Tips for Japanese Knotweed Seedling
- Dealing with Japanese knotweed requires precision and patience—here's how to maximize your chances of success while avoiding common pitfalls.
- Precision Cuts in Step 2: When cutting stems in Step 2, aim for that 1-2 inch cut below ground level—any shallower, and you risk leaving viable rhizome fragments.
- Herbicide Timing in Step 3: That 24-hour window after cutting is critical—the fresh cuts absorb herbicide most effectively.
Frequently asked questions
Got questions about Japanese knotweed seedlings?
You’re not alone—this invasive plant can be tricky! Below, we’ve answered the most common concerns to help you tackle it like a pro.
How do I tell if a small shoot is a Japanese knotweed seedling?
Look for zigzag stems, heart-shaped leaves with a distinctive prominent central vein, and reddish speckles on the stems when young. Unlike bamboo, it grows in clumps, not tall, solitary stalks. If unsure, snap a photo and compare it to verified images—never assume!
How long does it take for Japanese knotweed seedlings to become a full plant?
Seedlings can sprout within weeks of root fragments taking hold (even tiny pieces!). By late spring, they’ll reach 3–6 feet tall if left unchecked. Act fast—the sooner you remove seedlings, the harder they are to establish.
Can I just pull out a Japanese knotweed seedling by hand?
Nope! Pulling won’t kill the roots—it can spread them underground. Use gloves, goggles, and a spade to dig out the entire root system (including 2–3 inches of soil around it). Dispose of it properly—never compost!
Are there natural ways to kill Japanese knotweed seedlings without chemicals?
Yes! Try solarization (covering the area with clear plastic for 4–6 weeks in summer) or smothering with thick cardboard/mulch to block sunlight. For stubborn spots, vinegar (20–30% acetic acid) or boiling water can work—but repeat treatments are key.
What should I do if I find Japanese knotweed seedlings near my neighbor’s property?
Notify your neighbor in writing—Japanese knotweed is invasive and can damage foundations. Offer to help remove it (but don’t take action alone—some states require professional intervention). Check local laws; non-compliance can lead to fines.
Wrapping up and next steps
Dealing with Japanese knotweed seedlings can feel overwhelming, but armed with the right tools and knowledge, you’ve got this! 🌱 Remember, early detection and consistent action are your best allies—whether you’re digging, cutting, or treating, persistence pays off.
If you’re still unsure about the process, consider reaching out to a certified professional for expert guidance.
Your next logical step? Take action today! Start by inspecting your property for any signs of regrowth, and don’t hesitate to document progress. Small efforts now can save you from bigger headaches later. You’re well on your way to a knotweed-free space! 🚀