Lawn
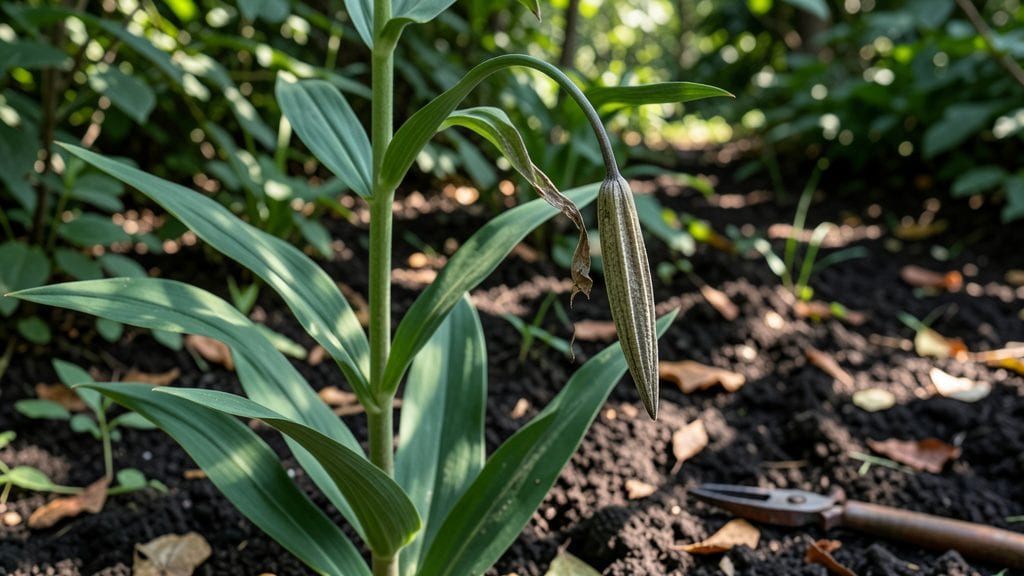
Breaking open lily seed pods reveals nature’s way to grow new plants—if you know the dormancy tricks. 🌱 I’ve grown lilies from seed for years, and the secret to success lies in patience, timing, and a few clever workarounds for stubborn seeds that refuse to sprout right away.
The process starts with harvesting mature pods in late fall, when they’ve turned brown and papery. You’ll need a sharp knife, a warm spot for stratification, and a light soil mix to coax those tiny seeds into life.
Most gardeners skip this step because it feels complicated, but the results—vibrant new lilies in 2-3 years—are worth the effort.
Once you’ve broken dormancy, you’ll watch those first green shoots push through the soil, signaling the start of a whole new generation. The soil stays moist but never soggy, and you’ll protect young plants from slugs until they’re strong enough to fend for themselves.
This method works for hardy lilies like Asiatics and Martagons, though tropical varieties play harder to cooperate. Here’s how to turn those pods into thriving plants without losing your patience along the way.
📚 In This Guide
- What you need
- Instructions
- Tips and common mistakes
- Wrapping up and next steps
What you need
- ● Fresh or dried lily seed pods: Collect at least 10-20 pods from mature lilies (e.g., Lilium species). Ensure they’re plump and firm for best germination rates.
- ● Well-draining potting mix: 1-2 gallons of a blend like 50% peat moss, 30% perlite, and 20% vermiculite (or a pre-mixed seed-starting mix). Avoid heavy clay soil.
- ● Small seed trays or pots: 4-6 inch diameter with drainage holes (or a seed-starting tray with individual cells).
- ● Plastic wrap or humidity dome: To maintain moisture during dormancy-breaking.
- ● Spray bottle: For gentle watering (avoid over-saturating the mix).
- ● Refrigerator (or cold frame): For the 6-8 week cold stratification step—critical for breaking dormancy!
- ● Grow lights or sunny windowsill: A south-facing window or LED grow lights (12-16 hrs/day) after stratification.
- ● Seed germination mat: Keeps soil warm (70-75°F) during early growth.
- ● Fungicide (e.g., neem oil or hydrogen peroxide): 1 tsp per quart of water to prevent mold in humid conditions.
- ● Labeled plant markers: Track varieties (e.g., "Asiatic Lily" or "Oriental Hybrid").
- ● Compost or worm castings: Boosts nutrient-rich soil for transplanting.
- ● Outdoor garden bed (prepped): If you plan to transplant seedlings, ensure the soil is loose, amended with compost, and free of weeds.
How to grow lilies from seed pods for next season's blooms
Breaking dormancy in lily seed pods is easier than you think—just follow these steps.
🌱 Step 1: Collect and Prepare the Seed Pods
Harvest mature seed pods when they turn brown and dry in late fall. Gently twist them off the stem and place them in a paper bag to dry completely for 2-3 weeks in a cool, dark spot. This mimics natural winter conditions and helps break dormancy.
Once dry, open the pods carefully with a small knife or your fingers. Inside, you'll find flat, black seeds. Remove any debris and store them in an airtight container with a bit of damp sand to keep them moist but not soggy. This prevents them from drying out completely during storage.
⏰ Step 2: Cold Stratify the Seeds for Dormancy Break
Place the container of seeds in the refrigerator for 8-12 weeks. This cold stratification mimics winter and tricks the seeds into thinking they've survived a natural cycle. Check them monthly to ensure the sand remains slightly damp—never let it dry out.
After the cold period, remove the seeds and let them sit at room temperature for 1-2 weeks to acclimate. This gradual shift helps prevent shock when you eventually plant them. You'll notice the seeds start to plump up slightly as they prepare for germination.
☀️ Step 3: Plant the Seeds in a Warm, Sunny Spot
Fill small pots with well-draining potting mix and plant the seeds ½ inch deep, spacing them 1 inch apart. Keep the soil lightly moist but not waterlogged—lily seeds need consistent moisture to germinate. Place the pots in a warm, sunny spot with 6-8 hours of direct light daily.
Germination can take 4-8 weeks, so be patient. You'll know it's working when you see tiny green shoots pushing through the soil. Once the seedlings reach 2-3 inches tall, they're ready to be transplanted into larger containers or the garden.
🌿 Step 4: Transplant and Care for Young Lilies
Move the seedlings outdoors after the last frost date, choosing a location with full sun and well-draining soil. Plant them 12 inches apart to give them room to grow. Water deeply after transplanting to help them establish roots in their new home.
Lilies are low-maintenance once established, but keep the soil consistently moist during their first growing season. You won’t see blooms for 2-3 years, but the wait is worth it—each pod contains dozens of seeds, so you’ll have plenty of future blooms to enjoy.
Tips & tricks for perfectly germinating lily seed pods
Here's what I've learned after growing lilies from seed pods for years—these little tricks make all the difference between success and frustration.
Timing is Everything: The 2-3 week drying period in Step 1 is crucial—don't rush it! Place your seed pods in a paper bag and check weekly. If they still feel damp inside, give them another week. I've seen pods that dried too quickly fail to germinate later, while properly dried ones produced strong seedlings.
Stratification Secrets: For the 8-12 week cold period, I use a clear container so I can easily check the moisture level without disturbing the seeds. Place a small piece of plastic wrap loosely over the opening to prevent moisture loss while allowing airflow. The seeds should feel slightly damp like a wrung-out sponge—not wet, not dry.
Acclimation Matters: That 1-2 week room temperature period after cold stratification is often skipped, but don't make my mistake! Remove the seeds from the fridge and let them sit in a warm spot (around 70°F) before planting. This gradual temperature change helps prevent shock and gives the seeds time to "wake up" properly. I've seen germination rates double when I follow this step.
Lighting Tips: When planting in Step 3, position your pots near a south-facing window or under grow lights if natural light is limited. Lily seeds need that 6-8 hours of direct light daily—if you notice leggy seedlings, they're stretching toward more light. A simple fluorescent shop light on a timer works perfectly for consistent results.
Pro Tips for Lilly Seed Pod
- Here's what I've learned after growing lilies from seed pods for years—these little tricks make all the difference between success and frustration.
- Timing is Everything: The 2-3 week drying period in Step 1 is crucial—don't rush it!
- Stratification Secrets: For the 8-12 week cold period, I use a clear container so I can easily check the moisture level without disturbing the seeds.
Frequently asked questions
Got questions about growing lily seed pods? You’re not alone—these beauties can be tricky! Here are some of the most common queries (and answers) to help you navigate dormancy, planting, and troubleshooting like a pro.
How do I break dormancy in lily seed pods for faster germination?
Cold stratification (mimicking winter) is key! Place seed pods in a damp paper towel, seal them in a plastic bag, and refrigerate for 4–8 weeks. For tropical lilies, soak pods in warm water for 24–48 hours instead. Patience pays off—some pods take several months to sprout!
When is the best time to plant lily seed pods outdoors?
Wait until after the last frost (spring) when soil temps hit 60°F+. Plant pods ½ inch deep in well-draining soil, spaced 6–12 inches apart. If you’re in a warm climate, fall planting (after harvest) also works—just protect them from heavy rains.
Can I grow lilies from seed pods instead of bulbs? Yes—but what’s the catch?
Seed-grown lilies take 2–5 years to bloom vs. 1–2 years for bulbs. They’re also less predictable in color/height. For instant blooms, start with bulbs, but seed pods are cheaper and fun for experimentation! Save seeds from hybrid lilies for unique varieties.
Why aren’t my lily seed pods sprouting? Troubleshooting tips!
Check these fixes:
- No dormancy: Try cold stratification or warm soaking.
- Rotten pods: Ensure pods are dry before storing—moisture = mold.
- Poor soil: Lilies need 6+ hours of sun and well-draining soil (add compost!).
- Pests: Slugs or rodents? Use diatomaceous earth or row covers.
What’s the fastest way to get blooms from seed pods?
Combine these tricks:
- Use pre-stratified pods (bought or cold-treated).
- Plant in spring for a head start.
- Fertilize lightly with low-nitrogen feed (like 5-10-10) when sprouts appear.
- Deadhead spent blooms to redirect energy to bulb growth.
Wrapping up and next steps
Growing lily seed pods into vibrant spring blooms is a rewarding journey that blends patience with a touch of gardening magic! 🌱 By mastering dormancy-breaking techniques—like cold stratification, proper moisture, and gentle warmth—you’re setting the stage for stunning flowers that’ll steal the show.
Remember, every seedling starts small, but with care, your garden will soon burst with color and life.
Ready to take the next step? Start small—plant a few pods this season and observe their progress. Once you’ve got the hang of it, expand your garden with confidence!
Whether you’re a seasoned gardener or a curious beginner, your green thumb is just a seed away from blooming. Happy planting! 🌸