
Propagation
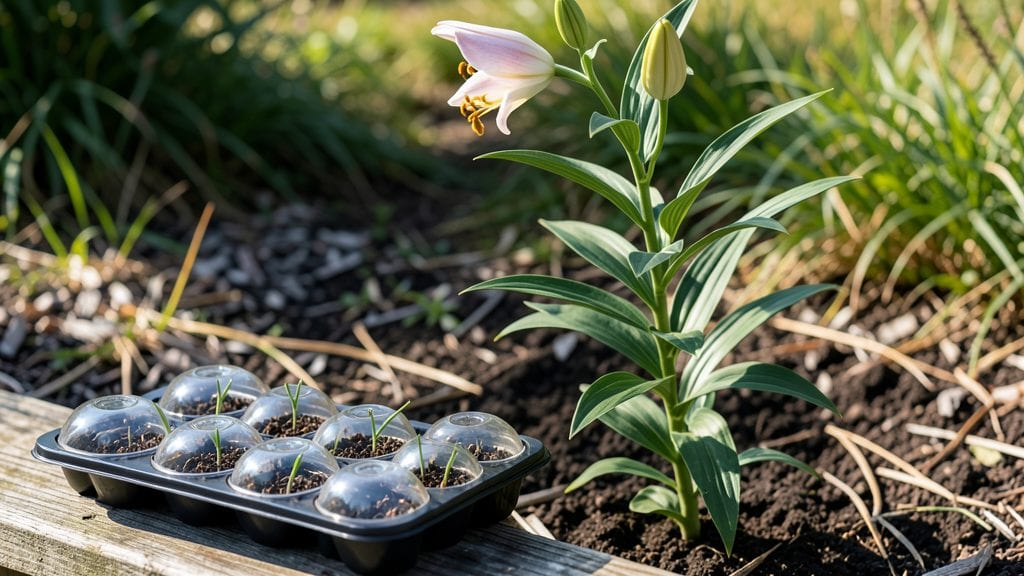
Growing lilies from seeds isn’t just possible—it’s the secret to unlocking rare blooms your neighbors won’t believe you grew yourself. 🌱 The trick lies in cold stratification, a process that mimics winter’s natural dormancy and tricks seeds into breaking their stubborn dormancy.
I’ve struggled with this myself, watching store-bought seeds sit for months without a single sprout—until I learned the right timing and conditions.
The real magic happens in three simple steps: sourcing fresh seeds, chilling them properly, and giving them the perfect balance of light and moisture. You’ll need a clear plastic bag, a bit of damp peat moss, and patience—because these seeds take their time.
Most gardeners give up here, but sticking with it through the first few weeks pays off when those first pale green shoots push through the soil.
By next spring, you’ll have sturdy young plants that’ll eventually produce blooms just like their bulb-grown cousins—though they might take an extra year or two. The payoff? Lilies with unique colors and patterns you’d never find in a nursery, all grown from seeds you nurtured yourself.
The process builds confidence too—once you master this, other tricky seeds won’t stand a chance.
This method works for hardy lilies like Asiatic and Martagon varieties, though tropical lilies need slightly different care. Whether you’re a patient beginner or a seasoned gardener looking for new challenges, these steps will give you the reliable blooms you’ve been dreaming of. Let’s get those seeds sprouting!
📚 In This Guide
- What you need
- Instructions
- Tips and common mistakes
- Wrapping up and next steps
What you need
- ● Lily seeds: Fresh, viable seeds (preferably from a trusted supplier or your own hybrid lilies). Aim for at least 5-10 seeds to increase your chances of germination.
- ● Cold stratification supplies: Plastic storage bag (resealable, quart-sized or larger)
- ● Moistened peat moss or coco coir (2-3 cups)
- ○ Optional: Vermiculite (1 cup) for better moisture retention
- ● Growing containers: Small pots (3-4 inches deep) with drainage holes (for post-stratification planting)
- ○ Seed-starting trays (optional, for organized sowing)
- ● Potting mix: Lightweight, well-draining mix (e.g., 50% peat moss + 50% perlite or coconut coir). Sterilized mix is ideal to prevent mold.
- ● Spray bottle (for gentle watering)
- ● Labels & marker (to track seed varieties and planting dates)
- ● Freezer or refrigerator (for cold stratification, set to 34–40°F (1–4°C))
- ● Grow lights (to supplement natural light during early growth)
- ● Humidity dome (to maintain moisture while seeds germinate)
- ● Seedling heat mat (if your home is chilly)
- ● Fungicide (e.g., neem oil or hydrogen peroxide solution) to prevent damping-off disease
- ● Journal or app (to log stratification progress and germination dates)
Step-by-Step instructions for growing lilies from seeds
Cold stratification is the secret weapon for breaking dormancy—here's how to do it right.
🌱 Step 1: Harvest and Prepare Lily Seeds
Collect seeds from fully mature, healthy lily pods after they turn brown and dry on the plant. Gently squeeze the pods to release the flat, black seeds inside—don’t crush them, or they’ll crack. I store them in a paper envelope until stratification, because plastic traps too much moisture and causes rot.
Before stratification, soak the seeds in lukewarm water for 24 hours to soften the tough outer coat. This mimics natural spring rains and speeds up germination. After soaking, let them dry completely on a paper towel overnight. You’ll see them darken slightly—that’s your signal they’re ready for cold treatment.
❄️ Step 2: Cold Stratify Seeds for 60-90 Days
Fill a small container with moistened but not soggy peat moss—just enough to hold the seeds without burying them. Mix in a handful of clean sand for drainage, then place the seeds ½ inch deep in the mix. Cover the container and refrigerate it at 35-45°F for 60-90 days.
Check the container monthly to ensure the mix stays lightly moist. If it dries out, mist it gently with water. This cold period mimics winter conditions and breaks the seed’s dormancy. Real talk: Skipping this step means seeds may never sprout—it’s non-negotiable for lilies.
☀️ Step 3: Plant Stratified Seeds in Spring
Once stratification ends, plant the seeds in a sunny spot in your garden or large pots with well-draining soil. Dig a hole 1 inch deep and place 2-3 seeds per spot, spacing them 6 inches apart. Cover lightly with soil and water gently to settle it around the seeds.
Keep the soil consistently moist but not waterlogged—lily seedlings hate soggy roots. You’ll see tiny sprouts emerge in 2-4 weeks, but don’t rush to thin them. Instead, let them grow until they’re 2 inches tall, then carefully remove the weakest one, leaving the strongest seedling in each spot.
🌿 Step 4: Care for Seedlings Until First Blooms
Lily seedlings need full sun (6+ hours daily) and regular watering to establish strong roots. I water mine deeply once a week, letting the soil dry slightly between waterings. Fertilize lightly with a balanced 10-10-10 formula every 4-6 weeks during the growing season to encourage steady growth.
Here’s the thing—lilies grown from seed take 3-5 years to bloom, so patience is key. You’ll know you’re on track when seedlings develop their first true leaves (the second set after the initial seed leaves). At this stage, they’ll look like tiny grass blades, but don’t mistake them for weeds!
Tips & tricks for perfect lily seed stratification
Here's what nobody tells you about getting those stubborn lily seeds to sprout reliably—these tricks have saved me from years of frustration.
Soaking Secret: That 24-hour lukewarm water soak in Step 1 isn't just about softening the seed coat—it's about mimicking natural spring rains. Use water that's warm enough to feel comfortable to your wrist (about 90°F), not scalding. I've found that adding a tiny pinch of cinnamon to the soaking water helps prevent mold without harming the seeds. After soaking, the seeds should feel plump to the touch, not dry or shriveled. This is your green light to proceed.
Stratification Setup: When creating your peat moss mix in Step 2, don't skip the sand! I've tried pure peat moss and it compacts too much, creating anaerobic pockets where seeds rot. The ½-inch depth is crucial—any deeper and they won't get enough oxygen, any shallower and they'll dry out too quickly. Place your container in the crisper drawer of your fridge where temperatures stay consistently around 45°F, which is ideal for breaking dormancy. Pro tip: Label your container with the date so you don't forget about it during the 60-90 day wait.
Monthly Maintenance: Those monthly checks during stratification are non-negotiable. I've seen seeds fail because people assumed the mix would stay moist. Use a spray bottle to mist gently—you want the mix to feel like a well-wrung sponge, not dripping wet. If you notice any seeds developing mold, remove them immediately and discard. The key is creating that perfect balance of moisture and airflow that mimics natural winter conditions.
Planting Precision: In Step 3, when planting those 2-3 seeds per spot, think of them like a tiny lily family. The 6-inch spacing gives each seedling room to develop strong roots before they compete for nutrients. I've found that planting in early spring (just as the last frost date passes) gives seedlings the full growing season to establish before winter. And here's my game-changer: I mark each planting spot with a small stake labeled with the year—this helps me track which lilies are 1-year, 2-year, etc., so I know which ones need special care.
Pro Tips for Lily From Seeds
- Here's what nobody tells you about getting those stubborn lily seeds to sprout reliably—these tricks have saved me from years of frustration.
- Soaking Secret: That 24-hour lukewarm water soak in Step 1 isn't just about softening the seed coat—it's about mimicking natural spring rains.
- Stratification Setup: When creating your peat moss mix in Step 2, don't skip the sand!
Frequently asked questions
How long does it take for lily seeds to germinate?
Germination can take anywhere from 3 weeks to 6 months, depending on the species and stratification success. Some seeds (like Lilium martagon) may sprout faster, while others (e.g., Lilium candidum) are slower. Patience is key—keep soil moist and warm (60–70°F) during this time!
Can I skip cold stratification and still get blooms?
Cold stratification mimics winter conditions, breaking seed dormancy for reliable germination. Skipping it may result in low or delayed germination (or none at all). If you’re impatient, try soaking seeds in warm water for 24 hours before planting, but stratification still improves success rates.
What’s the best soil mix for lily seeds?
Use a light, well-draining mix like:
- 50% peat moss or coconut coir
- 30% perlite or vermiculite
- 20% compost or worm castings
Why aren’t my lily seeds sprouting? Troubleshooting tips.
Common culprits:
- Improper stratification: Verify seeds got 4–8 weeks of cold, moist conditions (not freezing).
- Old seeds: Lily seeds lose viability after 1–2 years—source fresh ones!
- Overwatering: Seeds need moist but not waterlogged soil.
- Poor light: Place trays in bright, indirect light (no direct sun).
Will seeds grown from lilies bloom the first year?
Nope! First-year seedlings focus on roots—don’t expect blooms until years 3–5, depending on the variety. Some hybrids (like Lilium ‘Stargazer’) may flower earlier, but patience pays off—think of it as a long-term investment for stunning blooms!
Wrapping up and next steps
Growing lilies from seeds is a rewarding journey that unlocks the magic of nurturing these stunning blooms from scratch! 🌱 With patience, the right cold stratification techniques, and a little care, you’ll soon enjoy vibrant, homegrown flowers that’ll brighten your garden for seasons to come.
Whether you’re a seasoned gardener or just starting, this process is a fantastic way to expand your floral collection without breaking the bank.
Ready to take the next step? Start by planting your stratified seeds in well-draining soil, and keep an eye out for those first tender sprouts—your future blooms are just waiting to unfold! 🌸