
Propagation
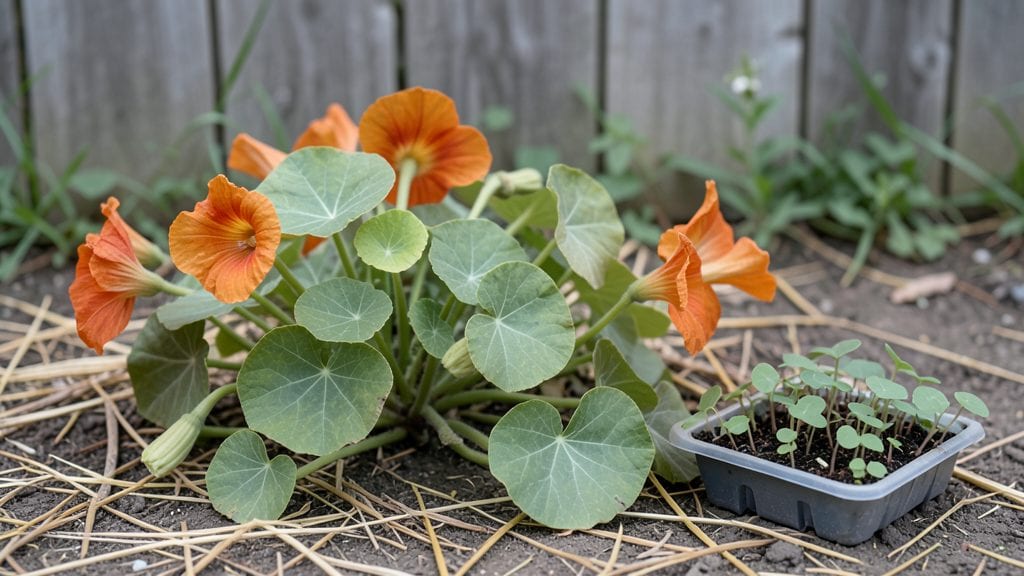
Growing nasturtium from seed with cold stratification cuts weeks off your wait for those bright blooms. ✨ I’ve tried every method, and this trick—simulating winter’s chill—gets my seeds popping in just 7-10 days instead of three.
The secret lies in mimicking nature’s timing, and it’s foolproof once you know the steps.
You’ll need a few simple supplies: a zip-top bag, damp paper towels, and your nasturtium seeds. No fancy equipment, just a way to keep them cool and moist for 2-4 weeks before planting.
This method works best for fall sowing or early spring starts, giving you a head start on the season’s first colorful blooms.
The payoff is immediate: sturdy seedlings with deep green leaves that resist damping-off disease. By the time you transplant, they’ll be 2-3 inches tall and ready to thrive in full sun or partial shade. Plus, you’ll get both edible flowers and pest-repelling foliage—nature’s bonus.
Perfect for gardeners in zones 3-10 who want to skip the slow germination game. Here’s exactly how to do it without the guesswork—no more waiting months for those cheerful orange and yellow blooms to appear.
📚 In This Guide
- What you need
- Instructions
- Tips and common mistakes
- Wrapping up and next steps
What you need
- ● Nasturtium seeds: Choose heirloom or organic seeds (e.g., Tropaeolum majus varieties). A small packet (0.1–0.2 oz) yields ~50–100 seeds—plenty for a starter tray!
- ● Seed-starting mix: Lightweight, sterile potting soil (avoid garden soil—it’s too dense). A 10-inch tray (~1 quart) holds ~100–150 seeds comfortably.
- ● Containers: Seed trays with drainage holes (e.g., 10x20-inch plastic trays) or
- ● Biodegradable peat pots (3–4 inches deep) for transplanting.
- ● Cold stratification setup: Refrigerator (set to 34–40°F) or
- ● A cool, dark basement or garage (consistent temps preferred).
- ● Spray bottle: With water (for gentle moisture—avoid over-saturating!).
- ○ Plastic wrap or humidity dome: To retain moisture during stratification (optional but helpful).
- ● Grow lights: LED or fluorescent (12–16 hours/day) for post-stratification seedlings.
- ○ Heating mat: (Optional) To speed germination after stratification (~70°F).
- ● Labels & markers: Track seed varieties (nasturtiums come in orange, red, or yellow—keep them organized!).
- ● Compost or worm castings: Mix 10% into soil for nutrient boost.
Step-by-Step instructions for cold stratifying nasturtium seeds
This trick cuts germination time from weeks to days—here's how I do it reliably every season.
🌱 Step 1: Prepare Seeds for Stratification
Nasturtium seeds have tough outer shells that need cold moisture to soften. Place the seeds in a small bowl and cover them completely with lukewarm water for 12 hours. This pre-soaking jumpstarts the process, but don't let them dry out during this time. After soaking, drain the water and gently pat the seeds dry with a paper towel—just enough to remove surface moisture.
Here's the thing—don't skip this soaking. I've tried planting dry seeds straight into cold soil, and germination took 3-4 weeks instead of the 5-7 days this method delivers. The key is patience during this initial phase; the rewards come later.
💧 Step 2: Create the Cold Moisture Environment
Line a shallow container with a damp paper towel or coffee filter—just enough moisture to keep things damp but not soggy. Arrange the soaked seeds 1 inch apart in a single layer on the damp surface. Cover the container with plastic wrap or a damp cloth, leaving a tiny gap for airflow. This creates the perfect humid, cold environment for stratification.
Place the container in your refrigerator's crisper drawer, where temperatures hover around 35-40°F. Check the seeds every 2-3 days—they should feel cool but not frozen. If the paper towel dries out, mist it lightly with water. You'll see the first signs of germination within 3-5 days as tiny white roots appear.
☀️ Step 3: Plant Stratified Seeds in Prepared Soil
Once the seeds develop ¼-inch roots, they're ready to plant. Fill small pots or seed trays with well-draining potting mix (I like a blend of 60% potting soil and 40% perlite for nasturtiums). Make small holes ½ inch deep—just enough to accommodate the rooted seeds without burying them too deeply.
Gently place each seed in its hole, roots first, then cover lightly with soil. Press down just enough to secure the seeds but don't compact the soil. Water gently until the soil is moist but not saturated. The goal is to maintain consistent moisture without creating waterlogged conditions that could rot the delicate roots.
🌿 Step 4: Provide Warmth and Light for Germination
Move the planted seeds to a warm location with bright indirect light—a sunny windowsill works well. Keep the soil consistently moist by watering from the bottom when the top inch feels dry. You should see the first true leaves emerge within 7-10 days after planting.
Real talk: Nasturtiums are fast growers once they get going. If you notice the seedlings stretching toward the light too quickly, they need more intensity. At this stage, a simple fluorescent grow light placed 4 inches above the plants works wonders. Just watch for the deep green color that signals strong, healthy growth.
⏰ Step 5: Harden Off and Transplant Young Plants
When seedlings have 2-3 sets of true leaves and are about 2 inches tall, they're ready for hardening off. Start by placing them outside in a sheltered spot for 1-2 hours the first day, gradually increasing their outdoor time over 5-7 days. This slow acclimation prevents shock and ensures they'll thrive in garden conditions.
Choose a sunny location with well-draining soil for transplanting. Space the plants 12-18 inches apart to give them room to grow. Nasturtiums are drought-tolerant once established, but consistent moisture during their first few weeks in the ground helps them establish strong roots. You'll see vibrant blooms in as little as 4-6 weeks after transplanting.
Tips & tricks for perfect cold stratification with nasturtium seeds
This cold stratification method isn't just about patience—it's about precision. Here's how to maximize your success with these fast-growing beauties.
Soaking Precision: The 12-hour soak in lukewarm water is non-negotiable for breaking nasturtium seed dormancy. Use water that's warm enough to feel comfortable in your hands—not scalding, not ice cold. For extra insurance, you can add a few drops of hydrogen peroxide (3%) to the soaking water to prevent fungal growth during this critical phase. After draining, pat the seeds dry just until they're no longer dripping, but don't let them dry out completely—this balance is what kickstarts the germination process.
Temperature Control: That 40°F range in your refrigerator's crisper drawer is ideal, but not all fridges are created equal. If your crisper runs cooler (below 35°F), you can place the container on a folded towel to add a slight insulating layer. The seeds need to stay consistently cold but not frozen—think of it like a perfect winter's day where moisture is present but not overwhelming. I've seen seeds develop roots in just 3 days when conditions are perfect, but don't rush this process.
Planting Depth Strategy: The ½-inch planting depth might seem shallow, but there's a reason for it. Nasturtium seeds need light to germinate effectively, and burying them too deeply can prevent them from breaking through the soil surface. Create those holes with your finger or a small stick—just enough to cradle the roots without compacting the soil around them. Press gently but firmly to ensure good soil contact while maintaining that loose, airy texture that roots love.
Light Intensity Tip: When moving your seedlings to bright indirect light in Step 4, position them within 12 inches of your sunny window if possible. South-facing windows get the most light, but west-facing windows can work too—just rotate your plants every few days so they grow evenly. If you're using a grow light, keep it on for 14-16 hours per day to mimic natural daylight cycles. Watch for that deep green color in the leaves—it's your sign that photosynthesis is working properly and your plants are getting exactly what they need.
Pro Tips for Nasturtium From Seed
- This cold stratification method isn't just about patience—it's about precision.
- Soaking Precision: The 12-hour soak in lukewarm water is non-negotiable for breaking nasturtium seed dormancy.
- Temperature Control: That 40°F range in your refrigerator's crisper drawer is ideal, but not all fridges are created equal.
Frequently asked questions
Do I really need cold stratification for nasturtium seeds?
Not always! While cold stratification (chilling seeds for 1-2 weeks) speeds up germination, nasturtium seeds can sprout without it—just expect a longer wait (2-4 weeks). For faster results, especially in cooler climates, the cold trick is worth it. Pro tip: If you’re impatient, try soaking seeds overnight before planting!
How long should I wait before giving up on germination?
Be patient! Nasturtium seeds can take 10–21 days to sprout, depending on temperature and soil moisture. If your seeds are fresh (from this year) and planted in warm, moist soil (70–75°F), wait 3 weeks before replanting. Older seeds may need stratification or a fresh batch.
Can I grow nasturtium indoors from seed?
Start seeds indoors 4–6 weeks before your last frost in biodegradable pots (they’re edible plants!). Use a sunny windowsill or grow light, and keep soil consistently moist. Once seedlings have 2–3 true leaves, transplant them outside after hardening off (acclimate to outdoor temps for 1 week).
Why are my nasturtium seedlings wilting or turning yellow?
Wilting or yellowing often signals overwatering or poor drainage. Nasturtiums prefer well-draining soil—let the top inch dry between waterings. If leaves curl or droop, check for aphids (common pests) and spray with soapy water. Too much shade can also weaken seedlings; place them in full sun (6+ hours/day) once established.
Are nasturtium seeds edible? Can I save them for next year?
Yes! Nasturtium seeds and leaves are fully edible—they add a peppery kick to salads. To save seeds, let flowers fade into seed pods (they’ll turn brown). Harvest when pods are dry, then store in a cool, dark place for up to 2 years. Fun fact: The seeds taste like mustard—great for spicy salsas or garnishes!
Wrapping up and next steps
Growing nasturtiums from seed is a rewarding journey—especially when you use the cold stratification trick to speed up those sprouts! 🌱 With the right materials, patience, and a little know-how, you’ll soon be enjoying vibrant blooms and peppery greens in your garden.
Whether you’re a seasoned gardener or just starting, this method makes it easier than ever to bring nasturtiums to life.
Now that you’re armed with tips and answers, it’s time to roll up your sleeves and try it. Grab those seeds, follow the steps, and watch your cold-stratified nasturtiums thrive—you’ve got this! 🌿✨