
Lawn
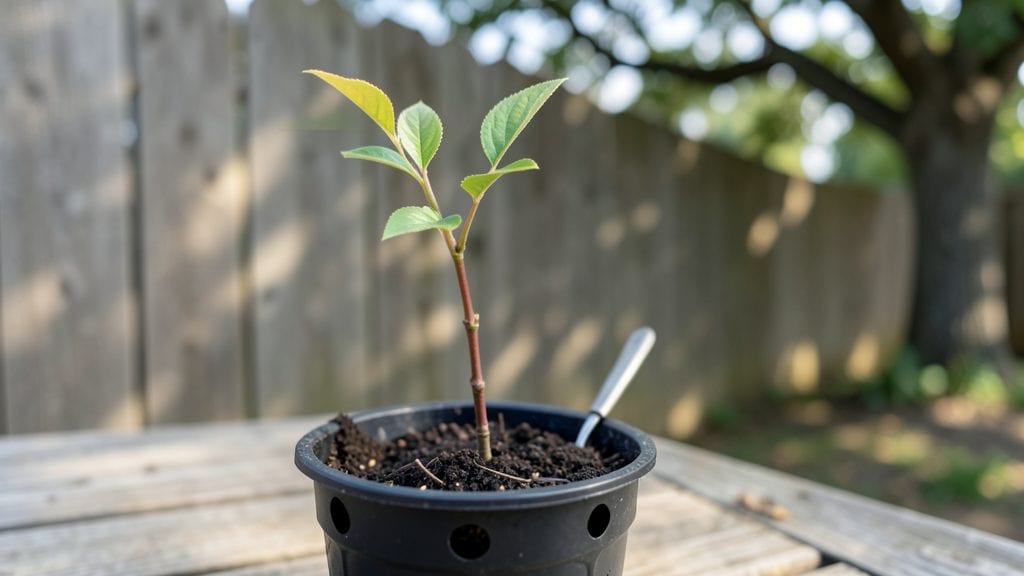
Peach seed stratification mimics winter's chill to wake up dormant seeds—without it, your peach seeds might never sprout. 🌱 I learned this the hard way after months of waiting for seeds that never broke soil.
The process tricks seeds into thinking they've survived winter, signaling them to grow when temperatures rise.
You’ll need peach pits (cleaned and dried), a breathable container like a paper towel-lined bag or a pot with well-draining soil, and a cold spot—like a fridge or unheated garage—set to 34–40°F.
Stratification takes 8–12 weeks, so start in late winter for spring planting. Most seeds need this cold period to break dormancy, and peaches are no exception.
Once stratified, you’ll watch roots emerge first, followed by a tiny shoot. Plant them in pots with sandy loam when they’re 2–3 inches tall, keeping soil consistently moist but never soggy. Young peach seedlings are delicate, so protect them from strong winds and direct sun until they’re established.
Common pitfalls? Overwatering or letting seeds dry out during stratification. If seeds rot, start fresh with new pits. With patience, you’ll end up with a tree that could bloom in 3–5 years—and maybe even produce fruit someday. Here’s how to do it right the first time.
📚 In This Guide
- What you need
- Instructions
- Tips and common mistakes
- Wrapping up and next steps
What you need
- ● Fresh peach pits (seeds): 5–10 clean, undamaged pits (harvested from ripe peaches).
- ● Perlite or vermiculite: 1–2 cups (sterile, moisture-retentive medium for stratification).
- ● Ziploc bag or airtight container: 1 medium-sized (quart or larger) with a seal.
- ● Paper towels or coffee filters: 2–3 sheets (for moisture control).
- ● Spray bottle: 1 (with water for gentle hydration).
- ● Refrigerator: A cold, dark space (34–40°F / 1–4°C) for stratification.
- ● Patience: 8 weeks of waiting (trust the process!).
- ● Grow lights: 1–2 (for post-stratification sprouting if natural light is limited).
- ● Potting soil: 1 small pot (2–3 inches deep) for transplanting germinated seeds.
- ● Humidity dome: 1 (to retain moisture during early growth).
- ● Label & marker: To track seed varieties (if experimenting!).
Step-by-Step instructions for stratifying peach seeds
Here’s how to break dormancy and coax those stubborn peach pits into life—naturally and reliably.
🌱 Step 1: Extract and Clean the Seeds
Start by carefully removing the pit from a fresh, organic peach—avoid store-bought varieties treated with growth inhibitors. Use a sharp knife to split the pit open lengthwise, then pry out the single seed inside with a butter knife. Rinse it under cool water to remove any remaining fruit flesh, which can rot during stratification.
Let the seed air-dry for 24-48 hours at room temperature. This prevents mold while keeping the outer shell intact. Handle gently—peach seeds are brittle and can crack if pressed too hard. Once fully dry, you’ll see a smooth, tan seed with a slightly tapered end; this is the orientation you’ll plant with the pointy side down.
💧 Step 2: Cold-Moisten Stratification in a Container
Fill a quart-sized resealable plastic bag with 2 cups of dampened peat moss or coconut coir—just enough moisture to feel like a wrung-out sponge. Place the dried peach seed inside, then seal the bag three-quarters closed, leaving a small gap for airflow. Label it with the date and variety (if known).
Store the bag in your refrigerator’s vegetable crisper where temperatures hover around 35-45°F. This mimics winter’s natural chilling cycle, breaking dormancy. Check the moisture weekly—if the peat feels dry, mist it lightly with water. After 8-12 weeks, the seed will sprout when conditions warm up.
☀️ Step 3: Transition to Warmth for Germination
Once the seed shows first signs of swelling (usually after 8 weeks), remove it from cold storage and plant it ½ inch deep in a 4-inch pot filled with sterile seed-starting mix. Press the soil gently around the seed to ensure good contact. Place the pot in a warm, bright spot—a seedling heat mat set to 70°F will speed germination.
Keep the soil consistently moist but not soggy—peach seedlings despise waterlogged roots. Within 2-4 weeks, you’ll see the first true leaves emerge, signaling successful stratification. Avoid transplanting until the seedling reaches 4-6 inches tall, with at least 3-4 sets of leaves.
⏰ Step 4: Harden Off and Plant Outdoors
When nighttime temperatures stay above 50°F (typically late spring), gradually acclimate the seedling to outdoor conditions. Start with 1-2 hours of shade on day one, increasing exposure by 1 hour daily over 10-14 days. This prevents transplant shock and strengthens the young plant’s resilience.
Choose a sunny, sheltered location with well-draining soil—peach trees need full sun and 6+ months of warmth to thrive. Plant the seedling at the same depth it grew in the pot, watering deeply to settle the soil. Mulch around the base with 2 inches of organic mulch to retain moisture and suppress weeds.
Tips & tricks for perfect peach seed stratification
Here's what I've learned after years of growing peach trees from seed—these small details make all the difference between a seed that sprouts and one that never wakes up.
Seed Orientation Matters: In Step 1, when you're drying your seed for 24-48 hours, pay close attention to the tapered end—the pointy side should always face downward when planting. This mimics the seed's natural position in the fruit and improves germination rates. I've seen seeds sprout within days when oriented correctly, while improperly placed seeds often fail to break dormancy.
Moisture Balance is Critical: During the 8-12 week cold stratification in Step 2, the peat moss or coconut coir should feel like a wrung-out sponge—not bone dry, not dripping wet. I check moisture weekly by squeezing a small amount between my fingers—if it crumbles easily, it's too dry; if water beads form, it's too wet. The 35-45°F refrigerator temperature helps maintain this delicate balance without needing constant attention.
Visual Cues for Germination: In Step 3, when transitioning to warmth, watch for the seed's outer shell to develop tiny cracks or a slight bulge after about 8 weeks. This is your signal that dormancy is breaking. I've found that placing the pot under a grow light (not direct sun) at this stage prevents leggy seedlings while maintaining the 70°F warmth needed for germination. The first true leaves will appear within 2-4 weeks of this swelling stage.
Harden Off Gradually: The 10-14 day hardening process in Step 4 is where most seedlings fail. Start with just 1-2 hours of shade on day one, then increase exposure by 1 hour daily. I've seen seedlings that looked perfectly healthy indoors wilt dramatically when exposed to full sun too quickly. The key is to build resilience—think of it like helping a child adjust to cold weather by layering clothing slowly rather than throwing them into a snowbank.
Pro Tips for Peach Seed Stratification
- Here's what I've learned after years of growing peach trees from seed—these small details make all the difference between a seed that sprouts and one that never wakes up.
- Seed Orientation Matters: In Step 1, when you're drying your seed for 24-48 hours, pay close attention to the tapered end—the pointy side should always face downward when planting.
- Moisture Balance is Critical: During the 8-12 week cold stratification in Step 2, the peat moss or coconut coir should feel like a wrung-out sponge—not bone dry, not dripping wet.
Frequently asked questions
Got questions about peach seed stratification? You’re not alone—this process can feel tricky at first! Below, we’ve answered the most common queries to help you grow those dreamy spring blooms with confidence.
How cold does it need to be for stratification?
Peach seeds thrive in 34–41°F (1–5°C) for optimal stratification. A standard refrigerator’s crisper drawer (usually around 38°F) works perfectly. Avoid freezing temps—those can damage the seed’s viability. If your climate dips below freezing, move seeds indoors or use a temperature-controlled seed stratification kit.
Can I skip stratification and just plant the seeds?
While possible, skipping stratification will drastically reduce germination rates—often below 20%. Without cold treatment, seeds may rot or sprout erratically. If you’re impatient, try scarification (lightly nicking the seed coat) as a shortcut, but stratification remains the gold standard for reliable results.
How long should I stratify peach seeds for best results?
Aim for 8–12 weeks of cold, moist stratification. Most seeds germinate best after 8 weeks, but extending to 12 weeks ensures even stubborn seeds break dormancy. Check weekly—if mold appears, reduce moisture slightly or adjust airflow.
What if my seeds won’t germinate after stratification?
Don’t panic! Try these fixes:
- Check seed viability: Soak a few seeds in water for 24 hours—if they sink, they’re likely viable. Floaters may be dead.
- Adjust moisture: Seeds should stay damp, not soggy. Use a spray bottle to mist if needed.
- Warmth shock: After stratification, soak seeds in warm water (80°F/27°C) for 24 hours before planting to kickstart growth.
Can I reuse stratification materials (like moist paper towels)?
No, reuse isn’t recommended—bacteria and mold thrive in damp, used materials. Always use fresh paper towels, peat moss, or a clean growing medium for each batch. For efficiency, prep multiple seed trays at once and label them with dates!
Wrapping up and next steps
Peach seed stratification isn’t just a gardening trick—it’s your ticket to vibrant spring blooms in just 8 weeks! By mimicking nature’s cold-warm cycle, you’re giving those tiny seeds the best shot at sprouting into healthy, fruitful trees.
Whether you’re a seasoned gardener or a curious beginner, this method is simple, rewarding, and full of potential.
Ready to turn those seeds into a thriving garden? Start your stratification process today—then grab a notebook to track progress and celebrate every tiny milestone. Who knows? You might just grow more than a plant—you could cultivate a new green thumb passion! 🌱✨