
Planting
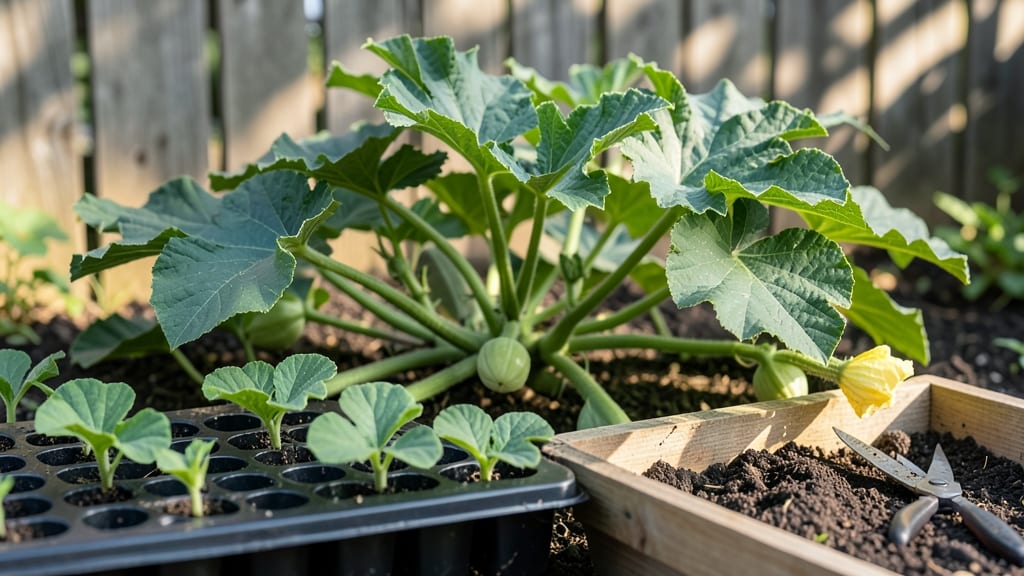
Planting butternut seeds from last year’s harvest saves money and guarantees heirloom varieties that stores can’t match. 🌱 I’ve grown mine from seed for three seasons now, and the difference in flavor—sweeter, nuttier—is worth the extra effort.
The key isn’t just burying seeds; it’s timing, soil warmth, and patience that turns those tiny kernels into 20-pound squash by fall.
You’ll need well-draining soil mixed with compost, a sunny spot with at least 6 hours of direct light daily, and a warm start—either a greenhouse or waiting until soil hits 60°F. Most beginners overwater at first, but butternuts hate soggy roots.
Plant seeds 1 inch deep, spaced 3 feet apart, and keep the soil consistently moist (not soaked) until germination, which takes 7-14 days.
Once sprouted, vines spread like lazy rivers, so give them room to roam. You’ll harvest 100-120 days after planting, when the rind turns hard and the stem shrinks where it meets the squash.
Store the seeds you save in a cool, dry place—50-60°F—and they’ll stay viable for 3-5 years. The first harvest feels like magic: golden, ribbed squash heavy enough to make your arms ache.
Watch for squash vine borers (tiny moths that drill into stems) and cucumber beetles—cover young plants with floating row fabric until vines toughen up. If you’ve ever struggled with store-bought butternuts that taste bland or mealy, growing your own changes everything.
Here’s how to make it foolproof the first time around.
📚 In This Guide
- What you need
- Instructions
- Tips and common mistakes
- Wrapping up and next steps
What you need
- ● Fresh butternut squash: Choose 2–3 fully mature, healthy squash (the riper, the better!)
- ● Sharp kitchen knife or serrated knife (for slicing open the squash)
- ● Large spoon or scoop (for scooping out seeds and pulp)
- ● Colander or fine-mesh strainer (to rinse seeds thoroughly)
- ● Paper towels or clean kitchen towels (for drying seeds)
- ● Small bowls or plates (for spreading seeds to dry)
- ● Air-tight storage containers (glass jars, plastic containers with lids, or seed envelopes—2–3 containers depending on yield)
- ● Permanent marker or labels (to label containers with the date and variety)
- ○ Optional: Desiccant packets (to absorb excess moisture in storage containers)
- ● Cutting board (to protect your countertops)
- ● Rubber gloves (to keep hands clean while handling pulp)
- ● Fine-mesh sieve (for separating seeds from fibrous pulp)
- ○ Food dehydrator or oven (optional, for faster drying at 135°F (57°C))
- ○ Digital scale (optional, to monitor seed weight post-drying)
- ● Allow squash to fully ripen on the vine (hard rind, dull color, and stem dried up)
- ● Work in a well-ventilated area (pulp smells strong while drying!)
- ● Choose a dry, warm spot (60–70°F / 15–21°C) for seed drying (avoid humidity!)
- ● Store seeds in a cool, dark place (ideal: 35–40°F (2–4°C)) for long-term viability.
Step-by-Step instructions for planting and storing butternut seeds
Here's how to turn this year's harvest into next year's garden—with minimal effort and maximum success.
🌱 Step 1: Extract and Clean the Seeds
Cut open a fully ripened butternut squash and scoop out the seeds along with the surrounding stringy pulp. Rinse them thoroughly under cool water to remove all flesh and debris. I spread them on a clean paper towel and let them air-dry for 24 hours in a warm, dry spot—this prevents mold from forming later.
Once dry, separate the seeds from any remaining pulp by gently rubbing them between your fingers. Discard any seeds that are shriveled, cracked, or discolored—these won’t germinate. Store the good ones in a labeled paper envelope or small mesh bag for now.
💧 Step 2: Stratify for Better Germination
Butternut seeds benefit from a short cold treatment called stratification, which mimics winter conditions. Place the clean seeds in a sealed plastic bag with a damp paper towel—just enough moisture to keep the towel damp, not soggy. Seal the bag and refrigerate for 10-14 days.
Check the seeds every few days to ensure the towel stays moist but not dripping. This step breaks dormancy and ensures stronger, more uniform germination. After 10-14 days, remove the seeds and let them dry again for 24 hours before storing.
🪴 Step 3: Store Seeds Properly for Long-Term Viability
For long-term storage, place the dried seeds in a small, airtight container like a glass jar or resealable plastic bag. Add a packet of silica gel or a few uncooked rice grains to absorb excess moisture—this keeps humidity low and preserves viability. Label the container with the variety and date.
Store the container in a cool, dark place, like a pantry or basement, where temperatures stay between 35-50°F. Butternut seeds remain viable for 3-5 years under these conditions. Avoid refrigerators or freezers—they create condensation when removed, which can ruin seeds.
⏰ Step 4: Plant Seeds in Spring
When spring arrives, soak the seeds in lukewarm water for 12 hours to soften the outer shell and speed up germination. Plant them 1 inch deep in well-draining soil, spacing them 2-3 feet apart if growing directly in the garden. Keep the soil consistently moist but not waterlogged.
Germination typically takes 7-14 days in 70-80°F soil. Thin seedlings to the strongest one per spot once they reach 2 inches tall. Watch for squash vine borer damage—cover young plants with row fabric if borers are common in your area.
🌿 Step 5: Harvest and Repeat the Process
Butternut squash plants mature in 80-100 days, depending on the variety. Harvest when the rind turns hard and the stem dries out—this usually happens in late fall. Cure the squash by storing it in a warm, dry place (80-85°F) for 10 days before eating or saving seeds.
Once cured, save the best specimens for seed extraction. Repeat the drying and stratification process, and you’ll have a reliable source of seeds for years to come. This method ensures you always have fresh, high-quality butternut squash without buying new seeds.
Tips & tricks for perfectly stored butternut seeds
Here's how to maximize your seed-saving success—these tricks will help you avoid common pitfalls and ensure your seeds stay viable for years.
Drying Efficiency: After rinsing the seeds in Step 1, spread them in a single layer on a clean paper towel and place them in a warm, dry spot with good air circulation. I use a wire cooling rack over a baking sheet to speed up drying while preventing moisture buildup. The 24-hour drying time is crucial—any lingering moisture will promote mold growth, especially in humid climates. If your kitchen feels damp, consider using a small fan on low to circulate air around the seeds.
Stratification Secrets: During the 10-14 day stratification in Step 2, I recommend placing the sealed bag in the crisper drawer of your refrigerator rather than on a shelf. The crisper maintains more consistent humidity levels, which is critical for breaking dormancy. Check the seeds every 3-4 days—if the towel feels dry, lightly mist it with water and reseal. This step mimics winter conditions perfectly, but too much moisture can lead to rot.
Storage Container Strategy: For long-term storage in Step 3, I prefer using small glass jars with tight-sealing lids over plastic bags. Glass doesn't absorb odors and provides better protection against light, which can degrade seed viability over time. If using plastic, opt for Mylar bags with zipper seals—they're specifically designed for seed storage. Remember to include a silica gel packet or uncooked rice in the container to maintain that critical 35-50°F temperature range and low humidity.
Spring Planting Prep: When you're ready to plant in Step 4, I've found that soaking the seeds in lukewarm water for 12 hours works best when combined with a gentle abrasion. After soaking, rub the seeds between two layers of damp paper towel to slightly roughen their outer shell. This helps break dormancy even further and can reduce germination time by 2-3 days. Just be gentle—you don't want to damage the seed itself.
Pro Tips for Plant Butternut Seeds
- Here's how to maximize your seed-saving success—these tricks will help you avoid common pitfalls and ensure your seeds stay viable for years.
- Drying Efficiency: After rinsing the seeds in Step 1, spread them in a single layer on a clean paper towel and place them in a warm, dry spot with good air circulation.
- Stratification Secrets: During the 10-14 day stratification in Step 2, I recommend placing the sealed bag in the crisper drawer of your refrigerator rather than on a shelf.
Frequently asked questions
Got questions about planting, storing, or harvesting butternut seeds? You’re not alone! Here are answers to the most common concerns—so you can confidently save seeds for next year’s harvest.
How do I know if my butternut seeds are viable for planting?
Test viability by filling a glass with water, adding seeds, and waiting 15–20 minutes. Sinkers are viable; floaters are not. Aim for 80%+ sinkers for best results. Store them in a cool, dry place until planting season!
When is the best time to plant butternut seeds?
Butternut seeds need warmth to germinate—plant them indoors 8–10 weeks before your last frost date (use a seedling heat mat if needed). Transplant outdoors after soil temps reach 70°F+. Patience pays off!
Can I plant butternut seeds directly in the garden instead of starting indoors?
Yes, but success depends on your climate. In warm regions (Zone 8+), sow seeds directly after the last frost when soil is consistently warm. In cooler areas, start indoors for stronger seedlings. Mulch helps retain heat!
Why aren’t my butternut seeds germinating?
Common culprits: cold soil (use a heat mat), old seeds (viability drops after 1–2 years), or moisture issues (keep soil damp but not soggy). Try scarifying seeds (lightly nicking the shell) to speed up germination.
How long does it take for butternut seeds to sprout?
Germination takes 14–30 days at ideal temps (70–85°F). Keep seeds in bright, indirect light and maintain consistent moisture. Thin seedlings to 12–18 inches apart for healthy growth!
Wrapping up and next steps
Growing butternut seeds is a rewarding way to ensure a fresh, homegrown harvest year after year! By following these simple steps—drying, storing, and planting—you’ll unlock the joy of nurturing your own butternut squash plants.
Whether you’re a seasoned gardener or just starting out, this process is totally doable with patience and care.
Now that you’re equipped with the know-how, take the next step: grab those dried seeds, find a sunny spot in your garden, and get ready to watch your butternut plants thrive! Happy planting—your future harvest awaits! 🌱🎉