
Vegetables
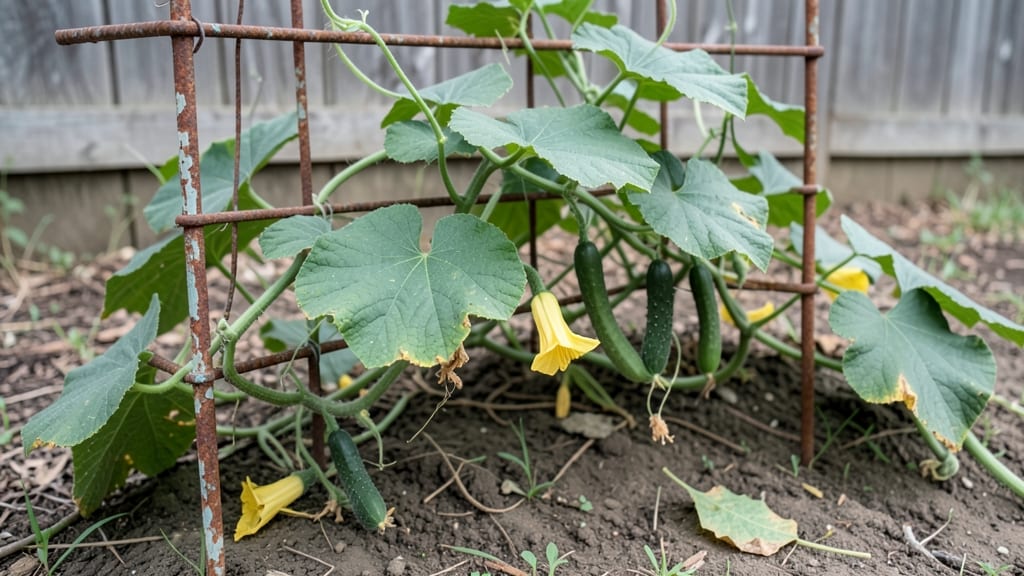
Saving vining cucumber seeds from this year’s harvest means next year’s garden will start with the best possible foundation.
I’ve learned the hard way that proper drying and storage can mean the difference between robust plants and weak seedlings—this method guarantees you’ll have seeds ready to grow cucumbers that climb, sprawl, and produce like champions.
The process is simpler than it sounds: after harvesting mature cucumbers, scoop out the seeds, rinse them, and let them dry on paper towels for a few days. Once fully dried, store them in a cool, dark place until planting time.
You’ll end up with seeds that sprout faster and stronger than store-bought varieties, and you’ll save money while preserving the exact traits you love—whether it’s disease resistance or that perfect sliceable texture.
By next spring, you’ll be planting seeds that grow into vines stretching 10 feet or more, each loaded with crisp, flavorful cucumbers. The key is patience during drying and proper storage—skipping these steps leads to moldy seeds or poor germination.
With the right care, your saved seeds will outperform commercial ones every time.
This method works for any vining variety, from classic slicers to pickling cucumbers, and adapts to both backyard gardens and container setups. Whether you’re a seasoned gardener or just starting, these seeds will give you a head start on a bountiful harvest. Let’s get those cucumbers preserved for next year!
📚 In This Guide
- What you need
- Instructions
- Tips and common mistakes
- Wrapping up and next steps
What you need
- ● Mature vining cucumber plants: Choose heirloom or open-pollinated varieties (hybrids won’t produce true seeds). Aim for at least 3-5 healthy plants to ensure genetic diversity.
- ● Ripe cucumbers: Select 3-5 fully mature cucumbers (yellow or brown-skinned, depending on the variety) that have gone slightly soft—these are seed-ready!
- ● Sharp knife or pruning shears: For harvesting cucumbers cleanly without damaging the plant.
- ● Large bowl or bucket: To collect cucumber pulp and seeds (use a non-reactive container like glass or stainless steel).
- ● Fine-mesh strainer or cheesecloth: For rinsing and separating seeds from pulp.
- ● Paper towels or coffee filters: To air-dry seeds thoroughly.
- ● Small paper envelopes or seed packets: For storing dried seeds (label with the variety and date!).
- ● Permanent marker or labels: To mark seed packets clearly.
- ○ Air-tight containers (optional but recommended): For long-term storage (e.g., glass jars with lids or resealable plastic bags with silica gel packets).
- ○ Gloves (optional): To keep hands clean while handling pulp and seeds.
- ○ Fine-tip tweezers (optional): For picking out debris or bad seeds during drying.
- ● Humidity-controlled space: A cool, dry, and well-ventilated area (like a basement or pantry) with 40-50% humidity for drying seeds.
- ● Basic knowledge of seed-saving: Familiarize yourself with open-pollination principles if growing near other cucumber varieties.
Instructions for properly drying, storing, and reviving vining cucumber seeds
Here’s how to preserve your best cucumber seeds for planting next season—without losing viability.
Harvest and Extract Seeds from Mature Cucumbers
Choose cucumbers that are fully ripe but not overripe, as they’ll have the best seed quality. Cut them open and scoop out the seeds along with the surrounding jelly-like pulp into a bowl. Let the mixture ferment for 3-5 days at room temperature. This process helps separate viable seeds from the pulp and removes any potential seed coatings that might inhibit germination.
After fermenting, stir the mixture daily. You’ll notice the good seeds will sink to the bottom while the bad ones and debris float. Once fermentation is complete, pour the mixture through a fine-mesh strainer or cheesecloth to collect the seeds. Rinse them thoroughly under cool water to remove any remaining pulp. Spread the clean seeds on a paper towel to air-dry for 1-2 hours before moving to the drying process.
Dry the Seeds Thoroughly for Long-Term Storage
Lay the rinsed seeds in a single layer on a clean, dry paper towel or mesh screen. Place them in a warm, dry spot with good airflow, like a sunny windowsill or a dehydrator set to 115°F. The goal is to reduce the moisture content to 5-7% so the seeds stay viable for years. You’ll know they’re dry enough when they feel light and brittle to the touch—crush one between your fingers, and it should crumble easily.
If you’re using a dehydrator, check the seeds after 4-6 hours to avoid over-drying. For air-drying, this process can take 3-5 days, depending on humidity levels. Store the dried seeds in a labeled envelope or small jar once completely dry to prevent moisture absorption.
Store Seeds in Ideal Conditions for Longevity
Place the dried seeds in an airtight container, such as a glass jar or resealable plastic bag with a silica gel packet. Store them in a cool, dark place like a pantry or refrigerator. The ideal storage temperature is 32-41°F, which helps maintain seed viability for 3-5 years. Label the container with the cucumber variety and the harvest year to keep track of your seed stock.
Check the seeds annually for signs of moisture or pests. If you notice any dampness or mold, transfer the seeds to a fresh container immediately. Properly stored seeds should remain firm and free of discoloration. This method ensures you’ll have healthy, ready-to-plant seeds for your next growing season.
Test and Revive Seeds Before Planting Next Year
Before planting, perform a simple viability test by placing 10 seeds between damp paper towels in a sealed plastic bag. Keep them in a warm spot (70-75°F) for 5-7 days. Check daily for sprouts—if 50% or more germinate, your seeds are still good to use. If fewer than half sprout, you may want to reduce the number of seeds planted or consider sourcing fresh ones.
To revive seeds that have lost some moisture, soak them in lukewarm water for 12 hours before planting. This rehydrates the seed coat and kickstarts germination. Plant the revived seeds in moist, well-draining soil at a depth of ½ inch and keep the soil consistently damp until sprouts appear. With proper storage, your cucumber seeds should remain viable and ready for next year’s garden.
Tips & tricks for perfectly preserving vining cucumber seeds
Saving cucumber seeds for next season doesn't have to be a guessing game—these practical tips will help you maximize viability and avoid common pitfalls.
Fermentation Insight: The 3-5 day fermentation in Step 1 is crucial for removing seed coatings that might inhibit germination. If your kitchen is cooler (below 70°F), extend fermentation to 5-7 days. Stir daily to prevent mold—you'll know it's ready when the mixture smells tangy and the good seeds sink while debris floats to the top.
Drying Strategy: When using a dehydrator at 115°F, check seeds every 30 minutes after the initial 4-6 hours to avoid over-drying. For air-drying, place seeds on a mesh screen in a warm, dry spot with good airflow—like a sunny windowsill with a fan nearby. The goal is to reach that light, brittle texture without turning them to dust.
Storage Wisdom: The 32-41°F storage temperature range in Step 3 is ideal for preserving viability, but if you don't have a cool pantry, a refrigerator works well too. Place seeds in the crisper drawer where temperatures stay most consistent. For extra protection, add a small silica gel packet to your storage container—it absorbs any moisture that might sneak in.
Viability Test Tip: When performing the germination test in Step 4, place the damp paper towels in a clear plastic bag so you can easily monitor progress without disturbing them. If you're testing seeds stored for 3+ years, expect slightly lower germination rates—aim for at least 40% sprout rate for reliable planting results.
Pro Tips for Vining Cucumber Seeds
- Saving cucumber seeds for next season doesn't have to be a guessing game—these practical tips will help you maximize viability and avoid common pitfalls.
- Fermentation Insight: The 3-5 day fermentation in Step 1 is crucial for removing seed coatings that might inhibit germination.
- Drying Strategy: When using a dehydrator at 115°F, check seeds every 30 minutes after the initial 4-6 hours to avoid over-drying.
Frequently asked questions
Got questions about saving and reviving vining cucumber seeds? You’re not alone—gardeners often wonder about timing, storage tricks, and how to troubleshoot common issues. Here are answers to the most common queries to help you master seed preservation like a pro!
How do I know when vining cucumber seeds are fully dry and ready for storage?
Seeds are ready when they’re completely dry and rattle inside the cucumber. Press a seed between your fingers—if it feels hard and doesn’t leave a mark, it’s dry! Spread them on a screen or paper towel for 1–2 weeks in a warm, dry spot (like a sunny windowsill) before storing. Pro tip: Avoid rushing—moisture is the enemy of long-term viability!
How long can I store vining cucumber seeds before they lose viability?
With proper drying and storage (cool, dark, and dry), vining cucumber seeds stay viable for 3–5 years. Some may even germinate after 7+ years, but expect lower success rates. Label your seed packets with the date to track freshness. Troubleshooting tip: If germination drops below 50%, consider refreshing your seeds!
What’s the best container for storing vining cucumber seeds long-term?
Use airtight, moisture-proof containers like glass jars, plastic bags with silica packets, or seed envelopes in a sealed tin. Avoid cardboard—it absorbs humidity and speeds up seed spoilage. For extra protection, store seeds in the fridge (not the freezer) to slow aging. Alternative: Mylar bags with oxygen absorbers work great for bulk storage!
Why did my stored vining cucumber seeds sprout mold or rot when I tried to revive them?
Mold or rot usually means excess moisture during storage. Check for these red flags:
- Condensation inside containers (fix: dry seeds immediately).
- Musty smells (fix: discard and restart drying).
- Soft or discolored seeds (fix: toss them—don’t risk it!).
Always re-dry seeds at room temp for 24+ hours before planting. Prevention tip: Store seeds with a dampness indicator (like silica gel) to catch issues early!
Can I use store-bought cucumber seeds instead of saving my own?
Store-bought seeds are a great backup, especially for hybrid varieties (which won’t produce true-to-type seeds). If you’re saving seeds, stick to heirloom or open-pollinated cucumbers for consistent results next season. Budget hack: Buy seeds in bulk or swap with fellow gardeners to save money!
Wrapping up and next steps
Growing vining cucumbers from saved seeds is a rewarding way to cut costs and preserve heirloom varieties—plus, it’s easier than you think! By mastering the art of drying, storing, and reviving seeds, you’ll unlock a year-round supply of fresh, homegrown cucumbers. 🌱
Ready to take the next step? Start by labeling your seed packets with the variety and harvest date, then experiment with different storage methods to find what works best for your climate. Happy gardening—your future harvests will thank you! 🌿