
Propagation
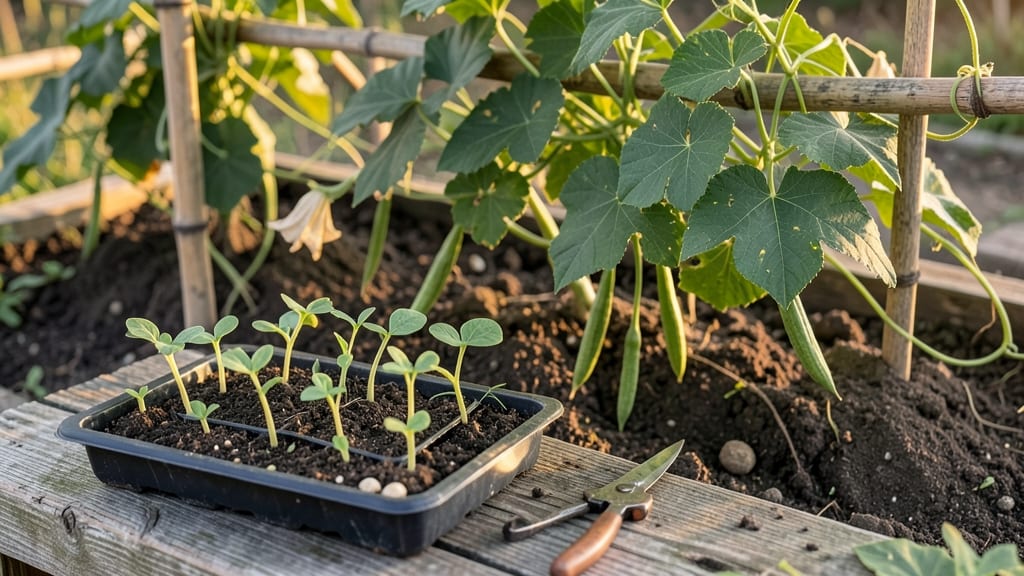
Pointed gourd seeds need patience and the right touch to break their stubborn dormancy—something I learned after three failed attempts. 🌱 The key isn’t forcing them to sprout; it’s mimicking their natural tropical rhythm with warm soil and consistent moisture.
My first batch finally cracked open after soaking overnight in warm water, and within two weeks, I had sturdy seedlings ready for transplanting.
You’ll need a sunny spot with well-draining soil, a humidity tray for early growth, and a 55-65°F soil temperature to keep them happy. Most gardeners overlook the pre-sprouting soak, but that’s where the magic happens—skipping it means waiting weeks for germination.
Once they’re up, keep the soil damp but not soggy; these plants hate wet feet.
By midsummer, you’ll be harvesting long, waxy gourds with a mild, cucumber-like flavor—perfect for stir-fries or pickling. The vines spread fast, so give them room or train them up a trellis. With the right start, pointed gourds reward you with abundant harvests for months, far outlasting most summer crops.
Works best in zones 9-11, but container growers in cooler areas can extend the season with row covers. Here’s how to avoid the pitfalls that trip up beginners—so you end up with a thriving patch, not a pile of dried-out seeds.
📚 In This Guide
- What you need
- Instructions
- Tips and common mistakes
- Wrapping up and next steps
What you need
- ● Pointed gourd seeds: 10–20 seeds (opt for heirloom or organic varieties for best results).
- ● Seed-starting mix: 2–3 gallons of sterile, well-draining potting soil (or coco coir for a lighter option).
- ● Containers: 4–6 biodegradable pots (3–4 inches deep) or
- ● A seed tray with drainage holes (for bulk starts).
- ● Watering can or spray bottle: With a fine rose attachment for gentle moisture control.
- ● Plastic wrap or humidity dome: To retain moisture during germination.
- ● Garden gloves: For handling soil and seeds comfortably.
- ● Small hand trowel: For transplanting seedlings later.
- ● Grow lights or sunny windowsill: A 12–16 hour light source (LED grow lights work great!).
- ○ Fertilizer (optional): Balanced liquid fertilizer (e.g., 10-10-10) or
- ● Compost tea for organic enrichment.
- ● Label markers: To track seed varieties and planting dates.
- ○ Heat mat (optional): For faster germination (70–85°F is ideal).
- ● A warm, well-lit space (65–85°F for germination).
- ● Patience! Pointed gourd seeds may take 10–21 days to sprout.
- ● Access to outdoor space (or a greenhouse) once seedlings are 4–6 inches tall.
Step-by-step instructions for germinating pointed gourd seeds
Here’s how I ensure my pointed gourd seeds sprout reliably—no guesswork, just science-backed steps.
🌱 Step 1: Soak Seeds to Break Dormancy
Pointed gourd seeds have a tough outer shell that slows germination. Soak them in lukewarm water for 12-24 hours to soften the coating. Place them in a bowl, cover, and let them sit—you’ll see the water cloud slightly as the seed coats absorb moisture.
After soaking, gently rub the seeds between your fingers to remove any remaining hard outer layer. This step is critical: seeds without this pre-treatment often take 3+ weeks to sprout, while prepped seeds emerge in 7-10 days. Discard any seeds that float—they’re likely nonviable.
💧 Step 2: Prepare Containers and Soil Mix
Use a lightweight seed-starting mix (never garden soil) to prevent compaction. Fill small pots or seed trays with the mix, leaving ½ inch of space at the top. Press the soil down lightly—it should feel like damp sand, not packed clay.
Plant the soaked seeds ½ inch deep in the soil, spacing them 2 inches apart to avoid overcrowding. A single seed per pot works best for pointed gourds, as they dislike transplanting. Water gently with a spray bottle until the soil is evenly moist but not soggy.
☀️ Step 3: Provide Warmth and Humidity
Pointed gourd seeds germinate best at 75-85°F. Place the pots in a warm spot—like on top of a refrigerator or near a heat mat—until sprouts appear. Cover the containers with plastic wrap or a humidity dome to retain moisture, but remove it as soon as seedlings emerge to prevent fungal growth.
Keep the soil consistently moist but never waterlogged. You’ll know it’s right when the surface feels damp to the touch but doesn’t pool. Seedlings typically break through the soil in 7-10 days, though cooler temperatures may extend this to 2-3 weeks.
🌿 Step 4: Transition to Bright Light
Once the first true leaves appear (not the initial cotyledons), move the seedlings to a spot with 6-8 hours of bright, indirect light daily. South-facing windows or grow lights work best. If seedlings stretch toward the light with pale stems, they’re not getting enough intensity—adjust the light source within 4 inches of the plants.
Thin seedlings if overcrowded, leaving the strongest one per pot. You’ll recognize healthy seedlings by their deep green leaves and sturdy stems. Avoid disturbing the roots during thinning—gently snip unwanted seedlings at soil level with clean scissors.
⏰ Step 5: Harden Off Before Transplanting
Two weeks before your last frost date, begin hardening off seedlings by placing them outdoors in a sheltered spot for 1-2 hours the first day. Gradually increase exposure over 7-10 days, ending with full sun. This prepares them for outdoor conditions and prevents transplant shock.
Transplant after all danger of frost has passed, choosing a location with full sun and well-draining soil. Pointed gourds thrive in warm climates but can tolerate brief cool spells once established. Water deeply at the base after planting to encourage root growth.
Tips & tricks for perfect pointed gourd germination
Real talk: Germinating pointed gourd seeds successfully requires patience and precision. Here are the secrets I’ve learned after years of trial and error to ensure your seeds sprout reliably.
The Soak Test: The 12-24 hour soak isn’t just about softening the seed coat—it’s also a viability test. If any seeds float during soaking, they’re likely nonviable and should be discarded immediately. I’ve found that using lukewarm water (around 85°F) speeds up the softening process while preventing damage to the seed’s delicate internal structure. After soaking, the gentle rubbing between fingers removes the final barrier without harming the seed itself.
Soil Science: That lightweight seed-starting mix isn’t just a recommendation—it’s a game-changer. Regular garden soil compacts easily, which can suffocate emerging roots. I press the soil down lightly until it feels like damp sand, creating just enough resistance for young roots to anchor into. The ½-inch planting depth and 2-inch spacing give roots room to establish without competing for nutrients, which is especially important for pointed gourds that dislike being transplanted.
Heat Hack: Those 75-85°F temperatures are non-negotiable for pointed gourd germination. I’ve had the best success using a seedling heat mat set to 80°F—it creates consistent warmth without the risk of overheating. If you don’t have a heat mat, place your pots on top of a refrigerator or near a warm appliance (but not too close). The key is maintaining that warmth until sprouts appear, which typically happens within 7-10 days under ideal conditions. If your home stays consistently cooler, you might see germination extend to 2-3 weeks.
Light Transition: The moment those first true leaves appear is when you need to act fast. Move seedlings to bright, indirect light immediately—they’re ready for more intensity than the initial cotyledons can handle. I’ve found that placing them within 4 inches of a grow light prevents that leggy stretching that signals light deprivation. Watch for deep green leaves and sturdy stems as your success indicators; anything pale or weak needs more light or better spacing.
Pro Tips for Pointed Gourd Seeds
- Real talk: Germinating pointed gourd seeds successfully requires patience and precision.
- The Soak Test: The 12-24 hour soak isn’t just about softening the seed coat—it’s also a viability test.
- Soil Science: That lightweight seed-starting mix isn’t just a recommendation—it’s a game-changer.
Frequently asked questions
Got questions about growing pointed gourd seeds? You’re not alone! Here are answers to the most common queries—from timing to troubleshooting—to help you achieve those reliable blooms next season.
How long does it take for pointed gourd seeds to germinate?
Pointed gourd seeds typically sprout within 7–21 days, depending on temperature and moisture. For fastest results, keep soil warm (70–85°F) and consistently damp. Patience is key—some seeds may take longer, especially in cooler conditions.
When is the best time to plant pointed gourd seeds?
Start seeds indoors 8–10 weeks before the last frost or sow directly in warm soil after all danger of frost has passed. Pointed gourds thrive in heat, so wait until nighttime temps stay above 55°F for best success.
Can I use pointed gourd seeds from a store-bought gourd?
Yes, but with caution! Store-bought seeds may be hybrid or treated to prevent germination. For reliable results, opt for seeds from a trusted supplier or save seeds from open-pollinated varieties grown in your region.
Why aren’t my pointed gourd seeds sprouting?
Check these common culprits: cold soil (use a heat mat), dry soil (keep moist but not soggy), or old seeds (viability drops after 2–3 years). If seeds float in water, they’re likely non-viable—try fresh ones!
Are there alternatives if pointed gourd seeds are hard to find?
Try similar winter squash or pumpkin seeds for a comparable growing experience. For edible vines, consider sicyos angulatus (prickly cucumber) or luffa seeds—both thrive in warm climates and produce unique harvests!
Wrapping up and next steps
Pointed gourd seeds may seem tricky, but with the right patience, preparation, and care, you’ll unlock a bounty of vibrant blooms next season! 🌱 From soaking seeds to mastering the ideal planting conditions, each step brings you closer to success.
Whether you’re a seasoned gardener or a curious beginner, these germination secrets will help you grow with confidence.
Ready to plant your future harvest? Start small—grab a few seeds, follow the steps, and watch your garden thrive. Happy growing! 🌿