
Lawn
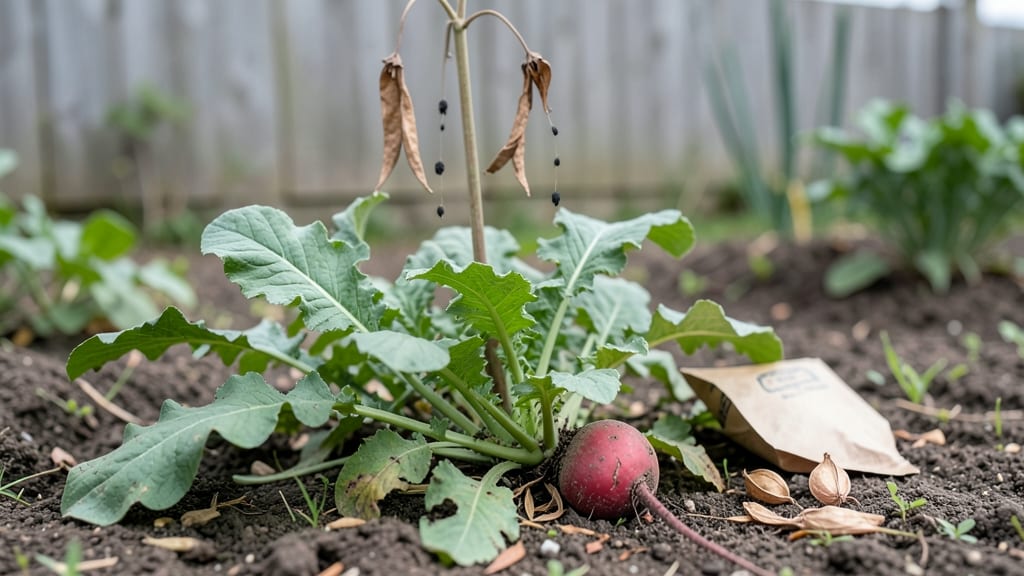
Saving radish seeds from your garden cuts costs and keeps heirloom varieties alive—plus, there’s nothing like watching those first seedlings sprout from your own saved stock. 🌱 The process starts with choosing the right plants and ends with dry, viable seeds ready for next spring, but the middle steps require timing and patience to avoid the two biggest pitfalls: cross-pollination and bolting before maturity.
You’ll need just a few simple supplies: a well-isolated garden plot (or containers), twine for marking, paper bags for drying, and a dry, dark spot for storage. Radishes self-pollinate easily, so isolation is key—plant varieties at least 500 feet apart or use row covers to prevent accidental cross-breeding.
The payoff? Seeds that stay true to your favorite varieties, year after year.
Once your radish plants flower and pods turn brown and papery, harvesting is straightforward: snip the pods, let them dry completely for 2-3 weeks, then rub the seeds into your hand. Store them in a sealed container where they’ll stay viable for 3-5 years.
The first time you see those familiar seedlings emerge from your saved seeds, you’ll know it was worth the effort.
This method works for all radish types—round, French breakfast, or daikon—but bolting is the real enemy. Keep plants watered and shaded in hot weather to delay flowering until pods mature properly. With a little practice, you’ll be saving seeds like a pro, and your garden will thank you for it.
📚 In This Guide
- What you need
- Instructions
- Tips and common mistakes
- Wrapping up and next steps
What you need
- ● Mature radish plants: Choose open-pollinated varieties (avoid hybrids like ‘Cherry Belle’). Let them bolt (flower) naturally—3–5 plants are ideal for cross-pollination.
- ● Scissors or pruning shears: Sharp, clean tools to harvest seed pods without damaging plants.
- ● Paper bags or breathable mesh bags: 2–3 bags (labeled!) to collect seed pods and allow airflow.
- ● Drying tray or screen: A flat, elevated surface (like a wooden board or wire rack) to dry pods. 12" x 12" minimum.
- ● Envelope or seed packet: 1–2 labeled with the variety name, date, and location.
- ● Permanent marker or labels: To mark bags/envelopes clearly.
- ● Desiccant (like silica gel packets): Speeds up drying for pods in humid climates.
- ● Fine-mesh sieve: For separating seeds from chaff after drying.
- ● Humidity monitor: Ideal for tracking drying conditions (aim for 30–40% humidity).
- ● Notebook: To log growing conditions (e.g., "Dried in garage at 70°F, 3 weeks").
- ● Gloves: Protects hands from radish hairs (some varieties are prickly!).
Step-by-Step guide to radish seed saving
Here’s how to preserve your favorite varieties—no fancy equipment needed, just patience and attention.
🌱 Step 1: Select the Best Plants for Seed Saving
Choose 4-6 of your healthiest, most vigorous radish plants from the center of your patch, avoiding edge plants that may have been stunted by competition. Look for uniform size, shape, and color—these traits will carry into next year’s seeds. I always pick Daikon or French breakfast varieties because they bolt more reliably than quick-maturing types.
Wait until pods turn yellow and dry before harvesting—green pods mean seeds aren’t mature. If you harvest too early, the seeds won’t germinate well. A gentle tug should release the entire pod; if it resists, leave it another day or two.
🌿 Step 2: Harvest and Dry the Seed Pods
Cut the pods from the plant at the stem base and lay them in a single layer on a paper towel or mesh screen. Place them in a dry, shaded spot with good airflow—a windowsill with indirect light works perfectly. Avoid direct sun, which can overheat and crack the pods.
Turn the pods every 2-3 days to ensure even drying. They’re ready when the pods rattle when shaken and the seeds inside look dark and plump. This usually takes 10-14 days in normal room conditions. If humidity is high, drying may take longer—just be patient.
💧 Step 3: Clean and Store the Seeds
Once fully dry, crush the pods between your palms to release the seeds. Use a fine-mesh strainer to separate seeds from chaff, then spread them on a clean sheet of paper to air-dry for another 24 hours. This extra step prevents mold during storage.
Transfer the seeds to a paper envelope or airtight glass jar, labeling with the variety name and harvest date. Store in a cool, dark place—a pantry or seed fridge works best. Properly stored, radish seeds stay viable for 3-4 years, though germination rates drop after year two.
⏰ Step 4: Test Seed Viability Before Planting
Before next spring, test a handful of seeds by placing them on a damp paper towel in a sealed plastic bag. Keep them in a warm spot (70-75°F) and check daily for sprouts. If 50% or more germinate within 7-10 days, your seeds are ready to plant. If germination is poor, try storing them in the fridge for a month to break dormancy.
Real talk: If your seeds fail this test, don’t toss them—radishes often need stratification (a cold period) to trigger germination. Just give them another try in a few weeks.
Tips & tricks for perfect radish seed saving
Avoid these common pitfalls—and elevate your seed-saving game with these pro techniques.
Selection Insight: In Step 1, when choosing your 4-6 healthiest plants, focus on those with the most consistent shape and color. I've learned the hard way that even small variations in pod size can lead to mixed seed characteristics next season. For French breakfast varieties, look for plants with the thickest roots—they tend to produce the most robust seed pods.
Drying Strategy: The 10-14 day drying period in Step 2 is your critical window. If your pods aren't rattling after 14 days, don't rush them—under-dried seeds won't store well. I keep a small fan blowing gently on my drying tray to maintain airflow without creating drafts that could scatter seeds. Humidity is your enemy here, so if you're in a damp climate, consider using a dehumidifier near your drying area.
Storage Wisdom: After the final 24-hour air-dry in Step 3, add a small silica gel packet to your storage container to absorb any residual moisture. I also like to include a tiny piece of paper with the year's average rainfall—this helps track potential germination challenges in future seasons. The cool, dark pantry storage isn't just about temperature; it's about creating a stable environment where seeds won't experience temperature fluctuations that could trigger premature sprouting.
Viability Test Hack: For the germination test in Step 4, use a clear plastic bag instead of a sealed one—this lets you monitor progress without opening it. I've found that placing the bag on top of my refrigerator (not inside) maintains that perfect 70-75°F range without needing a separate heat source. If you're impatient, you can speed up germination by placing the bag in a warm spot like on top of your microwave after it's cooled down.
Pro Tips for Radish Seed Saving
- Avoid these common pitfalls—and elevate your seed-saving game with these pro techniques.
- Selection Insight: In Step 1, when choosing your 4-6 healthiest plants, focus on those with the most consistent shape and color.
- Drying Strategy: The 10-14 day drying period in Step 2 is your critical window.
Frequently asked questions
Got questions about saving radish seeds? You’re not alone! Here are some of the most common queries—and their answers—to help you master the process like a pro.
How do I know when radish pods are ready for seed saving?
Radish pods are ready for harvest when they turn brown and papery, usually 6–8 weeks after planting. Avoid harvesting when pods are still green or swollen—they won’t contain viable seeds. Let them dry fully on the plant or indoors before processing. Pro tip: Wait for a dry, sunny day to harvest to prevent mold!
Can I save seeds from store-bought radishes?
Nope! Store-bought radishes are often hybrid varieties (marked as _F1_), meaning their seeds won’t grow true to the parent plant. For reliable seed saving, use heirloom or open-pollinated radishes labeled for seed production. Check seed packets for “good for seed saving” indicators.
What’s the best way to store radish seeds for next year?
Store seeds in a cool, dry place (like a sealed envelope or jar with silica gel) at 32–41°F (0–5°C). They’ll stay viable for 2–3 years. Label them with the variety and date! Pro tip: Freeze a small sample first to test germination before committing to long-term storage.
Why aren’t my radish plants producing seed pods?
Radishes bolt (go to seed) quickly in hot weather—if your plants flower but don’t form pods, it’s often due to heat stress or poor pollination. Try planting in early spring or fall for cooler temps, or hand-pollinate with a paintbrush if bees are scarce. Avoid over-fertilizing with nitrogen, which encourages leafy growth over flowering.
Can I save seeds from daikon radishes the same way?
Yes! Daikon radishes follow the same seed-saving steps as smaller varieties, but their pods are larger and longer (up to 6 inches). Allow them to fully mature and dry on the plant before harvesting—don’t rush! Daikon seeds are heirloom-friendly, so they’ll grow true if saved properly.
Wrapping up and next steps
Saving radish seeds is a rewarding way to ensure a fresh, homegrown harvest year after year—plus, it’s a fun and cost-effective gardening skill!
By following these simple steps, you’ll not only preserve biodiversity but also enjoy the satisfaction of growing your own heirloom varieties. Ready to take it further? Start small with just a few radish plants this season, and soon you’ll be a seed-saving pro! 🌱✨
Next up:
- Share your seed-saving wins with fellow gardeners!
- Experiment with different radish varieties next year.
- Expand your skills to other easy-to-save veggies like lettuce or beans.