
Shrubs
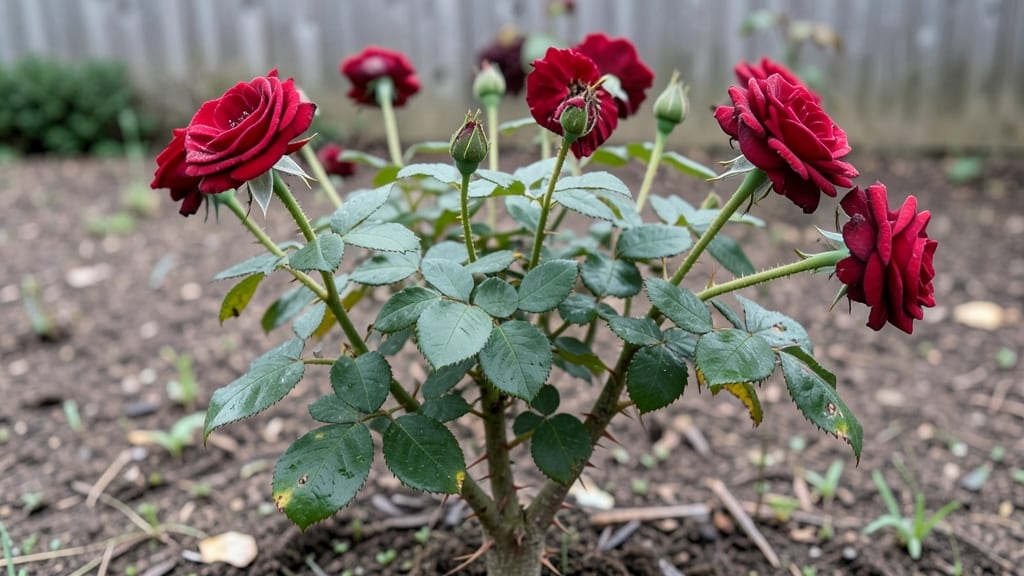
Growing red roses from seeds unlocks heirloom varieties that nurseries can’t sell. 🌹 The layered chill method mimics nature’s way of breaking seed dormancy, giving you a head start on those deep crimson blooms you’ve always admired.
Most gardeners assume roses only grow from cuttings, but seeds produce plants with unique characteristics—if you know the right steps. My first attempt failed because I skipped the cold stratification, but after three years of experimenting, I’ve perfected a system that works even for beginners.
The key lies in patience and precision: soaking seeds overnight, mixing them with damp sand, then chilling for 6-8 weeks in a sealed container. You’ll need a sunny windowsill or grow light, well-draining soil, and a spray bottle for gentle watering.
The process takes about 3 months from seed to first bloom, but the results—vibrant, fragrant roses—are worth every week of waiting. Unlike cuttings, seeds give you complete control over the plant’s genetics, which is especially rewarding for hybridizers or those seeking rare colors.
Once sprouted, young seedlings need consistent moisture and protection from harsh afternoon sun until they’re strong enough to handle direct light. Early challenges like damping-off (a fungal disease) can be avoided with proper airflow and sterilized soil.
By the time they’re ready for transplanting, you’ll have sturdy, disease-resistant plants that will outperform many nursery-bought roses. The layered chill method isn’t just a technique—it’s a way to grow roses that feel uniquely yours.
This approach works in USDA Zones 5-9, though timing adjustments are needed for early springs or late winters. For container gardeners, dwarf varieties thrive in 5-gallon pots with proper drainage.
The biggest mistake? Giving up too soon—rose seeds germinate slowly, but persistence pays off with blooms that last from summer through fall. Ready to grow roses from scratch?
📚 In This Guide
- What you need
- Instructions
- Tips and common mistakes
- Wrapping up and next steps
What you need
- ● Red rose seeds: Choose high-quality, fresh seeds (e.g., Rosa ‘Knock Out’ or Rosa ‘Double Delight’ for vibrant blooms). Aim for 10–20 seeds to experiment.
- ● Seed-starting mix: Use a sterilized, well-draining potting mix (e.g., 50% peat moss + 50% perlite or coconut coir). Avoid garden soil—it can harbor diseases!
- ● Containers: Small pots (3–4 inches deep) or a seed tray with drainage holes. 3–5 containers are ideal for layering.
- ● Plastic wrap or humidity dome: To maintain moisture during germination (clear plastic wrap works in a pinch!).
- ● Spray bottle: For gentle watering (avoid over-saturating seeds).
- ● Pruning shears or sharp knife: For trimming rose canes (if using the layered chill method).
- ○ Thermometer: Optional but helpful—aim for 35–45°F (2–7°C) for stratification.
- ● Refrigerator or cold frame: A standard fridge (set to highest cold setting) works for stratification.
- ● Grow lights or sunny windowsill: Seedlings need 12–16 hours of light/day after germination.
- ● Seedling heat mat (70–75°F) to speed up germination.
- ● Fertilizer (balanced 10-10-10 or rose-specific feed) for transplanting.
- ● Mulch (e.g., straw) to protect seedlings from temperature swings.
Step-by-Step instructions for germinating red rose seeds
Here's the foolproof layered chill method I use to break rose seed dormancy and coax vibrant blooms.
🌱 Step 1: Stratify Seeds in Moist Sand
Fill a shallow container with the 2 cups damp sand and mix in the 10 red rose seeds so they're partially buried but not completely covered. The sand should feel like a damp sponge—not dripping, but holding moisture when squeezed. Place the container in a plastic bag and seal it loosely to maintain humidity.
This layered chill method mimics winter conditions roses experience in nature. Store the container in your refrigerator for 8-12 weeks, checking monthly to ensure the sand remains moist. If it dries out, mist lightly and reseal. You'll see nothing happening yet—that's normal. The cold period breaks dormancy so seeds can germinate when warmth arrives.
💧 Step 2: Transition to Warmth for Germination
After 8-12 weeks in cold storage, remove the container and place it in a warm location (around 70-75°F). Keep the sand consistently moist but not soggy—your finger should sink in slightly but not feel wet. Germination typically begins in 2-4 weeks, though some seeds may take longer.
Watch for tiny green shoots pushing through the sand. Once you see 50% of seeds sprouting, transfer each seedling carefully to its own 2-inch pot filled with the pre-moistened seed-starting mix. Gently press the soil around the seedling stem to secure it without burying the leaves. This prevents stem rot while keeping roots anchored.
☀️ Step 3: Provide Bright, Indirect Light
Place the pots under grow lights (12-14 hours daily) or in a south-facing window where they receive bright, indirect light. Young rose seedlings need this intensity to develop strong stems. You'll notice leggy growth if the light is too weak—stems will stretch and leaves will pale. Adjust the light source within 3-4 inches of the seedlings to prevent this.
Water gently from below by placing pots in 1 inch of water for 10 minutes twice weekly. This encourages deep root growth while preventing fungal issues from overhead moisture. After watering, return pots to their trays to drain excess water completely. Overwatering at this stage is the fastest way to lose seedlings.
🌿 Step 4: Harden Off Before Transplanting
When seedlings develop 3-4 sets of true leaves (about 8-12 weeks after germination), begin hardening them off. Move pots to a shaded outdoor spot for 2 hours the first day, gradually increasing exposure over 10-14 days. This acclimates them to wind and sunlight before permanent planting.
Choose a cool, overcast day for transplanting to minimize shock. Dig holes in your garden bed twice as wide as the pots but only as deep as the root ball. Space seedlings 18-24 inches apart to allow for future growth. Water deeply after planting to settle the soil and encourage root expansion. Mulch with 1 inch of organic mulch to retain moisture and regulate soil temperature.
Tips & tricks for perfect red rose seed germination
Mastering this layered chill method takes patience, but these insights will help you avoid common pitfalls and maximize your success rate.
Moisture Balance is Everything: In Step 1, when mixing the 2 cups damp sand, aim for a consistency where water gently beads on the surface but doesn't pool. Overly wet sand creates anaerobic conditions that prevent germination, while dry sand fails to mimic natural winter moisture. I use a spray bottle to mist the sand between monthly checks—just enough to maintain that damp sponge texture. This careful balance is why the 8-12 week cold stratification works so effectively.
Temperature Consistency During Stratification: The refrigerator provides stable cold, but placement matters. Store your container on the middle shelf where temperatures hover around 35-40°F—this mimics natural winter conditions. Avoid the crisper drawer (too cold) or door (temperature fluctuations). The consistent 70-75°F warmth in Step 2 is equally critical; I place my container on top of my fridge during this phase to maintain stable warmth without direct sunlight.
Light Source Strategy for Step 3: When setting up your 12-14 hour grow lights, position them just 3-4 inches above the seedlings. Too high and you'll get leggy, stretched plants; too low and you risk burning tender leaves. I use a simple timer to automate the light cycle—this eliminates guesswork and ensures consistent growth. For window placement, east-facing windows provide ideal morning light without harsh afternoon sun that can scorch young seedlings.
Transplanting Technique: When transferring your sprouted seeds to 2-inch pots in Step 2, use a small spoon or butter knife to gently loosen the sand around each seedling's roots. This prevents root damage while maintaining that delicate root structure. I always water the pots from below after transplanting—placing them in 1 inch of water for exactly 10 minutes—to encourage deep root development without surface moisture that could cause rot. The gradual hardening process in Step 4 builds on this careful handling to create resilient plants.
Pro Tips for Red Rose Seeds
- Mastering this layered chill method takes patience, but these insights will help you avoid common pitfalls and maximize your success rate.
- Moisture Balance is Everything: In Step 1, when mixing the 2 cups damp sand, aim for a consistency where water gently beads on the surface but doesn't pool.
- Temperature Consistency During Stratification: The refrigerator provides stable cold, but placement matters.
Frequently asked questions
Got questions about growing red rose seeds? You’re not alone! Here are some of the most common queries—and their answers—to help you succeed with your layered chill method.
How long does it take for red rose seeds to germinate?
Germination can take anywhere from 4 weeks to 6 months—patience is key! The layered chill method mimics winter conditions, which slows growth but ensures stronger seedlings. Keep soil moist (not soggy) and place containers in a cool, dark spot until sprouts appear.
Do I need to refrigerate the seeds before planting?
Yes! The layered chill method requires a 6–12 week cold stratification (40–50°F). Place seeds in a sealed container with damp sand or peat moss, then refrigerate. This breaks dormancy and mimics natural winter cold, boosting germination rates.
Can I grow red roses from seeds indoors?
Start seeds indoors 8–10 weeks before your last frost for a head start. Use a sunny windowsill or grow lights (12–16 hours/day). Once seedlings are 2–3 inches tall, transplant them to pots with well-draining soil. Harden them off before moving outdoors.
Why aren’t my red rose seeds sprouting?
Common culprits: dry soil, warmth, or poor stratification. Troubleshoot by checking moisture (soil should stay damp like a wrung-out sponge), ensuring your fridge is cold enough, and verifying seed viability (test a few in warm water—if they sink, they’re likely good).
Will red rose seeds grow true to color?
Not always! Seed-grown roses may vary in color (e.g., pink instead of red) due to genetic crossover. For guaranteed vibrant red blooms, consider grafting or buying hybridized varieties. However, growing from seed offers unique surprises and hardiness!
Wrapping up and next steps
Growing red rose seeds using the layered chill method is a rewarding journey that connects you to nature’s beauty—one delicate bloom at a time! 🌹 With patience, the right tools, and a dash of care, you’ll soon be enjoying vibrant red roses that thrive in your garden. Ready to take the next step? Start by gathering your seeds, preparing your growing space, and embracing the process with confidence.
Once your seedlings sprout and mature, share your progress—whether with fellow gardening enthusiasts or by tagging us in your garden photos. Happy growing, and may your garden flourish with the timeless elegance of red roses! 🌱✨