
Propagation
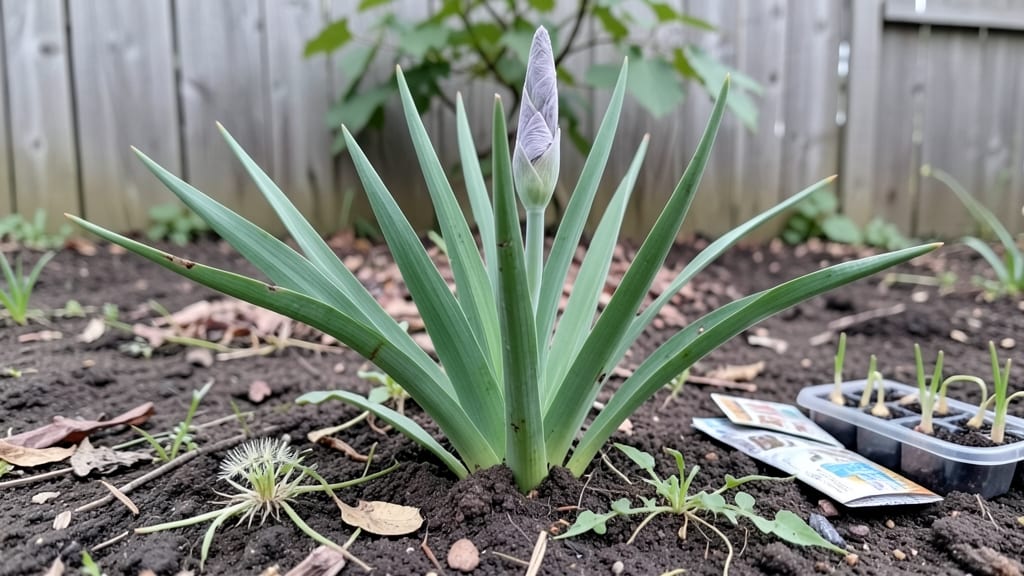
Planting gladiolus seeds using the cold-start method transforms fragile starts into bold summer blooms that command attention in any garden. I’ve watched these dramatic spikes emerge from tiny seeds, and the secret lies in mimicking their natural cold stratification—something most gardeners overlook.
The process isn’t about rushing; it’s about patience and precision, especially when dealing with seeds that need a winter chill to break dormancy.
You’ll need a well-draining seed-starting mix, small pots or a seed tray, and a cold frame or refrigerator for the stratification step.
The key is planting seeds just ¼-inch deep in early spring, then exposing them to 4-6 weeks of cold temperatures (35-45°F) before transferring them to a sunny windowsill or greenhouse. This mimics the natural conditions gladiolus seeds experience in their native habitats, ensuring stronger, more resilient plants.
By midsummer, you’ll be rewarded with tall, vibrant spikes in colors ranging from deep purple to fiery red, each one a testament to the care you’ve invested. The blooms arrive later than corms but make up for it with their striking height and dramatic presence.
Just be prepared for their 3-5 foot stature—they need space to shine without crowding other plants.
This method works best in Zones 5-9, where winters provide natural cold stratification, but container gardeners in warmer climates can replicate the process indoors. The real payoff?
Seeds produce plants with greater genetic diversity than corms, meaning your gladiolus will develop unique, heirloom-like characteristics over time. Let’s get those seeds started right.
📚 In This Guide
- What you need
- Instructions
- Tips and common mistakes
- Wrapping up and next steps
What you need
- ● Gladiolus seeds: Quantity: 10–20 seeds (depending on desired plant count)
- ● Type: Fresh or stored seeds (avoid seeds older than 1–2 years for best germination)
- ● Growing containers: Small pots (3–4 inches deep) or seed trays (with drainage holes)
- ● Quantity: 1–2 containers per seed (or a shared tray for multiple seeds)
- ● Potting mix: Well-draining, sterile mix (e.g., 50% peat moss + 50% perlite or vermiculite)
- ● Quantity: Enough to fill containers 2/3 full
- ● Plastic wrap or humidity dome: To retain moisture during germination.
- ● Spray bottle: For gentle watering (avoid over-saturating seeds).
- ● Grow lights or sunny windowsill: A south-facing window or LED grow lights (12–16 hours/day).
- ● Seed-starting heating mat: Speeds up germination (ideal for cooler climates).
- ● Fertilizer (balanced, water-soluble): Dilute to half-strength for young seedlings.
- ● Transplanting trays or biodegradable pots: For easier relocation when seedlings are ready.
- ● Garden twine or labels: To mark containers and track seed varieties.
- ● Refrigerator (for stratification): If using fresh seeds, chill for 4–6 weeks to mimic winter conditions.
Step-by-step instructions for planting gladiolus seeds using the cold-start method
This approach ensures strong, hardy blooms by mimicking natural winter conditions before spring planting.
Prepare Gladiolus Corms for Cold Stratification
Gladiolus seeds require a cold period to break dormancy, so begin this process in late fall. Place the 4 gladiolus corms in a paper bag with 1 cup dry sand—this mimics natural soil conditions while preventing rot. Store the bag in your refrigerator's crisper drawer, where temperatures stay between 35-40°F. Check weekly for moisture; if condensation forms, open the bag briefly to air it out.
The cold stratification lasts 8-12 weeks, so plan accordingly. You’ll know it’s working when the corms develop small, firm shoots—this signals they’re ready for planting. If your fridge runs warmer, extend the stratification by 2-3 weeks to compensate. This step is critical: skipping it results in weak, slow-growing plants that may never bloom.
Choose and Prepare the Planting Site
Select a location with full sun exposure—gladiolus thrives with 6-8 hours of direct sunlight daily. Work the soil to a depth of 12 inches, removing rocks and loosening compacted areas. Amend the soil with 2 cups compost per planting spot to improve drainage and fertility. Gladiolus roots need room to expand, so avoid heavy clay or waterlogged soil.
Test the soil’s moisture by squeezing a handful—it should crumble slightly but hold shape. If it feels dry, water the area 2 days before planting to ensure even moisture. Mark each planting spot with a small stake to avoid disturbing the soil later. This preparation ensures your corms establish roots quickly once planted.
Plant Corms at the Correct Depth and Spacing
Using a trowel, dig holes 4-6 inches deep—the corm’s top should sit 2 inches below soil level. Space the 4 corms 6-8 inches apart in a row to allow airflow and prevent disease. Gently place each corm in its hole, ensuring the pointed end faces upward. Cover with soil and firm lightly around the base to eliminate air pockets.
Water immediately after planting to settle the soil and remove any air gaps. Use 1 gallon of water per corm to ensure deep moisture penetration. Avoid overwatering, as soggy soil can cause rot. Mulch with 1 inch of straw to retain moisture and regulate soil temperature. This step sets the foundation for strong root development.
Maintain Moisture and Fertility Through the Growing Season
Water the corms once weekly during dry spells, providing 1 inch of water per week. Increase to 2 inches weekly once shoots emerge, as they’ll demand more moisture. Use a soaker hose to deliver water at the base without wetting the foliage, reducing fungal risks. Fertilize 4 weeks after planting with a balanced 10-10-10 fertilizer, applying 1 tablespoon per corm.
Watch for first true leaves—they’ll appear 4-6 weeks after planting—and adjust care accordingly. Remove any yellow or diseased leaves immediately to prevent spread. Stake taller varieties with bamboo stakes as they grow to support the heavy flower spikes. This maintenance ensures your gladiolus matures into robust, blooming plants.
Harvest and Store Corms for Next Season
After flowering, allow the foliage to yellow naturally before cutting it back. Once the leaves turn brown, dig up the corms using a fork, being careful not to pierce them. Rinse off excess soil and let them dry in a shady, well-ventilated area for 2-3 days. Store the cleaned corms in a paper bag with ½ cup dry sand in a cool, dark place at 50-60°F until next fall’s planting.
This storage method preserves their viability for 1-2 years. If you notice any corms shrinking or becoming soft, discard them—they won’t regrow. Proper storage ensures you can repeat this method year after year, building a thriving gladiolus collection. The key is consistency in cold treatment and careful handling during dormancy.
Tips & tricks for perfect gladiolus planting using the cold-start method
Mastering this cold-start technique transforms ordinary gladiolus into showstopping summer blooms. Here's how to elevate your results beyond basic instructions.
Cold Stratification Precision: The 8-12 week cold stratification at 35-40°F is non-negotiable for breaking dormancy. I place my paper bag with 1 cup dry sand in the refrigerator's crisper drawer, checking weekly for condensation. If you notice moisture buildup, open the bag immediately to prevent rot—this is where most beginners fail. The key is maintaining that precise temperature range; even a 5°F variation can delay shoot development by weeks.
Soil Preparation Insight: When amending your planting site with 2 cups compost per spot, focus on improving drainage rather than fertility. Gladiolus roots are particularly sensitive to waterlogging, so avoid heavy clay soils. I always test soil moisture by squeezing a handful—it should crumble slightly but hold shape. This simple check prevents the most common early-season failure: waterlogged roots that fail to establish properly.
Planting Depth Technique: The 4-6 inch hole depth with the corm's top 2 inches below soil level creates the perfect balance. I use a small garden flag to mark each planting spot before digging, which prevents disturbing the soil later. This precision planting ensures consistent emergence—something critical when you've invested weeks in cold stratification. The mulch layer of 1 inch straw isn't just decorative; it regulates soil temperature and prevents moisture loss during those critical first weeks of growth.
Post-Planting Care Strategy: After planting, I water immediately with 1 gallon per corm to eliminate air pockets, then switch to the weekly 1-inch watering schedule. The transition to 2 inches weekly after shoot emergence is what produces those bold summer blooms. I've found that using a soaker hose eliminates fungal risks by keeping foliage dry—a common oversight that leads to blight in humid climates.
Pro Tips for Gladiolus Seeds Planting
- Mastering this cold-start technique transforms ordinary gladiolus into showstopping summer blooms.
- Cold Stratification Precision: The 8-12 week cold stratification at 35-40°F is non-negotiable for breaking dormancy.
- Soil Preparation Insight: When amending your planting site with 2 cups compost per spot, focus on improving drainage rather than fertility.
Frequently asked questions
Got questions about planting gladiolus seeds?
Here are some of the most common ones—plus quick, practical answers to help you grow stunning blooms with confidence.
When is the best time to plant gladiolus seeds?
Gladiolus seeds thrive in warm soil—wait until after the last frost (typically late spring to early summer) when nighttime temps stay above 50°F (10°C). Cold soil can stunt germination, so patience pays off! For colder climates, start seeds indoors 8–10 weeks before transplanting.
How long does it take for gladiolus seeds to sprout?
Germination can take 2–4 weeks, depending on warmth and moisture. Keep soil consistently damp (not soggy) and place seeds in a sunny spot. If nothing emerges after 4 weeks, gently check for signs of mold or rot—adjust your care routine if needed!
Can I plant gladiolus seeds directly in the ground, or should I start them indoors?
Both work! Direct sowing is easiest for warm climates, while indoor starts (in pots with heat mats) give you a head start in cooler areas. If you choose outdoor planting, wait until soil temps hit 60°F (15°C) and space seeds 1–2 inches apart for better airflow.
What should I do if my gladiolus seedlings look weak or yellow?
Yellowing or leggy seedlings often signal overwatering, poor drainage, or pests. Check for aphids or slugs on stems. Adjust care by:
- Reducing water (let soil dry slightly between waterings).
- Ensuring pots/drainage have holes to prevent root rot.
- Spraying neem oil if pests are present.
Will gladiolus seeds grow into the same colorful blooms as store-bought bulbs?
Not always! Seeds produce smaller, less predictable flowers than hybrid bulbs (which are often propagated vegetatively). For showstopping colors, consider buying cormels or bulbs from nurseries—but seeds are a fun, budget-friendly experiment for gardeners!
Wrapping up and next steps
Growing gladiolus from seeds using the cold-start method is a rewarding way to unlock vibrant summer blooms—even for beginners! 🌱 With the right timing, soil prep, and patience, you’ll soon enjoy those striking spikes of color in your garden. Don’t wait for spring: start your seeds indoors now and give your plants a head start.
Ready to dive in? Grab your supplies, follow the steps, and soon you’ll be snapping photos of your thriving gladiolus—proving that bold blooms begin with a single seed! 🌸
Next up: Mark your calendar for planting reminders and watch your garden transform!