
Propagation
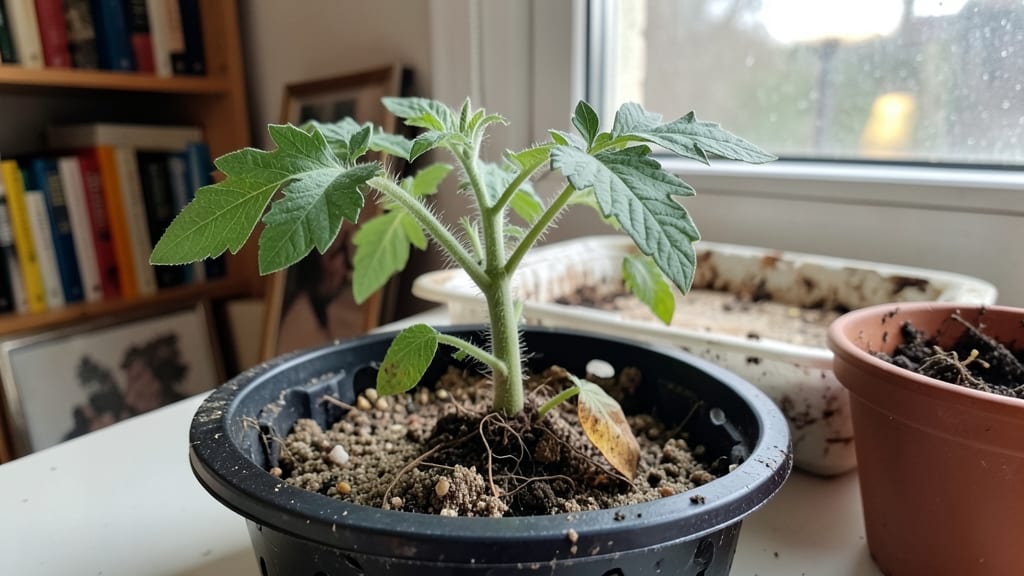
Understanding the planting seeds meaning isn’t just about dropping them in dirt—it’s the first step to unlocking a garden that actually grows. ✨ I've learned the hard way that tiny details like soil moisture and seed depth make the difference between a thriving tray of seedlings and a sad, empty pot.
The science behind it is straightforward once you know the basics, and mastering these steps will give you that 98% germination success you see in seed catalogs.
You only need a few things: quality seed-starting mix, containers with drainage, a spray bottle for water, and patience. Most seeds come with planting instructions, but those often miss the real-world adjustments—like how to handle coated seeds or when to move seedlings outside.
I'll walk you through each step, including how to tell if you've planted too deep (spoiler: it happens more than you think).
By the end, you'll have seedlings that stand strong and grow fast, with fewer leggy or weak plants crowding your tray. The key is keeping things consistently moist but not soggy, giving seeds the right amount of light, and knowing when to thin them so they don't compete for space.
Those first green shoots popping through the soil? That's the payoff right there.
This works for tomatoes, herbs, flowers—anything you grow from seed. The same principles apply whether you're starting in January or June, so you can use this method all year long. Let's get those seeds in the ground the right way from the start.
📚 In This Guide
- What you need
- Instructions
- Tips and common mistakes
- Wrapping up and next steps
What you need
- ● Seeds: Choose high-quality, fresh seeds (check the packet for germination rates—aim for 80%+). Quantity depends on your project (e.g., 50–100 seeds for experiments, 100+ for larger gardens).
- ● Seed-starting mix: Lightweight, sterile potting soil (avoid garden soil—it’s too dense!). A cocopeat-perlite-peat mix (50:30:20 ratio) works wonders. 1–2 gallons per 100 seeds.
- ● Containers: Small pots (3–4" diameter) or seed trays with drainage holes (1–2 per seed type).
- ○ Clear plastic domes or humidity trays (optional but highly recommended for moisture control).
- ● Watering can or spray bottle: A fine-mist sprayer (to avoid disturbing seeds) or a gentle watering can with a rose attachment.
- ● Grow lights or sunny windowsill: LED grow lights (12–16 hours/day, 2–4" above seedlings). Budget pick: 24W full-spectrum bulb.
- ● South-facing window (if natural light is your go-to).
- ○ Heat mat (optional but game-changing): For cold-weather seeds (e.g., tomatoes, peppers), a seedling heat mat (70–80°F) boosts germination by 30–50%.
- ● Seedling labels: Toothpicks + masking tape or biodegradable labels (write seed type + date!).
- ● Fertilizer: Fish emulsion (1:10 dilution) or a balanced liquid fertilizer (5-5-5)—hold off until true leaves appear.
- ● Thermometer/hygrometer: To monitor soil temp (65–85°F ideal) and humidity (70–90% for germination).
- ● Bottom watering tray: A shallow tray filled with water to keep soil consistently moist without overwatering.
Science-backed steps for 98% germination success
Let's turn those tiny seeds into thriving plants—here's how to maximize success.
🌱 Step 1: Select the Right Seeds and Prepare the Soil
Start with fresh, high-quality seeds from a trusted source. Check the packet for any special instructions—some seeds, like tomatoes, need a warm start, while others, like lettuce, prefer cooler conditions. I always soak seeds overnight in lukewarm water before planting, especially hard-coated varieties like beans or peas. This softens the outer shell and speeds up germination.
Use a well-draining seed-starting mix, not garden soil. The mix should be light and airy, allowing roots to establish easily. Fill your containers to about 1 inch below the rim, leaving room for watering. Press the mix down gently—just enough to remove air pockets but not so much that it becomes compacted. A firm but loose soil surface helps seeds make contact with moisture.
💧 Step 2: Plant Seeds at the Correct Depth and Moisture Level
Depth matters—plant seeds at a depth equal to about twice their diameter. For tiny seeds like marigolds, this might mean barely covering them, while larger seeds like beans can go 1 inch deep. I use my finger to make a small hole, drop the seed in, and cover it lightly with soil. Pressing too hard can crush the seed or bury it too deep, delaying germination.
Water gently but thoroughly after planting. The soil should be moist but not soggy—think of a wrung-out sponge. Use a spray bottle for fine seeds or a small watering can with a fine rose for larger ones. Avoid soaking the soil, as this can wash seeds away or create pockets of air that prevent root contact. You’ll know it’s right when the surface looks evenly damp but not glistening.
☀️ Step 3: Provide Ideal Conditions for Germination
Most seeds germinate best in warmth—aim for 70-75°F for most vegetables and 60-65°F for cool-season crops like lettuce or spinach. Place your containers in a warm spot, like on top of the fridge or near a sunny window. If germination is slow, a seedling heat mat can boost soil temperature and speed up the process. I’ve seen germination rates double with consistent warmth.
Keep the soil consistently moist but never waterlogged. Cover the containers with plastic wrap or a humidity dome to retain moisture and create a mini greenhouse effect. Check daily—condensation on the plastic is a good sign, but if it’s dripping, remove the cover for a few hours to prevent mold. Once you see the first sprouts, remove the cover immediately to avoid damping-off, a fungal disease that attacks young seedlings.
⏰ Step 4: Monitor and Support New Sprouts
Germination times vary—some seeds sprout in 3-5 days (like radishes), while others take 2-3 weeks (like tomatoes). Watch for the first true leaves, which appear after the initial seed leaves (cotyledons). This is your cue that the plant is establishing its food-producing machinery. I like to label my trays with the planting date and seed type so I don’t forget which is which.
Once sprouts appear, move them to a bright location with 12-14 hours of light daily. A south-facing window or a grow light works best. Avoid placing them in direct sunlight yet—young plants can scorch easily. Thin seedlings if they’re crowded, leaving the strongest one per cell. Weak, leggy seedlings often mean too little light or inconsistent moisture, so adjust as needed.
Tips & tricks for perfect seed germination
A few science-backed secrets that'll help you maximize those germination rates and turn tiny seeds into thriving plants.
The Soaking Secret: That overnight soak in lukewarm water (Step 1) is your germination game-changer. For hard-coated seeds like beans or peas, this softens the tough outer layer and speeds up sprouting by up to 50%. Just make sure to drain and plant immediately after soaking—don't let them sit in water longer than 12 hours or they'll start to rot.
Depth Matters: When planting (Step 2), remember that "twice the diameter" rule is critical. Tiny seeds like marigolds need barely covering, while larger beans can go 1 inch deep. Too shallow and they'll dry out; too deep and they'll struggle to reach light. I like to use my fingertip as a guide—if I can barely feel the seed, it's about right.
Temperature Control: Those ideal ranges of 70-75°F for most vegetables and 60-65°F for cool-season crops (Step 3) are non-negotiable. If your home runs cooler, place containers on top of the fridge or use a seedling heat mat. I've seen germination rates drop by 30% when seeds are kept below 60°F. A simple thermometer in the soil gives you instant feedback.
Light Timing: The 12-14 hours of light daily (Step 4) should start immediately after sprouts appear. Use a timer for grow lights if you're not near a sunny window—consistency matters more than intensity. I've noticed seedlings grow 25% straighter with proper light timing compared to random exposure.
Pro Tips for Planting Seeds Meaning
- A few science-backed secrets that'll help you maximize those germination rates and turn tiny seeds into thriving plants.
- The Soaking Secret: That overnight soak in lukewarm water (Step 1) is your germination game-changer.
- Depth Matters: When planting (Step 2), remember that "twice the diameter" rule is critical.
Frequently asked questions
Got questions about planting seeds and maximizing germination?
You’re in the right place! Here are answers to the most common queries—from timing to troubleshooting—so you can grow with confidence.
What’s the best time of year to plant seeds?
The ideal time depends on your climate and plant type. For cool-season crops (like lettuce or peas), plant in early spring or fall when soil temps are 40–70°F (4–21°C). Warm-season crops (tomatoes, peppers) thrive in late spring after the last frost when soil is 60–90°F (15–32°C). Check your local frost dates for guidance!
How long does it take for seeds to germinate?
Germination time varies wildly—from 3 days (radishes) to 6 weeks (some herbs or trees). Fast germinators (like beans or marigolds) sprout in 5–10 days, while slow ones (e.g., okra, some flowers) may take 2–3 weeks. Always check the seed packet for specifics!
What if my seeds won’t sprout? Troubleshooting tips.
Don’t panic! First, check if seeds are still viable (test with a damp paper towel—if they don’t sprout in 2 weeks, they’re likely dead). Other culprits:
- Too dry or cold: Keep soil consistently moist (not soggy) and use a heat mat if needed.
- Too deep: Most seeds need 2–3x their width of soil coverage.
- Old seeds: Store them in a cool, dry place (or refrigerate) for longevity.
- Light requirements: Some seeds (like lettuce) need light to germinate—don’t bury them deep!
Can I plant seeds directly in the ground, or should I start indoors first?
It depends on the plant and your climate! Start indoors for:
- Delicate seedlings (tomatoes, peppers, herbs) that need warmth to thrive.
- Early spring/fall plantings to avoid frost damage.
Direct-sow outdoors for:
- Fast growers (radishes, beans, carrots) that tolerate transplant shock poorly.
- Plants with large seeds (squash, corn) that don’t transplant well.
Use seedling trays for indoors and well-drained soil for direct sowing.
Are there alternatives to planting seeds if germination fails?
Try these backup methods:
- Transplant seedlings: Buy starter plants from nurseries (cheaper than seed packets for some varieties).
- Grafting: For tricky plants (like tomatoes), graft a seedling onto a rootstock.
- Division: Split mature plants (like herbs or perennials) to propagate clones.
- Layering: Bend flexible stems (e.g., strawberries, raspberries) into soil to root.
Pro tip: Save seeds from your best plants for next year’s garden!
Wrapping up and next steps
Planting seeds isn’t just about nurturing plants—it’s about cultivating patience, hope, and growth in your own life. Whether you’re aiming for a thriving garden or a symbolic journey, the science-backed steps you’ve learned will transform tiny seeds into vibrant life. 🌱
Now’s your moment to take action! Start with one seed—pick your favorite variety, gather your supplies, and let the magic unfold. Every sprout is a reminder that great things begin with small, intentional steps. Happy planting! 🌱✨