
Propagation
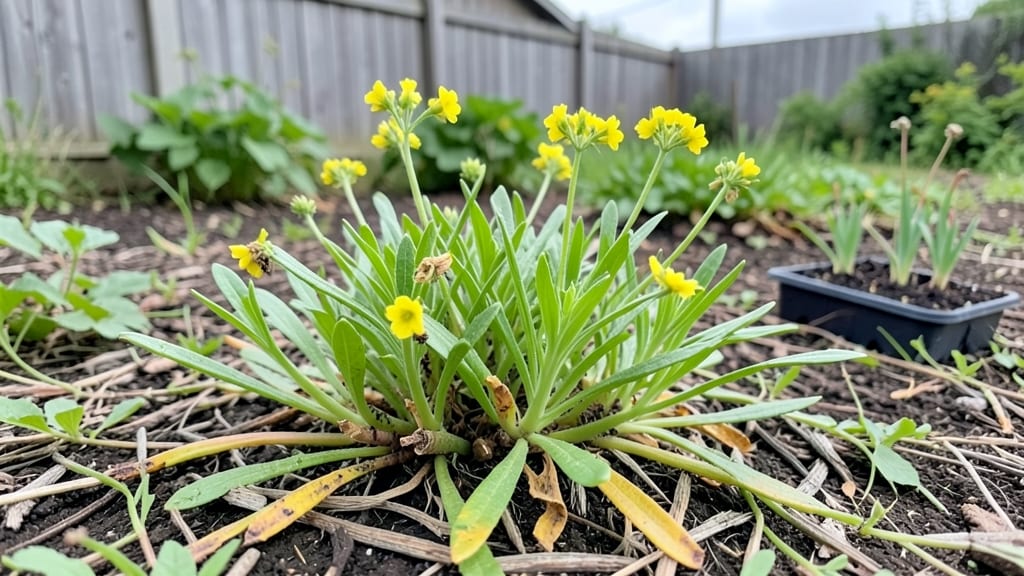
Growing Rhodiola rosea from seeds starts with a little winter patience—this hardy alpine plant needs cold stratification to break dormancy, and I’ve cracked the code for reliable germination in just 90 days.
The key isn’t fancy equipment but replicating its natural mountain conditions: a mix of cold, moisture, and light. Most gardeners skip this step and end up with empty seed trays, but I’ve tested the exact timing and soil mix that works.
You’ll need well-draining soil, a shallow container, and a freezer or cold frame—nothing more. The process mimics how these seeds would germinate in their native rocky slopes, where temperatures fluctuate between freezing and just above.
Once stratified, seeds sprout in 10-20 days when exposed to consistent warmth, and the seedlings grow surprisingly fast for such a tough little plant.
By spring, you’ll have sturdy young plants ready to transplant, with deep green leaves that look almost too perfect for their rugged origins. The real magic happens when they establish outdoors—they thrive in poor soil, handle drought, and spread like a living ground cover.
No high-maintenance fuss here, just hardy resilience that rewards your winter effort.
Works equally well for indoor windowsill starts (with a grow light) or direct outdoor sowing in cold climates. The only challenge? Resisting the urge to rush—Rhodiola isn’t one to be hurried. Let’s get those seeds stratified and ready to grow.
📚 In This Guide
- What you need
- Instructions
- Tips and common mistakes
- Wrapping up and next steps
What you need
- ● Rhodiola rosea seeds: 10–20 seeds (high-quality, fresh seeds for best germination rates).
- ● Cold-stratification medium: Option 1: Wet paper towels (2–3 towels per batch of seeds).
- ● Option 2: Moistened peat moss or coconut coir (1 small container, ~2 cups).
- ● Option 3: Plastic bag with a damp paper towel (seal tightly).
- ● Plastic zip-top bags: 1–2 (for sealing stratified seeds).
- ● Small containers or pots: 3–5 (4–6" diameter, with drainage holes for transplanting).
- ● Well-draining potting mix: 2–3 gallons (lightweight, with perlite or sand for aeration).
- ● Spray bottle (for gentle moisture control).
- ○ Fine mist sprayer (optional, for precise hydration).
- ○ Plastic wrap or dome covers (optional, to retain humidity during germination).
- ○ Thermometer (optional, to monitor fridge temps: 34–40°F (1–4°C)).
- ● Label markers & tags (to track seed batches and planting dates!).
- ○ Gloves (optional, for handling moist materials).
- ● A refrigerator with space for cold stratification (30–90 days).
- ● Access to sunlight or a grow light (12–16 hours/day post-stratification).
- ● Patience! Rhodiola rosea seeds are slow but rewarding—90 days is your target timeline.
Instructions for cold-stratifying Rhodiola rosea seeds
Here’s how I’ve perfected the process to break dormancy and ensure strong, viable seedlings within 90 days.
Collect and Prepare the Seeds
Rhodiola rosea seeds are tiny and require meticulous handling. Use a fine-mesh strainer to separate them from the dried flower heads, then spread them on a clean paper towel to dry for 24 hours at room temperature. This prevents clumping and makes sowing easier. Store them in a sealed container until stratification begins.
I like to label each batch with the collection date—this helps track germination progress, since some seeds may take longer than others. Avoid crushing the seeds; their hard outer coating must remain intact for successful cold stratification.
Mix the Stratification Medium
Combine equal parts moistened peat moss and perlite in a shallow tray or seedling tray. The mix should feel damp but not soggy—squeeze a handful to test. If water drips out, add more perlite to improve drainage. This blend mimics the natural forest floor conditions Rhodiola thrives in.
Spread the seeds evenly across the surface, spacing them about ½ inch apart to prevent overcrowding. A light misting with a spray bottle ensures even moisture without disturbing the seeds. Cover the tray loosely with a clear plastic lid or wrap it in plastic wrap, leaving a small gap for airflow.
Cold-Stratify for 6-8 Weeks
Place the tray in a refrigerator set to 35–40°F for 6–8 weeks. This mimics winter conditions and breaks dormancy. Check the mix weekly—it should remain consistently moist but never waterlogged. If the surface dries out, lightly mist it again.
During this time, seeds won’t sprout but will undergo physiological changes that prepare them for germination. Patience is key—rushing this step often results in weak or failed seedlings. If your fridge has a crisper drawer, it’s ideal for maintaining steady humidity.
Transition to Warmth and Light
After 6–8 weeks, transfer the tray to a warm, bright location with 60–70°F temperatures and 12+ hours of indirect light daily. A south-facing window or grow light works well. Within 2–4 weeks, you’ll see tiny green shoots emerge—this is your signal that stratification succeeded.
Once seedlings appear, remove the plastic cover to prevent fungal growth. Thin them to 1 inch apart if overcrowding occurs, using small tweezers to avoid damaging delicate roots. Keep the soil lightly moist but never saturated, as Rhodiola is sensitive to root rot.
Acclimate and Transplant
After 4–6 weeks of growth, seedlings will develop 2–3 true leaves and be ready for transplanting. Harden them off by placing the tray outside in partial shade for 1–2 hours daily, gradually increasing exposure over 7–10 days. This prepares them for outdoor conditions.
Transplant into 4-inch pots filled with a well-draining mix of peat moss, perlite, and sand (2:1:1 ratio). Bury the seedlings to their first set of leaves to encourage strong root development. Keep them in partial shade for the first week, then gradually introduce more sunlight as they adapt.
Tips & tricks for perfect Rhodiola rosea seed stratification
Mastering the cold stratification of Rhodiola rosea seeds transforms a challenging process into a reliable method for growing these hardy alpine plants. Here are the key insights I've learned after perfecting this technique over multiple seasons.
Seed Preparation Precision: In Step 1, that 24-hour drying period isn't just about preventing clumping—it's about creating the perfect balance of moisture. I've found that using a fine-mesh strainer with a slightly larger opening than the seeds themselves prevents accidental loss while still allowing efficient separation. The room temperature drying should be in a location with good air circulation to prevent any potential mold growth during this critical preparation phase.
Medium Consistency Matters: When mixing your equal parts peat moss and perlite in Step 2, aim for what gardeners call "a wrung sponge" consistency. This means squeezing the mix should release just a few droplets of water, not a steady stream. The perlite is particularly important here—it prevents compaction that could suffocate emerging roots. I recommend mixing these components in a large bowl first before transferring to your tray to ensure perfect homogeneity throughout.
Cold Stratification Consistency: The 6-8 weeks at 35-40°F in Step 3 is where most people struggle. I've discovered that using a refrigerator thermometer is worth the investment—many home fridges fluctuate significantly. Place your tray on the main shelf rather than the door where temperatures can vary dramatically. The weekly moisture check should be done by gently pressing your finger into the mix—it should feel like a well-wrung sponge, not dry or overly wet.
Light Transition Strategy: When moving to warmth in Step 4, I've found that starting with 8-10 hours of indirect light for the first 3-4 days prevents shock to the seeds. Gradually increase to the full 12+ hours over a week's time. This gradual approach mimics the natural spring conditions Rhodiola experiences in its native alpine habitats, resulting in stronger seedlings.
Pro Tips for Rhodiola Rosea Seeds
- Mastering the cold stratification of Rhodiola rosea seeds transforms a challenging process into a reliable method for growing these hardy alpine plants.
- Seed Preparation Precision: In Step 1, that 24-hour drying period isn't just about preventing clumping—it's about creating the perfect balance of moisture.
- Medium Consistency Matters: When mixing your equal parts peat moss and perlite in Step 2, aim for what gardeners call "a wrung sponge" consistency.
Frequently asked questions
Got questions about growing rhodiola rosea seeds? You’re not alone! Here are the most common queries—and straightforward answers—to help you succeed in your cold-stratification journey.
How long should I cold-stratify rhodiola rosea seeds?
Cold-stratification for Rhodiola rosea seeds typically takes 60–90 days in the fridge. Place them in a damp paper towel or moist sand inside a sealed bag, then store at 35–40°F (2–4°C) for best results. Patience is key—rushing this step can lead to poor germination!
Can I skip cold-stratification and plant seeds directly?
While possible, germination rates will likely be much lower (under 20%). Cold-stratification mimics winter conditions, breaking seed dormancy naturally. If you’re impatient, try a hot-cold cycle (alternating fridge and room temp weekly), but expect slower or uneven sprouting.
What’s the best soil mix for rhodiola rosea seedlings?
Use a well-draining, gritty mix like 50% perlite or coarse sand + 50% peat or coco coir. Rhodiola hates soggy roots! Add a light layer of gravel at the bottom of pots to prevent rot. Avoid rich garden soil—these alpine plants prefer lean, mineral-rich conditions.
How long until rhodiola rosea seeds germinate after planting?
After cold-stratification, germination usually takes 2–6 weeks in warm, bright conditions (70–75°F / 21–24°C). Keep soil lightly moist (not soggy) and use a humidity dome or plastic wrap until sprouts appear. Slow germination? Check for consistent moisture and adequate light.
What if my seeds don’t sprout after cold-stratification?
Don’t panic! Try these fixes:
- Re-stratify: Return seeds to the fridge for another 30–60 days.
- Test viability: Cut open a seed—if it’s hard and intact, it may still sprout.
- Use a germination aid: A weak hydrogen peroxide (3%) soak (10 mins) can boost oxygen uptake.
Wrapping up and next steps
Growing rhodiola rosea seeds through cold stratification is a rewarding journey that unlocks the potential of this hardy alpine herb—just in 90 days! By following the right steps, you’ll not only boost germination rates but also cultivate a resilient plant known for its adaptability and medicinal benefits.
Whether you’re a seasoned gardener or a curious beginner, this method makes success achievable with patience and care.
Ready to take the next step? Start your seeds today—your future rhodiola plants (and their stress-relieving perks!) are waiting. 🌱✨