
Propagation
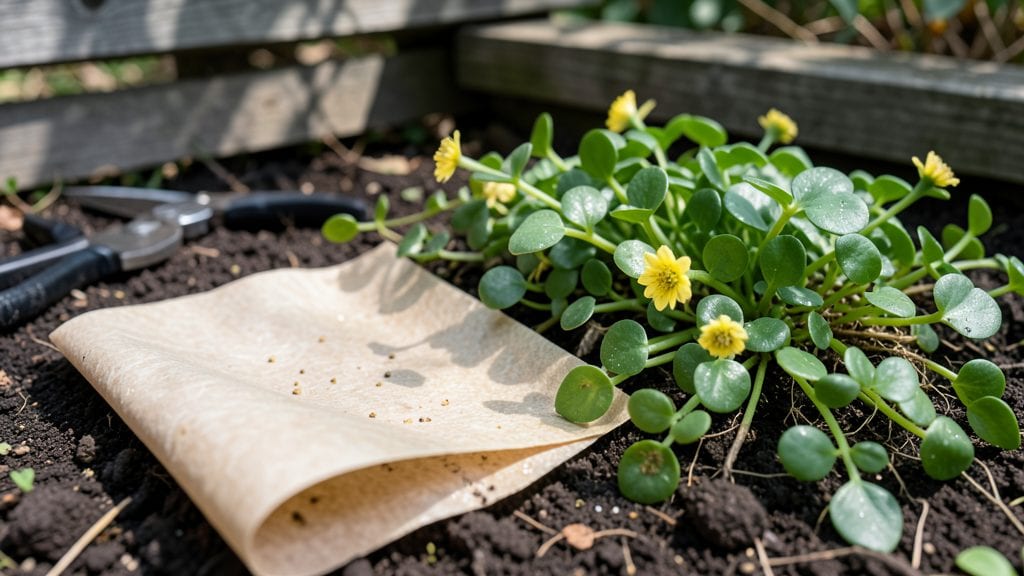
My first time using seeded paper instructions turned a messy seed-starting project into a sleek, zero-waste success—no more soggy paper towels or lost seeds. The paper itself holds tiny seeds embedded in a biodegradable pulp, so you just plant it directly in soil when the sprouts are ready.
Honestly, I was skeptical until I saw how neatly it organized my seed packets and eliminated waste.
All you need is a tray, a spray bottle, and sunlight—no fancy setups required. The paper stays moist from the bottom up, so you avoid overwatering while keeping roots happy.
Most varieties germinate within 7-14 days, and the whole process feels cleaner than traditional seed-starting methods. I’ve used it for herbs, flowers, and even some veggies with great results.
Once those first green shoots appear, you’ll transplant the whole paper into the ground—it breaks down naturally, feeding the soil as your plants grow. The biggest mistake? Forgetting to keep the paper damp but not soaked.
Too much water drowns the seeds; too little stalls germination. With the right balance, you’ll have sturdy seedlings in no time.
This method works for beginners and seasoned gardeners alike, whether you’re growing in pots or straight into the earth. The paper even doubles as a seed organizer, so you’ll never mix up varieties again. Ready to try it?
📚 In This Guide
- What you need
- Instructions
- Tips and common mistakes
- Wrapping up and next steps
What you need
- ● Seeded paper sheets: 1–5 sheets (depending on how many plants you want to grow; standard size is ~8.5" x 11"). Choose varieties like basil, thyme, or sunflower—each sheet is pre-planted with seeds!
- ● Water: Room-temperature or slightly warm (not boiling). A spray bottle or small watering can works best.
- ● Shallow tray or container: A flat, wide dish (e.g., baking tray, plant propagator, or even a repurposed takeout container) with drainage holes or a waterproof liner.
- ● Plastic wrap or clear lid: To create a humidity dome (e.g., a Ziploc bag, cling film, or the lid of a seed-starting kit).
- ● Scissors or craft knife: For trimming seeded paper to size (if needed).
- ● Pencil or pen: To mark the front of the paper (seeds are embedded on one side only!).
- ● Grow lights or sunny windowsill: A south-facing window or a small LED grow light (12+ hours of light/day speeds up germination).
- ● Plant labels or masking tape: To label your seeded paper with the plant type and date.
- ○ Perlite or coconut coir: A thin layer (¼ inch) at the bottom of your tray improves drainage (optional but helpful for moisture control).
- ● Tweezers: For gently handling delicate sprouts when transplanting.
- ● Compost or potting soil: For transplanting seedlings (once they’re ready!).
Step-by-Step instructions for creating seeded paper starters
Here's how to transform recycled paper into vibrant, zero-waste plant starters that grow strong and healthy.
Prepare Your Seeded Paper Mixture
Tear or shred the recycled paper into small, confetti-sized pieces—about the size of a dime. This ensures even moisture distribution and faster decomposition. Place the shredded paper in a large bowl and add the 1 part wildflower seeds and 1 part compost to the 4 parts shredded paper. Mix everything thoroughly with your hands until the seeds are evenly distributed throughout the paper fibers.
I like to add a few drops of water at this stage to help the mixture clump together slightly. The goal is to create a thick, paste-like consistency that holds its shape when pressed. If the mixture feels too dry, add a little more water drop by drop until it binds together. This ensures the paper will hold its form during the pressing stage and won't fall apart when wet.
Press the Mixture into Molds
Line your 4 small seedling trays with the plastic wrap to create a non-stick surface. Spoon the seeded paper mixture into each mold, pressing firmly but evenly with your hands or a flat tool like the back of a spoon. Fill each mold completely, packing it down until the surface is smooth and level. The mixture should be about ¼ inch thick—thicker layers take longer to decompose and may not germinate as consistently.
Use the wooden dowel to create small drainage holes in the bottom of each mold if they don't already have them. This prevents waterlogging, which can cause the paper to mold before seeds germinate. Once pressed, remove the molds carefully and set them aside to dry for 24 hours in a warm, shaded area. This step is crucial—it allows the paper to firm up and hold its shape while preventing the seeds from washing away during watering.
Water and Germinate the Seeded Paper
After the seeded paper has dried completely, place each sheet back into its mold and water it gently from the bottom. Fill the seedling trays with 1 inch of water and let the paper soak up moisture from underneath. This method ensures even hydration without disturbing the seeds. Once the top of the paper feels damp but not soggy, remove the excess water and place the trays in a warm, sunny location—ideally between 65-75°F.
Cover the trays loosely with the clear plastic wrap to retain moisture and create a mini greenhouse effect. Check the paper daily and mist the top lightly with water if it feels dry to the touch. Germination typically occurs within 7-14 days, depending on the seed type and environmental conditions. You'll know it's working when you see tiny green shoots pushing through the paper—this is your signal to remove the plastic wrap and increase airflow.
Care for Seedlings Until Transplanting
Once the seedlings have developed their first true leaves, which usually takes about 3-4 weeks, it's time to transition them to individual pots. Gently peel back the seeded paper to expose the roots, then transfer each seedling to its own 2-inch biodegradable pot filled with the potting soil. Press the soil lightly around the base of the seedling to secure it, leaving the first set of true leaves above the soil line. This prevents the stem from rotting as it grows.
Place the pots in a bright, indirect light area for the next 2 weeks to harden off the seedlings. Water the pots from the bottom whenever the soil feels dry to the touch—about every 2-3 days. Avoid overwatering, as the biodegradable pots don't drain as efficiently as traditional containers. Once the seedlings are 3-4 inches tall and show strong stems, they're ready to transplant outdoors or into larger containers.
Transplant and Maintain Your Plants
Choose a cloudy day or late afternoon to transplant your seedlings outdoors. Dig small holes in the garden bed or larger pots that are twice as wide as the biodegradable pots and gently remove the seedlings, placing the entire pot into the hole. Cover the pot with soil and water thoroughly to help it settle. Over the next few weeks, the biodegradable pots will decompose, allowing the roots to spread naturally into the surrounding soil.
Continue to water the plants deeply once a week, ensuring the soil stays moist but not waterlogged. Monitor the plants for signs of stress, such as yellowing leaves or wilting, and adjust care as needed. With proper attention, your seeded paper starters will grow into healthy, thriving plants—all while reducing waste and giving back to the earth.
Tips & tricks for perfect seeded paper starters
Transforming recycled paper into thriving plant starters is a rewarding process, but a few key strategies will help you avoid common pitfalls and maximize success.
Paper Preparation Matters: When tearing your recycled paper into confetti-sized pieces, aim for consistency—about the size of a dime. Uneven pieces can lead to inconsistent moisture distribution and uneven germination. I've found that using a clean, sharp pair of scissors works best for achieving those uniform shapes. Also, avoid using glossy or coated paper, as these materials can inhibit seed growth and decomposition.
The 24-Hour Drying Secret: The 24-hour drying period in Step 2 is crucial for creating sturdy starters that won't fall apart during watering. Place your pressed sheets in a warm, shaded area (around 75°F) to speed up the process without risking over-drying. I like to set them on a cooling rack over a baking sheet to allow airflow on all sides. If your kitchen is particularly humid, you might need to extend this drying time slightly to prevent mold growth during germination.
Germination Environment: Maintaining that ideal 65-75°F range during germination is key—too cold and seeds may not sprout, too hot and they risk drying out. I've had success using a seedling heat mat set to 70°F under my trays, especially in cooler climates. Once you see those first green shoots, remove the plastic wrap gradually over 2-3 days to prevent shock. This slow acclimation helps seedlings develop stronger cell walls for better outdoor survival.
Transplanting Timing: Waiting for those first true leaves (around 3-4 weeks) gives your seedlings a strong root system before transplanting. I've found that gently pressing the biodegradable pots into the soil rather than removing them completely helps maintain root integrity during the transition. For outdoor planting, choose a cloudy day to minimize transplant shock—this simple precaution can double your survival rate.
Pro Tips for Seeded Paper Instructions
- Transforming recycled paper into thriving plant starters is a rewarding process, but a few key strategies will help you avoid common pitfalls and maximize success.
- Paper Preparation Matters: When tearing your recycled paper into confetti-sized pieces, aim for consistency—about the size of a dime.
- The 24-Hour Drying Secret: The 24-hour drying period in Step 2 is crucial for creating sturdy starters that won't fall apart during watering.
Frequently asked questions
Got questions about growing plants from seeded paper?
You’re not alone! Here are answers to the most common queries to help you master this eco-friendly method with confidence.
How long does it take for seeds to sprout in seeded paper?
Germination time varies by seed type, but most sprouts appear within 7–14 days under ideal conditions (warmth, moisture, and indirect light). Fast growers like basil or microgreens may sprout in 3–5 days, while slower seeds (e.g., sunflowers) could take up to 2–3 weeks. Patience is key—keep the paper moist but not soggy!
Can I reuse seeded paper if the seeds don’t sprout?
Unfortunately, no. Seeded paper is designed for single-use germination. If seeds fail to sprout, compost the paper instead—it’s still biodegradable! For a second chance, try planting new seeds in fresh paper. Pro tip: test a few seeds first to ensure viability before committing to a large sheet.
What’s the best way to keep seeded paper from drying out?
Seeded paper needs consistent moisture to germinate. Mist it 2–3 times daily or place it in a shallow tray with ½ inch of water, ensuring the paper stays damp (not dripping). For extra humidity, cover it loosely with plastic wrap or a damp paper towel until sprouts emerge. Once roots appear, reduce watering slightly to prevent rot.
Do I need special soil after the seeds sprout?
Not right away! Seeded paper is self-contained, so you can plant it directly into soil once roots are 1–2 inches long. Simply fold the paper into a "V" shape, place it in a pot or garden bed, and cover with ½ inch of potting mix. The paper will decompose naturally, enriching the soil. No transplant shock—just gentle care!
What if mold grows on my seeded paper?
Mold is a red flag—it means your paper is too wet or lacks airflow. Act fast: unfold the paper, let it dry in indirect sunlight for a few hours, then mist lightly. Improve airflow by placing it in a well-ventilated spot (e.g., near a fan on low). If mold persists, compost the paper and start fresh with a thinner layer of water next time.
Are there alternatives if I can’t find seeded paper?
Try these zero-waste swaps:
- Coffee filters: Soak in water, sprinkle seeds, and roll into a "taco" shape for easy planting.
- Tea bags: Remove staples, rinse, and use like seeded paper (works best with herbs like basil or parsley).
- Recycled paper: Blend old paper with water and seeds, press into molds, and dry—though germination rates may vary.
Wrapping up and next steps
Creating your own seeded paper is a rewarding way to grow plants while reducing waste—no green thumb required! 🌱 With just a few simple steps, you’ve got a ready-to-plant, eco-friendly starter that’s perfect for herbs, flowers, or veggies.
Whether you’re a beginner or a seasoned gardener, this method makes propagation fun, sustainable, and effortlessly creative.
Now that you’re equipped with the know-how, why not try it today? Start small with a few sheets, experiment with different seeds, and watch your zero-waste garden grow. Happy planting! 🌿