
Planting
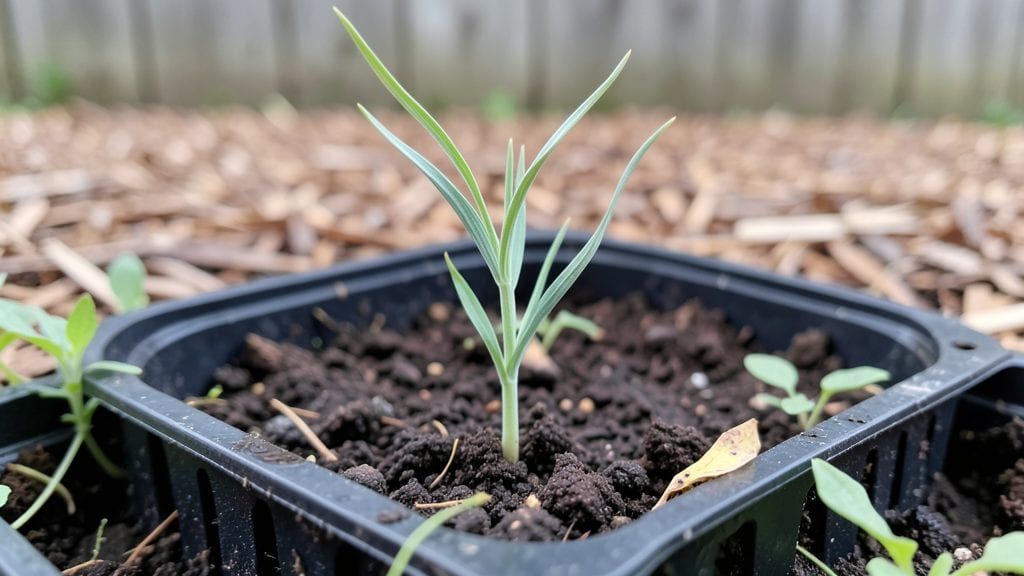
Sowing wheat seeds with the layered moisture method ensures your young plants start with the perfect balance of moisture and air. I learned this technique after struggling with uneven germination in dry soil—now my wheat sprouts emerge strong and consistent every season.
The secret lies in preparing the soil to hold moisture without becoming waterlogged, creating ideal conditions for those delicate seeds to wake up and grow.
You’ll need a well-drained seedbed, wheat seeds, a fine sifted soil or compost mix, and a gentle watering can or spray bottle. Start by tilling the soil to a depth of 6 inches, removing any rocks or debris that could hinder root growth.
For conventional cultivation, a light fertilizer application at planting time helps, while organic gardeners can use compost tea or worm castings instead. The key is to keep the soil moist but not soggy throughout the germination process.
Plant the seeds about 1 inch deep and 2 inches apart in rows spaced 6 inches apart. After sowing, use the layered moisture method: water lightly to settle the soil, then apply a thin layer of mulch or straw to retain moisture while allowing airflow.
Wheat seeds germinate best in temperatures between 50°F and 70°F, so aim to sow when daytime temperatures are consistently above 55°F. Within 7 to 14 days, you’ll see those first green shoots breaking through the soil.
Watch for early signs of stress like yellowing leaves or slow growth—these often signal overwatering or compacted soil. Adjust your watering schedule as needed, keeping the top inch of soil consistently moist but never waterlogged.
With patience and the right care, your wheat will establish a strong root system, setting the stage for a productive harvest. This method works equally well for small-scale garden plots or larger fields, making it versatile for any grower.
📚 In This Guide
- What you need
- Instructions
- Tips and common mistakes
- Wrapping up and next steps
What you need
- ● Wheat seeds: 1 lb (high-quality, certified organic if possible). Choose varieties like Hard Red Winter or Soft White Spring based on your climate.
- ● Planting container: 1–2 shallow trays (10" x 20") or a raised bed (12" deep). Ensure it has drainage holes!
- ● Growing medium: 50% potting mix (sterile, seed-starting blend).
- ● 50% perlite or coarse sand (for aeration and drainage).
- ● Watering can or spray bottle: With a fine mist nozzle for gentle hydration.
- ● Plastic wrap or humidity dome: To retain moisture during germination.
- ○ Fertilizer (optional but recommended): 1 tsp balanced fertilizer (10-10-10 or 5-5-5) per gallon of soil mix, or a slow-release granular fertilizer.
- ● Seed starter fertilizer (like fish emulsion) for an extra boost.
- ● Heat mat: Keeps soil warm (70–75°F) for faster germination.
- ● pH test kit: Aim for a soil pH of 6.0–7.5—wheat loves slightly acidic to neutral soil.
- ● Grow lights: If starting indoors before last frost (12–16 hours of light daily).
- ● Label markers: To track seed varieties and planting dates.
- ● Compost or worm castings: For nutrient-rich soil amendments.
Instructions for sowing wheat seeds with the layered moisture method
This technique keeps soil consistently damp without waterlogging—exactly what wheat needs to sprout evenly.
Prepare the Sowing Bed for Even Moisture
Start by tilling the soil to a depth of 6 inches, breaking up any clumps so water can penetrate evenly. Wheat roots need loose soil to establish quickly, so avoid compacting it after tilling. Spread 1 inch of coarse sand over the prepared bed—this creates a drainage layer that prevents water from pooling at the seed level.
Next, mix 2 gallons of compost into the top 3 inches of soil. This adds organic matter that holds moisture while allowing excess water to drain away. The compost also provides the microbial activity wheat seedlings need to thrive. Use a rake to level the surface, creating a smooth, flat bed where seeds will sit at the same depth.
Create the Moisture Layers for Germination
Water the prepared bed deeply until the soil is saturated to a depth of 4 inches, then let it drain for 12 hours. This ensures the moisture layer is stable before sowing. Wheat seeds need consistent dampness but will rot if submerged. After draining, spread 1 inch of peat moss evenly over the bed—this layer retains moisture while allowing air to reach the seeds.
Lightly rake the peat moss so it covers the soil uniformly without clumping. The goal is to create a 1-inch-thick moisture-retaining layer that stays damp longer than bare soil. Press down gently with the back of a rake to settle it, but don’t compact it—you want it fluffy enough for seeds to push through easily.
Sow Seeds at the Correct Depth and Spacing
Scatter 4 ounces of wheat seeds evenly across the bed, aiming for 1 inch between seeds in all directions. Wheat seeds are small, so I use a seed spreader or sprinkle them by hand while walking in a grid pattern. Press them ½ inch deep into the peat moss layer—any deeper delays germination, while shallower planting risks drying out.
After sowing, cover the seeds with a thin layer of vermiculite (about ¼ inch thick). This lightweight material insulates the seeds while allowing moisture to reach them. Water the bed again with a fine mist until the vermiculite looks uniformly damp but not soggy. The layered approach ensures moisture stays near the seeds without overwhelming them.
Maintain Consistent Moisture Without Overwatering
Check the soil daily for the first 7 days—wheat seeds need to stay evenly moist but never waterlogged. Use a moisture meter or stick your finger 1 inch deep into the soil; it should feel like a wrung-out sponge. If the top layer dries out, water lightly with a spray nozzle until the vermiculite darkens slightly.
Once seedlings emerge (typically 7-10 days after sowing), reduce watering to every other day. You’ll know moisture is right when the soil feels cool to the touch and the peat moss layer holds its shape but doesn’t feel hard. Avoid overhead watering—direct streams can dislodge young seedlings or create uneven moisture pockets.
Thin Seedlings for Strong, Uniform Growth
When seedlings reach 2 inches tall (usually 3-4 weeks after sowing), thin them to 3 inches apart in all directions. Use sharp scissors to snip excess plants at soil level—pulling can disturb roots of remaining seedlings. Wheat needs space to develop properly, so don’t rush this step. After thinning, water the bed again to settle the soil around the remaining plants.
Continue monitoring moisture levels, but reduce watering to twice weekly once the wheat reaches 4 inches. The layered method ensures the soil retains enough moisture for root development without encouraging rot. By 6 weeks, your wheat should show strong tillers—proof the layered moisture technique worked.
Tips & tricks for sowing wheat seeds with the layered moisture method
A few simple adjustments can make all the difference when using this layered moisture technique for wheat seeds.
The 12-Hour Drainage Rule: That 12-hour drainage period after watering in Step 2 is crucial for preventing waterlogged soil. If you're short on time, consider watering in the evening so the bed drains overnight. This ensures the moisture layer is stable when you sow, which is exactly what wheat seeds need to germinate evenly without rotting.
Peat Moss Texture Matters: When spreading the 1-inch layer of peat moss in Step 2, aim for a fluffy consistency—almost like a light blanket. If it feels too dense, gently fluff it with your fingers or a rake. This creates the perfect balance of moisture retention and air circulation that wheat seedlings thrive in. Compact peat moss can suffocate emerging roots.
Vermiculite Layering Tip: The ¼-inch vermiculite layer in Step 3 serves two purposes: it insulates seeds while allowing moisture to reach them. To check if it's the right thickness, hold it up to the light—you should see the seeds through it, but not so thinly that they're exposed. This layer keeps the moisture right where the seeds need it during those critical first days.
Daily Moisture Check: During the first 7 days in Step 4, I recommend checking moisture levels twice daily—morning and late afternoon. Early morning is the best time to water if needed, as it gives excess moisture time to evaporate slightly before nightfall. This mimics natural rainfall patterns and prevents fungal issues that can plague wheat seedlings.
Pro Tips for Sowing Wheat Seeds
- A few simple adjustments can make all the difference when using this layered moisture technique for wheat seeds.
- The 12-Hour Drainage Rule: That 12-hour drainage period after watering in Step 2 is crucial for preventing waterlogged soil.
- Peat Moss Texture Matters: When spreading the 1-inch layer of peat moss in Step 2, aim for a fluffy consistency—almost like a light blanket.
Frequently asked questions
Got questions about sowing wheat seeds?
You’re not alone! Here are some of the most common questions—and answers—to help you grow a thriving wheat crop using the layered moisture method.
What’s the best time of year to plant wheat seeds?
The ideal planting window for wheat depends on your climate, but most growers aim for early fall (September–October) in temperate zones. This allows seeds to germinate before winter dormancy. In warmer regions, late winter (January–February) works too. Always check your USDA Plant Hardiness Zone for local guidance.
How long does it take for wheat seeds to sprout?
With the layered moisture method, germination typically takes 7–14 days under optimal conditions (60–75°F, consistent moisture). If seeds aren’t sprouting within 3 weeks, check soil temperature, moisture levels, or seed viability. Pro tip: Soak seeds overnight before planting to speed up the process!
Do I need to fertilize wheat seeds right after planting?
Not immediately! Wheat seeds have enough energy to sprout without extra fertilizer. Wait until 3–4 weeks after germination (when seedlings have 2–3 leaves) to apply a balanced 10-10-10 or 5-10-10 fertilizer. Over-fertilizing early can burn tender roots. Organic options like compost tea work too!
What should I do if pests or mold appear after sowing?
Act fast! For pests (like wireworms or aphids), use neem oil or diatomaceous earth. If mold (fuzzy gray/green growth) appears, improve airflow, reduce overhead watering, and consider a fungicide like copper spray. Always remove infected plants to prevent spread.
Can I use the layered moisture method for other grains like barley or rye?
The layered moisture method works for barley, rye, and oats too—just adjust planting depth (barley: 1–1.5"; rye: 1–2"). Seed spacing may vary slightly, but the moisture-retention technique improves germination across cool-season grains. Bonus: Rye acts as a great cover crop before wheat!
Wrapping up and next steps
Sowing wheat seeds with the layered moisture method is your ticket to a thriving harvest—whether you're a seasoned gardener or just starting out! 🌱 By mastering soil prep, seed spacing, and consistent moisture, you’ll give your wheat the strong foundation it needs to grow tall and healthy.
The key is patience and precision, but the rewards—golden stalks swaying in the breeze—are worth every effort.
Ready to take the next step? Start small—try a test patch first, then expand as you gain confidence. Keep a planting journal to track progress, and soon, you’ll be sharing your wheat-growing wisdom with fellow gardeners. Happy planting!