
Propagation
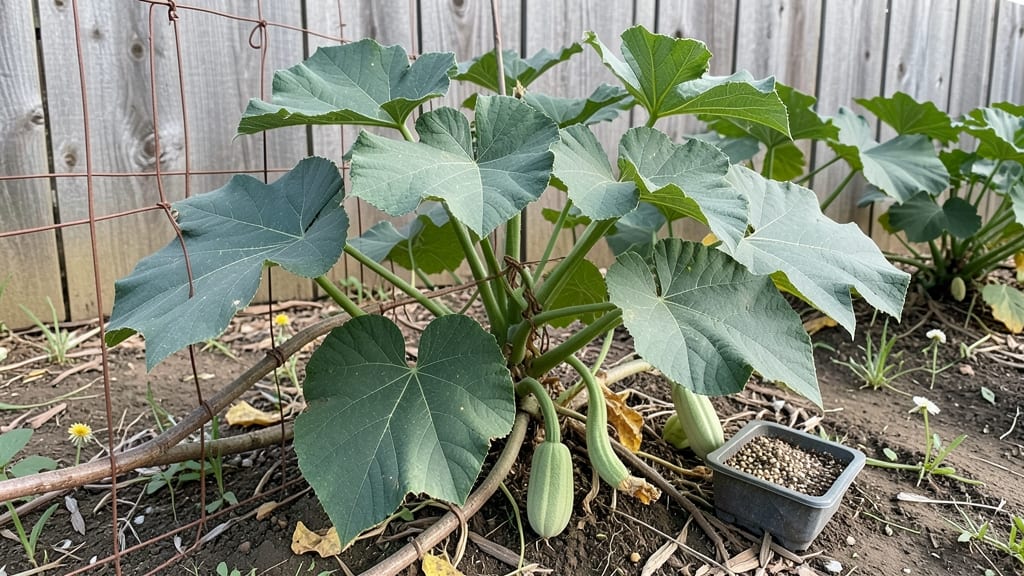
Sponge gourd seeds need a little extra coaxing to break dormancy, but once they sprout, they grow like weeds. 🌱 I’ve learned that soaking seeds overnight and using bottom heat tricks can cut germination time from weeks to just 5-7 days—no fancy equipment needed.
The secret lies in warmth and moisture. Plant seeds ½ inch deep in well-draining soil, keep them consistently damp (not soggy), and place the pot in a sunny spot or under grow lights.
Sponge gourds thrive in full sun and warm soil, so if your spring is still chilly, a heat mat makes all the difference.
Within weeks, you’ll see those first delicate tendrils emerge, and before you know it, your vines will sprawl 10-15 feet across trellises or fences. The real magic happens when the gourds form—soft, spongy, and perfect for cleaning or crafts.
These gourds are hardier than most, tolerating heat and drought once established, but watch for powdery mildew in humid climates. A quick spray of neem oil keeps them healthy. Ready to grow yours?
📚 In This Guide
- What you need
- Instructions
- Tips and common mistakes
- Wrapping up and next steps
What you need
- ● Sponge gourd seeds: 5–10 fresh, high-quality seeds (look for plump, dark-colored ones for best results).
- ● Seed-starting mix: 2–3 cups of sterile, well-draining potting soil (avoid garden soil—it may contain pathogens).
- ● Containers: 2–3 small pots (4–6 inches deep) or a seed tray with drainage holes.
- ● Watering can or spray bottle: For gentle hydration (avoid oversaturating seeds).
- ● Plastic wrap or humidity dome: To create a mini greenhouse effect.
- ○ Heating mat: Optional but speeds up germination (set to 75–85°F).
- ● Grow lights or sunny windowsill: For consistent warmth and light (6–8 hours/day).
- ● Fertilizer (mild, organic): A balanced 10-10-10 or compost tea after sprouts emerge.
- ● Tweezers or small spoon: For careful seed placement.
Step-by-Step instructions for germinating sponge gourd seeds quickly
Here's how to coax stubborn sponge gourd seeds into sprouting within days—not weeks.
🌱 Step 1: Pre-Soak Seeds for 12 Hours
Sponge gourd seeds have tough outer shells that slow germination. Start by placing them in a bowl of lukewarm water for 12 hours. This softens the seed coat and kickstarts hydration. I like to use a mesh bag so I can easily transfer them later without losing any.
Check the water level occasionally—it should cover the seeds by about 1 inch. If the water cools, swap it for fresh warm water. You'll see the seeds plump up noticeably; this means they're absorbing moisture and preparing to break through their shells.
💧 Step 2: Prepare Moistened Germination Paper or Towels
Lay two sheets of paper towels on a clean, flat surface. Dampen them with warm water until they're thoroughly wet but not dripping. The goal is to create an environment that mimics the humidity of a tropical greenhouse—sponge gourds thrive in these conditions.
Gently squeeze out excess water to avoid pooling. Arrange the pre-soaked seeds about 1 inch apart on one towel, then fold the second towel over them. Place the folded towel in a sealed plastic bag to trap moisture and warmth. This setup keeps the seeds consistently moist without risking rot.
☀️ Step 3: Provide Warmth and Indirect Light
Sponge gourd seeds germinate fastest at 75-85°F. Place the bagged seeds on top of a refrigerator or in a warm, dark corner of your kitchen. A seedling heat mat set to 80°F works even better if you have one. Check daily—you should see tiny white roots emerging within 2-3 days.
Once the roots reach about ½ inch long, move the seeds to a bright, indirect light source. Avoid direct sunlight at this stage—it can stress the delicate sprouts. A south-facing window with sheer curtains works well. You'll notice the seeds begin to sprout upward within 24-48 hours of reaching light.
🪴 Step 4: Transplant Sprouted Seeds into Pots
Fill small pots with well-draining potting mix and make a tiny hole about ½ inch deep for each seedling. Use a pencil or your finger to create the hole gently. Place the seedling in the hole, making sure the roots are covered but the sprout itself remains above soil level.
Lightly press the soil around the seedling to secure it without compacting. Water gently with a spray bottle until the soil is evenly moist but not soggy. Keep the pots in a warm, bright spot for the first week, then gradually introduce them to more sunlight as they grow stronger.
⏰ Step 5: Monitor and Maintain Ideal Conditions
Sponge gourd seedlings need consistent warmth and moisture to thrive. Keep the soil lightly damp—never let it dry out completely. You'll know it's time to water again when the top ½ inch of soil feels dry to the touch. Avoid overwatering, which can lead to root rot and stunted growth.
Within 2-3 weeks, you should see the first true leaves appear—these will be larger and more defined than the initial cotyledons. At this stage, you can thin seedlings if necessary, keeping only the strongest one per pot. Keep an eye out for pests like aphids, which can attack tender new growth.
Tips & tricks for fast sponge gourd germination
Fast germination isn't luck—it's science. These proven techniques will help you bypass the weeks-long wait and get those stubborn sponge gourd seeds sprouting in record time.
Water Temperature Matters: The 12-hour pre-soak in lukewarm water (around 85°F) is non-negotiable. Too cold and the seeds won't activate; too hot and you risk damaging the delicate embryos. I use a thermometer to confirm the water stays between 75-85°F—this temperature range triggers the metabolic processes that break dormancy. If your tap water runs cool, heat it gently on the stove until it's warm to the touch but not scalding.
Seed Positioning Secret: When arranging seeds on the damp paper towels in Step 2, place them with the flat side down. This orientation mimics their natural position in the soil and helps roots emerge more quickly. I also space them exactly 1 inch apart—any closer and they'll compete for moisture; any farther and they may dry out before sprouting. After folding the towels, give them a gentle press to ensure even contact with the moisture.
Heat Source Hack: For the 75-85°F warmth required in Step 3, I've found that placing the bagged seeds on top of a refrigerator works surprisingly well—most fridges maintain a consistent 80°F on their top surfaces. If you don't have a heat mat, try placing the bag near a sunny window during the day (but move it to indirect light once roots appear). The key is maintaining that narrow temperature range consistently—even a 5°F drop can delay germination by days.
Transplant Timing: Wait until roots reach exactly ½ inch before transplanting in Step 4. This length gives the seedlings enough root development to establish themselves in soil without being too fragile. I use a magnifying glass to check root length—it's amazing how different each seedling can look at this stage. When transplanting, avoid pressing the soil too firmly around the roots; gentle is the word here to prevent shock.
Pro Tips for Sponge Gourd Seeds
- Fast germination isn't luck—it's science.
- Water Temperature Matters: The 12-hour pre-soak in lukewarm water (around 85°F) is non-negotiable.
- Seed Positioning Secret: When arranging seeds on the damp paper towels in Step 2, place them with the flat side down.
Frequently asked questions
Got questions about growing sponge gourd from seeds? You’re not alone! Here are the most common queries—and their answers—to help you get started with confidence.
How long do sponge gourd seeds take to germinate?
Sponge gourd seeds typically sprout within 7–14 days in warm, moist conditions (70–85°F). For faster results, soak seeds overnight in warm water or use a heat mat. If germination takes longer than 2 weeks, check soil moisture and temperature—dry or cold soil can delay sprouting.
Do I need to scarify sponge gourd seeds before planting?
Scarification (lightly nicking the seed coat) can speed up germination, but it’s not always necessary. If you’re impatient or dealing with older seeds, try soaking them in warm water for 24 hours or gently rubbing them with sandpaper. For fresh seeds, skip this step—just ensure warm, moist soil!
Can I grow sponge gourd indoors or only outdoors?
Yes! Start seeds indoors 4–6 weeks before the last frost in pots with well-draining soil. Use grow lights if natural light is limited. Once seedlings have 2–3 true leaves, transplant them outdoors after the soil warms to at least 60°F. A greenhouse or sunny windowsill works too!
Why are my sponge gourd seeds rotting instead of sprouting?
Overwatering or poor drainage are the usual culprits. Ensure pots have drainage holes and use a light, airy potting mix. Water only when the top inch of soil feels dry, and avoid soggy conditions. If seeds rot, try planting fresh ones in a drier, well-aerated medium.
What’s a good alternative if sponge gourd seeds won’t sprout?
If germination fails, try these fast-growing alternatives for similar textures or flavors:
- Loofah gourds (easy to grow, edible young)
- Zucchini (quick harvest, versatile)
- Cucumber (similar care, faster sprouting)
- Chayote (mild, sponge-like texture)
Wrapping up and next steps
Growing sponge gourd from seeds is a rewarding journey—especially when you unlock the secrets to fast, healthy sprouting! With the right mix of moisture, warmth, and patience, you’ll soon be harvesting vibrant, edible vines packed with flavor and nutrition.
Don’t let hesitation hold you back; start small, experiment, and enjoy the process—your garden (and taste buds) will thank you!
Ready to take the next step? Plant those seeds today and watch your green thumb grow! 🌱 For even more tips, explore our guide on maintaining sponge gourd plants—happy gardening!