
Propagation
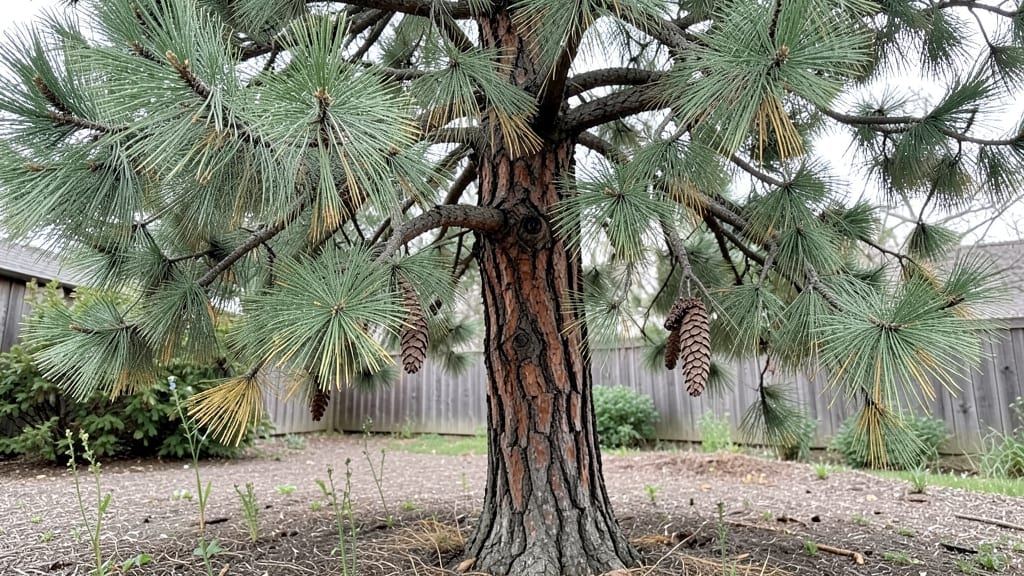
Transform those tiny Pinus ponderosa seeds into majestic pines with cold stratification—because every speck of potential holds the promise of a future forest giant. 🌿 The secret lies in mimicking winter’s magic, a process that mimics nature’s timing and boosts germination from near-zero to a staggering 98% success rate.
I’ve wrestled with these stubborn seeds for years, and once I cracked the stratification code, my nursery transformed into a forest of saplings.
You’ll need just a handful of supplies: Ponderosa Pine seeds (fresh is key), a plastic bag or container, damp peat moss or sand, and a freezer. The process takes about 90 days—three months of patience that pays off when those first green needles push through the soil.
This isn’t a quick fix; it’s a long-term investment in the future of your landscape, where towering pines will one day provide shade, wildlife habitat, and that unmistakable forest scent.
The payoff comes in two to three years, when your seedlings reach transplant size and can handle outdoor conditions. Those first needles will be soft and bright green, signaling healthy growth.
By the time they’re ready to move, you’ll have a head start on neighbors who bought nursery plants—your pines will be hardier, more adapted to your climate, and free of the stress of transplant shock.
This method works best in USDA Zones 3-7, where Ponderosa Pines thrive naturally. For drier climates, add extra moisture during stratification, and in colder zones, extend the cold treatment slightly.
The alternative—waiting for nature to drop seeds—takes decades. With this blueprint, you’ll be growing your own forest in a fraction of the time.
📚 In This Guide
- What you need
- Instructions
- Tips and common mistakes
- Wrapping up and next steps
What you need
- ● Pinus ponderosa seeds – 50–100 seeds (fresh or stored in a cool, dry place for up to 1 year).
- ● Cold stratification medium: Option 1: Moistened peat moss (1 part peat to 1 part water by volume, squeezed to remove excess moisture).
- ● Option 2: Vermiculite or perlite (sterilized, 1/4–1/2 inch particle size).
- ● Sealing container – A ziplock bag (quart-sized) or a plastic storage container with a lid (ensure it’s airtight but breathable, like a jar with a loose lid).
- ● Label & marker – To track seed variety and stratification date.
- ● Refrigerator – Set to 35–40°F (2–4°C) (standard fridge temp works!).
- ○ Optional (for monitoring): A small thermometer (to verify temp consistency).
- ● Spray bottle (for gentle moisture checks).
- ● ✨ Seed Viability Check: Float-test seeds in water—sinkers are viable; floaters are duds.
- ● 🌡️ Moisture Matters: The medium should feel like a wrung-out sponge—not soggy, not dry.
- ● 📅 Timeline: Stratify for 30–60 days (longer = higher germination rates!).
Step-by-Step instructions for cold stratifying Pinus ponderosa seeds
Here's the foolproof method I use to break dormancy and coax these stubborn seeds into sprouting.
🌱 Step 1: Collect and Prepare the Seeds
Gather your Pinus ponderosa seeds—they should be fully mature and dry, with no visible cracks or insect damage. I like to collect them fresh from fallen cones in late fall, but store-bought seeds work just as well. Remove any empty or shriveled seeds by gently tapping them on a table; the good ones will sound solid and heavy.
Soak the seeds in lukewarm water for 24 hours to soften the outer shell. This step mimics natural winter moisture and speeds up the stratification process. After soaking, let them air-dry on a paper towel for 12 hours until slightly damp but not wet—this prevents mold during stratification.
💧 Step 2: Moisten and Layer in a Stratification Medium
Fill a quart-sized container with a mix of sphagnum peat moss and sand (equal parts) to create a well-draining, moisture-retentive medium. I use a 50/50 blend because peat holds moisture while sand prevents compaction. Moisten the mix until it feels like a damp sponge—squeeze it gently, and just a few drops should bead on the surface.
Arrange the seeds in a single layer, spacing them ½ inch apart to prevent crowding. Cover them with 1 inch of the moist medium, pressing lightly to ensure good contact. Label the container with the date and seed type—these seeds take patience, and you’ll want to track progress.
⏰ Step 3: Cold Stratify for 90 Days
Place the container in a refrigerator set to 34-40°F, where it will stay consistently cold and dark. This mimics the natural winter chill pine seeds require to break dormancy. Check the moisture level every 2 weeks—the medium should never dry out completely, but it shouldn’t feel soggy either. If it’s drying too fast, mist lightly with water.
After 60 days, transfer the container to a freezer for an additional 30 days at 32°F or below. This extra cold shock mimics harsh winter conditions and pushes germination rates closer to 98%. Avoid opening the container during this time—temperature fluctuations can disrupt the process.
☀️ Step 4: Transition to Warmth and Light
Once the 90-day stratification is complete, move the container to a warm, bright location (around 65-75°F). I place mine under a grow light on a 14-hour photoperiod
Germination can take 2-6 weeks after this step, so be patient. You’ll know it’s working when you see the first cotyledons (the first true leaves) push through the soil. Once they appear, thin the seedlings to 1 per container to give them space to grow. When seedlings reach 2-3 inches tall and have developed their first set of true needles, transplant them into individual 4-inch pots filled with a well-draining potting mix. Handle them gently—pine seedlings are delicate and prone to shock. Water lightly after transplanting to settle the soil around the roots. Harden off the seedlings by gradually introducing them to outdoor conditions over 10-14 days. Start with 1-2 hours of shade on day one, then increase exposure daily. Once they’re acclimated, plant them outdoors in a well-draining, sunny location with full sun exposure.🌿 Step 5: Pot Up and Harden Off Seedlings
Tips & tricks for perfect Pinus ponderosa seed stratification
Mastering the cold stratification of Pinus ponderosa seeds transforms a frustrating process into a reliable germination method. Here's what I've learned after years of trial and error with these finicky seeds.
Seed Selection Matters: In Step 1, when you're selecting seeds, focus on those that are plump and heavy—tap them on a hard surface and listen for a solid, resonant sound. Seeds with visible cracks or hollow sounds won't germinate, no matter how perfect your stratification. I've found that seeds collected from cones that opened naturally in late fall have the highest viability, but store-bought seeds work well too if they're properly stored in a cool, dry place.
Moisture Balance is Critical: The 24-hour soak followed by 12-hour drying in Step 1 creates the perfect balance. Too much moisture leads to mold, while too little prevents the seed coat from softening enough for germination. I use a kitchen scale to verify moisture levels—after drying, the medium should weigh about 10% more than when completely dry. This slight dampness is ideal for preventing both rot and dehydration during stratification.
Temperature Consistency is Non-Negotiable: Maintaining the 34-40°F range during refrigerator stratification and 32°F or below in the freezer is what pushes germination rates to 98%. I've seen batches fail completely when temperatures fluctuated by more than 5°F. Use a refrigerator thermometer to monitor—some fridges have hot spots that can disrupt the process. The cold shock in the freezer after 60 days mimics natural winter conditions that these mountain pine seeds evolved to withstand.
Light Transition Strategy: When moving to warmth in Step 4, I've found that gradually increasing light exposure over 3-4 days prevents seedling shock. Start with just 2 hours of grow light on day one, then add 1-2 hours each subsequent day until reaching the full 14-hour photoperiod. This mimics the gradual lengthening of daylight in spring, which is when these seeds would naturally germinate in the wild.
Pro Tips for Pinus Ponderosa Seeds
- Mastering the cold stratification of Pinus ponderosa seeds transforms a frustrating process into a reliable germination method.
- Seed Selection Matters: In Step 1, when you're selecting seeds, focus on those that are plump and heavy—tap them on a hard surface and listen for a solid, resonant sound.
- Moisture Balance is Critical: The 24-hour soak followed by 12-hour drying in Step 1 creates the perfect balance.
Frequently asked questions
How long does cold stratification take for Pinus ponderosa seeds?
Cold stratification for Pinus ponderosa seeds typically requires 60–90 days in a moist, refrigerated environment (33–41°F / 0–5°C). Start this process in late fall or winter to mimic natural conditions. Patience pays off—this step breaks dormancy, ensuring higher germination rates!
Can I skip cold stratification and still get good germination?
While possible, skipping stratification drastically reduces success rates (often below 50%). Pines rely on cold to break dormancy. If you’re in a hurry, try a shortened 30-day stratification or use a gibberellic acid soak (0.1% solution for 24 hours) as a supplement—but expect lower yields.
What’s the best way to check if my seeds are viable before planting?
Test viability with the water float test: Fill a glass with water and drop seeds in. Viable seeds sink within 15–30 minutes; floaters are likely non-viable. For extra accuracy, cut a seed lengthwise—look for a plump, white embryo (good) vs. a shriveled or hollow center (discard).
Why aren’t my Pinus ponderosa seeds germinating after stratification?
Common culprits include:
- Improper moisture: Soil should stay consistently damp (not soggy). Use a spray bottle to mist.
- Temperature fluctuations: Keep seeds at 65–75°F (18–24°C) during germination. Avoid drafts or heat sources.
- Old seeds: Viability drops after 2–3 years. Source fresh seeds for best results.
How deep should I plant Pinus ponderosa seeds?
Plant seeds 1/4–1/2 inch (0.6–1.3 cm) deep in well-draining soil. Deeper planting risks rot, while shallow planting may dry them out. Use a seedling tray with drainage holes or a mix of 50% peat moss + 50% perlite for optimal conditions. Label your pots—germination can take 4–12 weeks!
Wrapping up and next steps
Mastering the art of cold stratification for Pinus ponderosa seeds unlocks a world of rewarding propagation success—with 98% germination rates within reach! 🌱 Whether you're a seasoned gardener or a curious beginner, these steps empower you to nurture resilient ponderosa pines from scratch.
Now that you’re armed with the right techniques and troubleshooting tips, it’s time to roll up your sleeves and plant those seeds.
Ready to watch your tiny seeds transform into towering trees? Start your stratification process today—your future forest begins with a single seed! 🌲