Picking
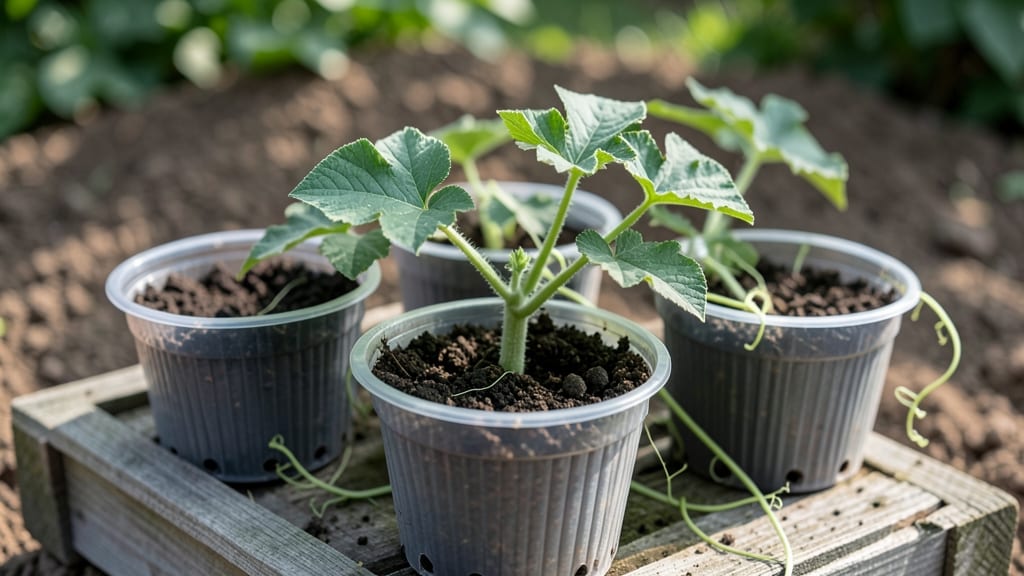
Sprouting watermelon seeds indoors gives you a head start on that juicy harvest you crave by summer. 🌱 I’ve learned the hard way that skipping this step means waiting longer for vines to catch up—so I now start mine in late winter, and the difference is night and day.
The secret isn’t complicated: it’s about warmth, patience, and the right soil mix to coax those first green leaves out of stubborn seeds.
You’ll need just a few supplies: seed-starting trays, a heat mat (or sunny windowsill), and a mix of potting soil with perlite to keep roots happy.
Plant seeds about half an inch deep, keep the soil damp but not soggy, and watch for sprouts in 5-10 days if conditions are perfect.
The key is consistency—watermelon seeds need warmth (70-80°F) to germinate, and they’ll let you know when they’re ready with tiny green hooks breaking the soil.
Once those first leaves appear, you’ll be hooked on the process. Strong seedlings mean faster growth outdoors, bigger vines, and—most importantly—those juicy melons you’ve been dreaming of. Within 4-6 weeks, you’ll be transplanting sturdy plants that outpace store-bought starts, giving you a head start on the season.
The payoff? Ripe, sweet watermelons that beat the grocery store every time.
This method works year-round with grow lights, so you can grow watermelons even in cooler climates. Just adjust your timing: start seeds 8-10 weeks before your last frost for outdoor planting, or keep them indoors all season long.
The only mistake I’ve made? Waiting too long to start—don’t let that be you.
📚 In This Guide
- What you need
- Instructions
- Tips and common mistakes
- Wrapping up and next steps
What you need
- ● Watermelon seeds: Choose heirloom or hybrid varieties (e.g., 'Sugar Baby,' 'Crimson Sweet,' or 'Black Diamond'). Aim for 10–15 seeds per plant—you can plant 3–5 seeds per pot or directly in the ground.
- ● Growing containers or garden bed: Containers: 5-gallon pots or larger (at least 12–18 inches deep) with drainage holes. 3–5 plants per container (thin to the strongest sprout).
- ● Garden bed: Well-draining soil in a sunny spot (6+ hours of sunlight daily). Space plants 3–6 feet apart for vining varieties.
- ● Potting mix: High-quality, seed-starting mix or a blend of 60% compost, 30% coconut coir, and 10% perlite for aeration.
- ○ Sprouting tray or damp paper towels: For pre-sprouting seeds (optional but speeds up germination).
- ● Watering can or spray bottle: For gentle hydration—avoid overwatering!
- ● Fertilizer: Balanced organic fertilizer (e.g., 5-5-5 or compost tea) or a slow-release granular fertilizer.
- ○ Trellis or stakes (optional but helpful): Watermelons are vining plants! Use a 6–8 foot trellis or sturdy stakes to save space and improve air circulation.
- ● Grow lights: For indoor sprouting or early starts (12–16 hours of light daily).
- ● Mulch: Straw or black plastic to retain moisture and suppress weeds.
- ● pH test kit: Ideal soil pH for watermelons is 6.0–6.8.
- ● Insect netting: Protects against pests like cucumber beetles.
- ● Harvesting tool: Pruning shears or a sharp knife for cutting vines at maturity.
Step-by-Step instructions for growing watermelon sprouts indoors
Here's how to kickstart your watermelon vines early—no greenhouse needed.
🌱 Step 1: Prep Containers and Seed Starting Mix
Fill your 4-inch diameter pots with the seed-starting mix until they're about ¾ full. Press the mix down gently with your fingers to remove air pockets, but don't pack it too tightly—watermelon roots need room to spread. I like to make a small indentation in the center of each pot with my thumb, just deep enough to cradle the seed.
Moisten the soil lightly with a spray bottle until it feels like a damp sponge. You want it damp enough to support germination but not soaking wet, which can suffocate seeds. If the mix feels dry after pressing, add a little more water—just enough to make the surface glisten slightly. This ensures even moisture without oversaturating.
💧 Step 2: Plant Seeds and Create a Humid Dome
Place 1-2 watermelon seeds into each indentation, spacing them about ½ inch apart. Cover them with a thin layer of the seed-starting mix—just enough to bury them ½ inch deep. Watermelon seeds need light to germinate, so don't press too hard or they'll be planted too deep.
After planting, mist the soil surface again with the spray bottle until it's evenly damp. Place the pots inside a clear plastic bag or under a humidity dome to trap moisture and warmth. This creates the ideal environment for germination, which typically takes 5-10 days at 75-85°F. Check the soil daily—it should stay consistently moist but never soggy.
☀️ Step 3: Provide Warmth and Light for Germination
Keep the pots in a warm spot, like on top of your refrigerator or near a sunny window. Watermelon seeds germinate fastest in warmth, so if your home runs cooler, consider using a seedling heat mat set to 80°F. You'll see tiny sprouts push through the soil in about a week—this is your signal that germination is underway.
Once the first true leaves appear (these are the second set of leaves, after the initial seed leaves), remove the plastic bag or dome immediately. At this stage, seedlings need airflow to prevent mold and disease. Move them to a bright spot with 6-8 hours of indirect light daily. If natural light is limited, supplement with a grow light kept 4-6 inches above the plants.
🌿 Step 4: Thin Seedlings and Transition to Larger Pots
When the seedlings are about 2 inches tall and have developed their first true leaves, thin them so only the strongest seedling remains in each pot. Use small scissors to snip the weaker seedling at the soil line—this prevents disturbing the roots of the plant you're keeping. Watermelon vines are vigorous, so giving them space now ensures they grow strong and healthy.
After thinning, transplant the remaining seedling into a 5-gallon container filled with potting mix. Gently remove the seedling from its small pot, keeping the root ball intact, and place it in the center of the larger container. Fill in around the roots with more potting mix, pressing lightly to secure the plant. Water thoroughly to help the roots settle into their new home.
✂️ Step 5: Maintain Growth for Transplanting Outdoors
Continue providing 6-8 hours of light daily and keep the soil consistently moist but not waterlogged. Watermelon plants are thirsty, so water when the top inch of soil feels dry to the touch. Fertilize lightly with a balanced, water-soluble fertilizer (like 10-10-10) every 2-3 weeks to encourage strong vine growth.
When nighttime temperatures stay above 55°F and there's no risk of frost, it's time to transplant your seedlings outdoors. Choose a sunny spot with at least 8 hours of direct sunlight daily. Harden off the plants by gradually exposing them to outdoor conditions over 7-10 days, starting with 1-2 hours in a shaded area and slowly increasing their time outside.
Tips & tricks for perfect sprouts-seeded watermelon
Here's what I've learned from growing watermelon sprouts indoors—tricks that'll help you avoid common pitfalls and get those vines thriving.
Warmth is Everything: In Step 3, those 75-85°F temperatures aren't just suggestions—they're critical for germination. If your home runs cooler, invest in a seedling heat mat set to 80°F. I've seen germination times double when seeds are kept too cool. Place your pots on top of your fridge or near a sunny window to maintain warmth consistently.
Light Matters More Than You Think: The 6-8 hours of indirect light in Step 3 is a minimum—more is always better for watermelon seedlings. If you're using grow lights, position them 4-6 inches above the plants and keep them on for 12-14 hours daily to mimic summer growing conditions. Leggy seedlings? That's a sign they need more light.
Thinning Technique: When you reach Step 4 and need to thin seedlings, use clean scissors to snip at soil level rather than pulling. This prevents disturbing the roots of your remaining plant. I've found that watermelon seedlings are surprisingly resilient—even if you accidentally damage one, the other will often recover beautifully with proper care.
Transplanting Hack: Before moving your seedlings to the 5-gallon containers in Step 4, give the root ball a good soak in water for 10-15 minutes. This helps prevent transplant shock and encourages the roots to spread more quickly in their new home. The extra moisture also helps settle the soil around the roots when you replant.
Pro Tips for Sprouts Seeded Watermelon
- Here's what I've learned from growing watermelon sprouts indoors—tricks that'll help you avoid common pitfalls and ge...
- Warmth is Everything: In Step 3, those 75-85°F temperatures aren't just suggestions—they're critical for germination....
- Light Matters More Than You Think: The 6-8 hours of indirect light in Step 3 is a minimum—more is always better for w...
Frequently asked questions
Got questions about growing sprouts-seeded watermelons?
You’re not alone! Here are answers to the most common queries to help you crush this year-round harvest hack like a pro.
How long does it take for sprouts-seeded watermelon to bear fruit?
With the right conditions, sprouts-seeded watermelons can produce fruit in 60–90 days—faster than traditional seeds! Since you’re starting with a head start (literally), expect earlier blooms and fruit if you’re in a warm climate or using a greenhouse. Patience is key, but the wait is worth it for those juicy rewards!
Can I grow sprouts-seeded watermelons indoors or in containers?
These vines thrive in large containers (at least 5-gallon pots) with trellises or cages to support their growth. Place them near a sunny window or under grow lights for 6–8 hours daily. Just ensure good drainage and warmth—watermelons love it hot (70–90°F is ideal).
What do I do if my sprouts-seeded watermelon plant wilts or turns yellow?
Wilting or yellowing leaves usually signal overwatering, underwatering, or nutrient deficiencies. Check the soil moisture (it should be dry 1–2 inches down) and adjust watering. Yellow leaves? Test your soil pH (6.0–6.8 is perfect) and fertilize with a balanced organic mix. Pro tip: Avoid soggy roots—watermelons hate "wet feet"!
Are sprouts-seeded watermelons more expensive than regular seeds?
Upfront, yes—sprouts-seeded watermelons can cost $5–$15 per seed (vs. $1–$3 for traditional seeds). But here’s the hack: One sprout-seeded watermelon = multiple plants! Cut the fruit into quarters, plant each section, and you’ve got a mini orchard. Long-term, it’s a steal for gardeners craving big harvests with minimal effort.
Can I use sprouts from other fruits/veggies (like tomatoes or cucumbers) the same way?
Not all sprouts are created equal! Watermelons, cucumbers, and melons work best for this method because their seeds germinate easily and the fruit can regrow. Tomatoes? Maybe—but success rates are lower. Stick to vine fruits (like cantaloupe or honeydew) for the most reliable results. Experiment, but manage expectations!
How do I overwinter sprouts-seeded watermelons for year-round growth?
Watermelons are tropical, so they need warmth year-round. In colder months, move potted plants indoors near a sunny window or under grow lights. Keep temps above 55°F and reduce watering slightly. If you’re in a frost zone, save seeds from your best fruit to replant in spring. No greenhouses? Try a heated propagation mat for a head start!
Wrapping up and next steps
Growing sprouts-seeded watermelon is your ticket to a year-round harvest of juicy, homegrown fruit—no matter your climate! 🌱 By mastering this clever technique, you’ve unlocked a way to enjoy fresh, vine-ripened watermelon even in colder months.
Whether you’re a seasoned gardener or just starting out, this method proves that big rewards come from small seeds.
Now that you’re armed with the know-how, why not take the next step? Try experimenting with different varieties or even share your success with fellow gardening enthusiasts. Your garden—and your taste buds—will thank you! 🍉✨