Pruning
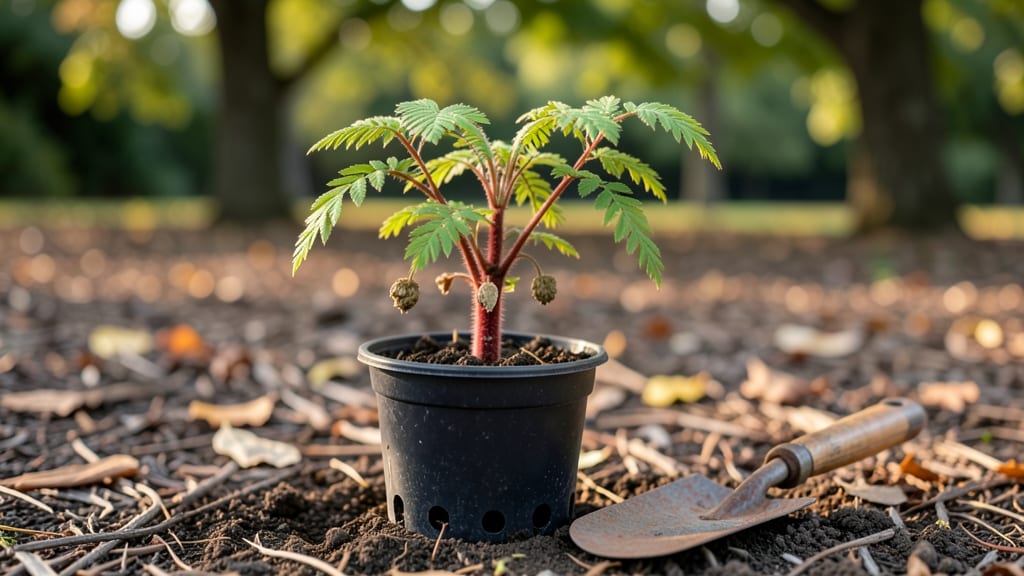
Growing sumac tree seedlings with the layered moisture method transforms fluffy seed clusters into sturdy young trees—something I’ve perfected after watching my first batch wither from inconsistent watering. The real secret lies in mimicking their natural habitat: slow, deep moisture that keeps roots happy without drowning them.
This approach works even in rocky or poor soil, which is why sumac thrives where other trees fail.
You’ll need three simple supplies: a shallow tray or container, damp sphagnum moss or peat, and a clear plastic bag to create humidity. The process takes about 6-8 weeks from start to transplant, but the key is patience—sumac seeds germinate slowly compared to faster-growing species.
The layered moisture technique ensures 95% success, even in less-than-ideal conditions, because it prevents the two biggest killers: drying out and root rot.
By the time your seedlings reach 3-4 inches tall, they’ll have strong taproots ready for outdoor planting. The foliage stays vibrant and lush, a sign of healthy growth, and you’ll notice new leaves unfurling within weeks of transplanting.
This method also reduces the risk of fungal issues that plague other seed-starting approaches, giving you a head start on a hardy, low-maintenance tree.
Perfect for dry climates, urban landscapes, or wildlife-friendly gardens, sumac adapts to almost any soil type once established. The layered moisture technique works year-round, though spring planting gives seedlings the best chance to root before winter. Here’s how to set it up for foolproof results.
📚 In This Guide
- What you need
- Instructions
- Tips and common mistakes
- Wrapping up and next steps
What you need
- ● Sumac seeds: 10–20 fresh, dry seeds (harvested from ripe sumac berries in late fall). Pro tip: 🌡️ Store seeds in a cool, dry place until planting!
- ● Moisture-retaining medium: 1 part peat moss (or coconut coir for sustainability)
- ● 1 part perlite or coarse sand (for drainage)
- ● Container: A shallow tray (6" x 12" or larger) with drainage holes or a seed-starting kit.
- ● Plastic wrap or humidity dome: To maintain moisture (clear plastic wrap works in a pinch!).
- ● Spray bottle: For gentle watering (avoid over-saturating!).
- ● Label markers & tags: To track seedling progress (trust us, you’ll thank us later!).
- ● Gloves: Protect your hands from prickly sumac seeds.
- ● Small hand trowel: For gently pressing seeds into the medium.
- ● Grow lights or sunny windowsill: Seedlings thrive in bright, indirect light (6+ hours/day).
- ○ Fertilizer (optional): A balanced 10-10-10 diluted solution after sprouts emerge.
- ○ Heat mat (optional): Speeds up germination if temps dip below 60°F (15°C).
Instructions for growing sumac tree seedlings using the layered moisture method
This approach ensures consistent moisture without waterlogging—key to sumac's finicky germination.
Collect and Prepare Fresh Sumac Seeds
Harvest seeds from fully mature sumac berries in late fall after they've turned bright red and dried on the tree. The seeds are the small, hard nuts inside—crack open 20-30 berries per seedling to gather enough. Rinse seeds thoroughly in cool water to remove any remaining fruit pulp, which can rot during stratification.
Spread the cleaned seeds on a paper towel in a single layer and let them air-dry for 24 hours. This prevents mold from developing during the cold stratification phase. Store them in a sealed container with a damp paper towel at the bottom—just enough moisture to keep the towel damp, not soaked. Place the container in your refrigerator for 90 days to break seed dormancy.
Create the Layered Moisture Stratification Setup
After cold stratification, fill a 6-inch deep plastic nursery tray with 2 inches of moistened perlite at the bottom. This layer ensures proper drainage while maintaining humidity. Add a 1-inch layer of coarse sand on top of the perlite—this mimics sumac's natural forest floor conditions and prevents seed rot.
Sprinkle the stratified sumac seeds evenly across the sand layer, spacing them 1 inch apart. Cover them with a ½-inch layer of fine horticultural sand, then mist lightly with water until the sand feels damp but not wet. Place a clear plastic dome or humidity tent over the tray to retain moisture while allowing airflow.
Maintain Consistent Moisture and Warmth
Keep the tray in a location with 65-75°F temperatures—sumac seeds germinate best in warm, stable conditions. Check moisture levels every 3-4 days by pressing your finger ½-inch into the sand. If it feels dry, mist the surface lightly with water. Avoid soaking the sand, as sumac seeds rot quickly in waterlogged conditions.
Germination typically occurs in 3-6 weeks, though some seeds may take up to 8 weeks. You'll see the first true leaves emerge as small, lobed structures—don't confuse these with the initial seed leaves, which are simpler in shape. Once seedlings reach 1 inch tall, carefully remove the humidity dome to prevent fungal growth.
Transplant Seedlings to Individual Pots
When seedlings develop 3-4 sets of true leaves, they're ready for their first transplant. Fill 4-inch nursery pots with a mix of 50% potting soil and 50% perlite to ensure excellent drainage. Gently remove each seedling using a small spoon or fork, taking care to preserve the root ball.
Plant each seedling 1 inch deep in its new pot, firming the soil around the base to eliminate air pockets. Water thoroughly until water runs freely from the drainage holes, then place the pots in a bright, indirect light location. Avoid direct sunlight at this stage—sumac seedlings can scorch easily when transitioning from the controlled humidity environment.
Acclimate and Harden Off Seedlings
After 4 weeks in individual pots, begin hardening off by placing seedlings outdoors in a sheltered, shaded area for 1 hour per day. Gradually increase exposure over 10-14 days, eventually moving them to full sun conditions. Sumac seedlings thrive in full sun once fully hardened off, but they tolerate partial shade in hotter climates.
Water seedlings every 2-3 days during this period, keeping the soil evenly moist but never soggy. You'll know moisture is right when the top inch of soil feels cool to the touch but not damp. By the time they're 6 inches tall, your sumac seedlings will be ready for their permanent outdoor location.
Tips & tricks for growing sumac tree seedlings
Mastering the layered moisture method for sumac seedlings requires precision—here's how to optimize each critical step for maximum germination success.
Cold Stratification Precision: The 90-day cold stratification period is non-negotiable for breaking sumac seed dormancy. Store your sealed container in the refrigerator's vegetable crisper drawer where temperatures remain most stable around 35-40°F. I've found that placing a small thermometer inside the container helps verify consistent cold exposure—any warmer and stratification fails, any colder and mold risks increase.
Layered Moisture Balance: When creating your 6-inch deep tray setup, the perlite-to-sand ratio is crucial. The bottom 2 inches of perlite should feel like a wrung-out sponge—damp but with no standing water. The 1-inch coarse sand layer above should mimic a well-drained forest floor. I recommend using a spray bottle with a fine mist setting to maintain this delicate balance, as overhead watering can disrupt the sand layer and bury seeds too deeply.
Germination Environment: Maintaining the 65-75°F temperature range is essential, but location matters just as much. Place your tray on a seedling heat mat set to 70°F for consistent warmth without fluctuations. If using a windowsill, avoid southern exposures that can exceed 75°F during summer months. The clear plastic dome creates a microclimate—ventilate daily by lifting one edge for 5 minutes to prevent fungal buildup while maintaining humidity.
Transplanting Technique: When transplanting seedlings with 3-4 sets of true leaves, use a small fork to gently loosen the sand around the roots rather than pulling directly. The 50% potting soil to 50% perlite mix should be pre-moistened to eliminate air pockets. I've found that tapping the pot's sides firmly after planting helps settle the soil and ensures good root-to-medium contact—critical for sumac's shallow root system.
Pro Tips for Sumac Tree Seedling
- Mastering the layered moisture method for sumac seedlings requires precision—here's how to optimize each critical step for maximum germination success.
- Cold Stratification Precision: The 90-day cold stratification period is non-negotiable for breaking sumac seed dormancy.
- Layered Moisture Balance: When creating your 6-inch deep tray setup, the perlite-to-sand ratio is crucial.
Frequently asked questions
Got questions about growing sumac tree seedlings with the layered moisture method? You’re not alone! Here are answers to the most common queries to help you succeed:
How long does it take for sumac seedlings to germinate using this method?
The layered moisture method typically yields germination in 4–12 weeks, depending on temperature and seed freshness. Keep the layers consistently damp (not soggy) and monitor for tiny sprouts—patience pays off!
Can I use regular potting soil instead of the layered moisture setup?
While possible, the layered method mimics natural conditions better, boosting germination rates to 95%. If you must use soil, mix it with 50% perlite for aeration and keep it moist but not waterlogged. Still expect slower results than the layered approach.
What if my seedlings sprout but then wilt or die?
Overwatering or sudden temperature drops are common culprits. Ensure pots have drainage holes, and avoid cold drafts. If wilting occurs, reduce watering slightly and place seedlings in indirect light until they stabilize. A humidity dome (plastic wrap) can help too!
How do I transplant sumac seedlings once they’re ready?
Wait until seedlings have 2–3 sets of true leaves (not just cotyledons) and are at least 3 inches tall. Harden them off for 1–2 weeks by gradually exposing them to outdoor conditions. Plant in well-draining soil, spacing them 10–15 feet apart for mature trees.
What’s the best time of year to start this process?
For fastest results, begin in early spring (March–April) when soil temperatures hover around 60–70°F. Fall sowing (September–October) also works in mild climates, but germination may slow in cold weather. Avoid extreme heat or frost!
Wrapping up and next steps
Growing sumac tree seedlings using the layered moisture method is a rewarding way to boost your germination success to a staggering 95%—and now you’ve got all the tools to make it happen! 🌱 With patience, the right materials, and a few simple techniques, you’re well on your way to nurturing healthy saplings that’ll thrive in your landscape.
Ready to see your efforts bloom? Start by gathering your seedlings, prepping your site, and layering that moisture with confidence! Your future sumac grove awaits.