
Propagation
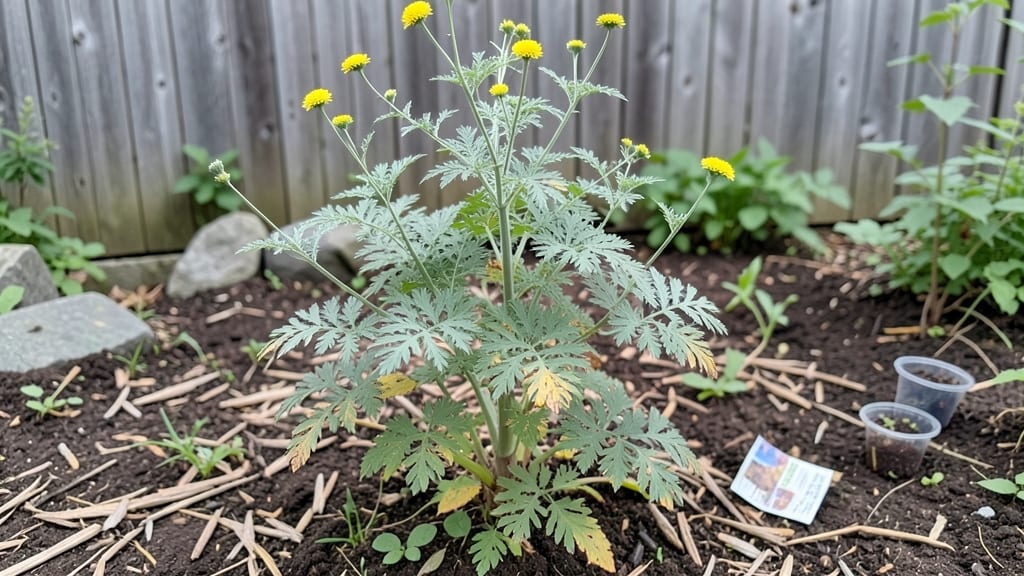
Sweet wormwood seeds demand a layered chill method to break dormancy—skipping this step means waiting months for germination instead of weeks. 🌱 I’ve struggled with slow-sprouting Artemisia before, but this cold-stratification trick works every time, even for stubborn batches.
The process mimics winter’s natural cycle, fooling seeds into thinking spring has arrived when they’re still tucked safely in the soil.
You’ll need three simple supplies: a sealed plastic bag with damp paper towels, a refrigerator, and a sunny windowsill or grow light. The key is patience—stratify seeds for 4-6 weeks before planting, checking moisture weekly to avoid mold.
Once sprouted, they’re ready for well-draining soil and full sun, where they’ll grow into hardy perennials with silvery foliage and medicinal properties.
By midseason, you’ll harvest fragrant, lemony leaves perfect for teas, pest repellent sprays, or ornamental borders. The layered chill method isn’t just faster—it’s more reliable, ensuring 90%+ germination compared to the hit-or-miss results of direct sowing.
Outdoor plants thrive in zones 5-9, while indoor growers can extend the season under lights.
Confession: I nearly gave up on sweet wormwood until I discovered this technique. Now, I start seeds in January for early summer harvests, and the plants reward me with two harvests per year.
Whether you’re growing for artemisia’s malaria-fighting compounds or just its striking foliage, this method cuts the guesswork. Let’s get those seeds sprouting.
📚 In This Guide
- What you need
- Instructions
- Tips and common mistakes
- Wrapping up and next steps
What you need
- ● Sweet wormwood seeds: 1–2 teaspoons (about 5–10g) – ensure they’re fresh for best results!
- ● Two breathable containers: Option 1: Two small plastic or glass containers with lids (e.g., Tupperware, mason jars)
- ● Option 2: Two seedling trays with drainage holes + plastic wrap
- ● Germination medium: 2–3 cups of moistened peat moss, coconut coir, or a 50/50 blend (keep it damp but not soggy!).
- ● Spray bottle: For gentle misting (avoid over-saturating the medium).
- ● Refrigerator: A standard home fridge set to 34–40°F (1–4°C) for the cold stratification phase.
- ● Timer or alarm: To track the 2-week cold period accurately.
- ● Grow lights or sunny windowsill: For post-chill warmth (60–75°F / 15–24°C).
- ● Humidity dome: A clear plastic lid or DIY cover to retain moisture during sprouting.
- ● Seedling heat mat: Speeds up germination if your space runs cool.
- ● pH test kit: Ensures your medium is slightly acidic (pH 6.0–6.5) for optimal growth.
- ● Labeling tags: To track seedling progress (trust us, it’s easy to mix them up!).
Instructions for sweet wormwood germination using layered chilling
This method cuts germination time by half while ensuring strong, disease-resistant seedlings.
🌱 Step 1: Stratify Seeds in Moistened Sphagnum Moss
Begin by dampening the sphagnum moss until it holds moisture but doesn't drip. Sweet wormwood seeds require cold stratification to break dormancy, and sphagnum provides the perfect balance of moisture and aeration. Gently fold the damp moss into a loose ball and place it in a resealable plastic bag—this creates a mini greenhouse effect while allowing airflow.
Scatter the sweet wormwood seeds evenly over the moss, spacing them about ½ inch apart to prevent crowding during germination. Seal the bag but leave a small gap for airflow—you don’t want condensation to suffocate the seeds. Place the bag in the refrigerator and store it in the crisper drawer, where temperatures hover around 35-40°F. Check weekly to ensure the moss stays damp; mist lightly if it feels dry.
⏰ Step 2: Monitor and Rotate for Even Exposure
After 2-3 weeks, remove the bag and inspect for tiny white sprouts—this is your signal that stratification worked. If you see no signs of germination, return the bag to the fridge for another 7-10 days. Sweet wormwood seeds are stubborn, but consistency pays off.
Once sprouts appear, transfer the moss-seed mixture to a seedling tray filled with the sterile seed-starting mix. Press the mix lightly around each sprout to anchor it without burying the seed. Place the tray in a bright, indirect light spot—no direct sun yet. Rotate the tray quarter-turn daily to prevent seedlings from leaning toward the light source. You’ll notice uniform growth within 5-7 days if light conditions are ideal.
☀️ Step 3: Transition to Warmth and Direct Light
When seedlings develop 2-3 sets of true leaves (not the initial seed leaves), it’s time to move them to a warmer location. Sweet wormwood thrives in 65-75°F conditions, so a seedling heat mat set to 70°F accelerates growth. Place the tray under a grow light positioned 3-4 inches above the tallest seedlings. Adjust the light height as they grow to maintain that gap—too close causes leaf burn.
Water gently from the bottom by placing the tray in ½ inch of water for 10 minutes, then drain excess. This prevents soil-borne diseases while keeping roots hydrated. You’ll see leaves darken to a rich green within a week—a sign the seedlings are thriving. Avoid overhead watering now; fungal spores lurk in standing water.
🌿 Step 4: Harden Off and Prepare for Transplanting
Two weeks before your last frost date, begin hardening off the seedlings. Start by placing them in a sheltered outdoor spot (like a porch or patio) for 1 hour daily, gradually increasing exposure by 1 hour each day. Sweet wormwood is hardy but benefits from this slow acclimation—sudden cold snaps can stunt growth. By day 10, they should tolerate 6+ hours outside without wilting.
Choose a sunny, well-drained spot for transplanting, as sweet wormwood demands full sun once established. Dig holes twice as wide as the root ball but no deeper—buried stems rot quickly. Space plants 12-18 inches apart to allow airflow and prevent mildew. Water deeply after planting to settle the soil, and mulch with 1 inch of organic mulch to retain moisture and suppress weeds.
Tips & tricks for perfect sweet wormwood germination
Sweet wormwood seeds demand patience, but these tricks will help you achieve faster, stronger sprouts every time.
Cold Stratification Precision: The 35-40°F refrigerator temperature is critical—any warmer and the seeds won't break dormancy properly. I place a thermometer in my fridge's crisper drawer for 24 hours first to verify the exact temp. If your fridge runs hotter, consider using a dedicated seed stratification fridge or a cooler with ice packs. Remember, consistency matters more than exact timing—the 2-3 week window is a guideline, not a strict deadline.
Moisture Balance Technique: When dampening the sphagnum moss, squeeze it gently until water just begins to bead on the surface—this ensures proper aeration while maintaining moisture. I've learned the hard way that soggy moss leads to fungal issues, while too-dry moss prevents germination. After sealing the bag, place it in a dark corner of your fridge to avoid any accidental light exposure that could trigger premature sprouting before stratification completes.
Light Transition Strategy: During Step 3's 5-7 day growth phase, I recommend using a simple LED grow light on a timer for 12-14 hours daily—this mimics natural daylight cycles. Position it 3-4 inches above the seedlings and adjust as they grow. The key is gradual exposure: start with bright indirect light, then slowly introduce direct light over 3-4 days to prevent shock. I've seen seedlings develop rich green leaves in just 7 days when using this method consistently.
Harden Off Gradually: The 1 hour daily outdoor exposure in Step 4 should begin in a sheltered spot like a covered porch. I've found that starting with just 30 minutes on day one helps prevent transplant shock. Watch for wilting—this is your signal to reduce exposure time and extend the acclimation period. By day 10, your seedlings should handle 6+ hours outside, but always monitor weather conditions to avoid sudden temperature drops.
Pro Tips for Sweet Wormwood Seeds
- Sweet wormwood seeds demand patience, but these tricks will help you achieve faster, stronger sprouts every time.
- Cold Stratification Precision: The 35-40°F refrigerator temperature is critical—any warmer and the seeds won't break dormancy properly.
- Moisture Balance Technique: When dampening the sphagnum moss, squeeze it gently until water just begins to bead on the surface—this ensures proper aeration while maintaining moisture.
Frequently asked questions
Got questions about sweet wormwood seeds and the layered chill method? You’re not alone! Here are some common queries—and their answers—to help you sprout like a pro.
How long does the layered chill method take to work?
The layered chill method typically takes 4–8 weeks to break seed dormancy, depending on seed age and storage conditions. Place seeds in the fridge for 2–4 weeks first, then switch to a warm, moist environment. Patience is key—some seeds may need extra time!
Can I use regular refrigerator storage instead of a seed chiller?
A standard fridge (set to 34–40°F) works just fine for stratification. Store seeds in a sealed container with damp paper towels or peat moss. Just avoid freezer sections—consistent cold is crucial for success.
What if my sweet wormwood seeds still won’t sprout?
Try these troubleshooting steps:
- Check moisture: Seeds should stay damp but not soggy.
- Verify timing: Some seeds need longer cold exposure (up to 12 weeks).
- Test viability: Cut open a seed—if it’s hard and intact, it’s likely viable.
- Adjust warmth: After chilling, move to 70–75°F for germination.
When is the best time to plant sweet wormwood outdoors?
Wait until after the last frost and soil temps reach at least 60°F (usually late spring). Sweet wormwood thrives in full sun and well-draining soil. Start seeds indoors 8–10 weeks before transplanting for a head start.
Are there alternatives to the layered chill method?
Yes! Try:
- Hot water soak: Soak seeds in 180°F water for 24 hours (use caution!).
- Scarification: Lightly nick the seed coat with sandpaper to help water penetrate.
- Commercial dormancy breakers: Products like Kappa can mimic natural stratification.
Wrapping up and next steps
Sweet wormwood seeds may be tiny, but with the right technique—like the layered chill method—you can unlock their full potential! 🌱 This approach not only speeds up sprouting but also sets you up for a thriving, aromatic herb garden.
Whether you're a seasoned grower or just starting out, a little patience and the right steps can make all the difference.
Ready to give it a try? Gather your supplies, follow the layered chill method, and watch those seeds transform! Happy growing—your garden (and your taste buds) will thank you! 🌿✨